India Mark II Head Section Replacement

Archived Guide
This guide is retained solely for historical purposes. Use the updated version of the guide to perform your repair.

What you need

  1. India Mark II Head Section Replacement, Cover Plate: step 1, image 1 of 1
    • Use a wrench to remove the bolt on the top of the cover plate.

    • When replacing the cover plate, this bolt only needs to be hand tight.

  2. India Mark II Head Section Replacement: step 2, image 1 of 1
    • Remove the top cover by pulling it straight off the pump.

    • Store the top cover in a sanitary place, preferably above ground, to prevent contamination.

  3. India Mark II Head Section Replacement, Head Section: step 3, image 1 of 3 India Mark II Head Section Replacement, Head Section: step 3, image 2 of 3 India Mark II Head Section Replacement, Head Section: step 3, image 3 of 3
    • Pull the pump handle all the way down and hold it in this position, exposing the pump rod.

    • Place the spacer around the pump rod and under the chain attachment point.

    • Make sure the spacer is beveled side down, and flat side up.

    • Lift the pump lever until there is no tension in the chain and hold it in this position.

  4. India Mark II Head Section Replacement: step 4, image 1 of 2 India Mark II Head Section Replacement: step 4, image 2 of 2
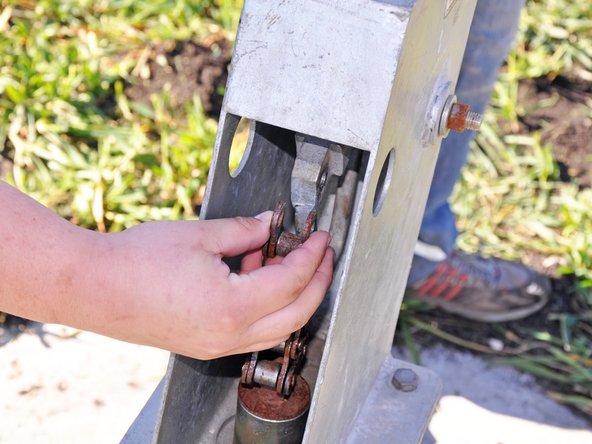
    • Remove the bolt connecting the chain to the pump handle.

    • Remove the chain from the handle.

  5. India Mark II Head Section Replacement: step 5, image 1 of 3 India Mark II Head Section Replacement: step 5, image 2 of 3 India Mark II Head Section Replacement: step 5, image 3 of 3
    • There are 4 bolts securing the head section to the water tank, located at the corners of head section base.

    • Continue supporting the pump handle so the pump head doesn't fall off when all the bolts are removed.

    • Remove the 4 bolts on the base of the water tank.

  6. India Mark II Head Section Replacement: step 6, image 1 of 1
    • Lift the pump head off of the water tank and place in a sanitary place, preferably above ground, to prevent contamination.

Conclusion

To reassemble your device, follow these instructions in reverse order.

Phillip Takahashi

Member since: 08/22/11

86,704 Reputation

87 Guides authored

0 Comments

Add Comment

View Statistics:

Past 24 Hours: 0

Past 7 Days: 0

Past 30 Days: 0

All Time: 662