
IBM ThinkPad 365 X/XD RAM Replacement

What you need

  1. IBM ThinkPad 365 X/XD RAM Replacement, Getting Inside the Thinkpad: step 1, image 1 of 3 IBM ThinkPad 365 X/XD RAM Replacement, Getting Inside the Thinkpad: step 1, image 2 of 3 IBM ThinkPad 365 X/XD RAM Replacement, Getting Inside the Thinkpad: step 1, image 3 of 3
    • Using both latches on the left and right side of the Thinkpad, lift up the screen.

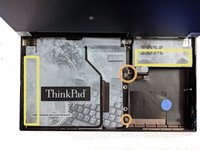
    • Again using both latches, push them back while pushing the keyboard up till it pops up, then lift the keyboard up. You may need to use a little force.

  2. IBM ThinkPad 365 X/XD RAM Replacement, Removing the Battery: step 2, image 1 of 2 IBM ThinkPad 365 X/XD RAM Replacement, Removing the Battery: step 2, image 2 of 2
    • Lift the battery using it's cloth pull tab and lift it out of the ThinkPad. Set it aside.

  3. IBM ThinkPad 365 X/XD RAM Replacement, Removing Screws/Lifting Cover: step 3, image 1 of 2 IBM ThinkPad 365 X/XD RAM Replacement, Removing Screws/Lifting Cover: step 3, image 2 of 2
    • Remove the following screws, there should be 3. Two of the screw spots may be slightly different on yours.

    • The cover has adhesive on it at these spots, pull it slowly till the adhesive releases. Then lift the cover up, you may need to hold it.

    • Keep track of the screws, the one that holds the drive to the board and cover is small, so don't loose it!

  4. IBM ThinkPad 365 X/XD RAM Replacement, Removing the RAM stick: step 4, image 1 of 3 IBM ThinkPad 365 X/XD RAM Replacement, Removing the RAM stick: step 4, image 2 of 3 IBM ThinkPad 365 X/XD RAM Replacement, Removing the RAM stick: step 4, image 3 of 3
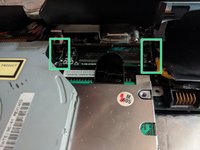
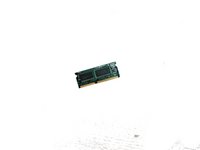
    • Using both hands, push the clips holding the RAM stick in outwards, till the RAM stick pops up.

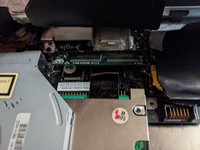
    • Pull the stick out, and replace by pushing it in the same position you pulled it out, then down till the clips click.

    • Compatible with 144 pin 4x64-60ns EDO sticks. Some users have reported the ThinkPad can support up to 72 MB of ram using a 64 MB stick, but it has not worked for all users so there is no guarantee!

Conclusion

To reassemble your device, follow these instructions in reverse order.

Olda1120

Member since: 07/04/18

399 Reputation

3 Guides authored

0 Comments

Add Comment

View Statistics:

Past 24 Hours: 0

Past 7 Days: 2

Past 30 Days: 4

All Time: 324