-
-
Flip the laptop over so the back of the case is facing away from you.
-
Remove the batteries and set aside.
-
Remove the three screws at the front of the case using a #1 Philips bit.
-
Unlock and extend the back legs to reveal 2 screws (each). Remove these screws using a #1 Philips bit. Pull the legs directly up and out of the case to release. Set aside.
-
Turn laptop over. Gently lift the keyboard cover up at the front. Pull towards you to release the back tabs from the case. Set aside.
 Ask FixBot
-
-
-
Remove the two 4.5mm screws from the center of the keyboard.
-
Remove the single 18mm screw from the middle securing the copper bracer and metal bracer arm. Remove these and set aside.
-
Remove the 4.5mm screw from the left securing the back plate.
-
Gently fold the keyboard back away from you to expose two screws securing the trackball housing to the case. Remove these screws and set aside.
-
-
-
There are three plastic clips that must be freed before continuing. Use a plastic spudger to push them up and back to free them.
-
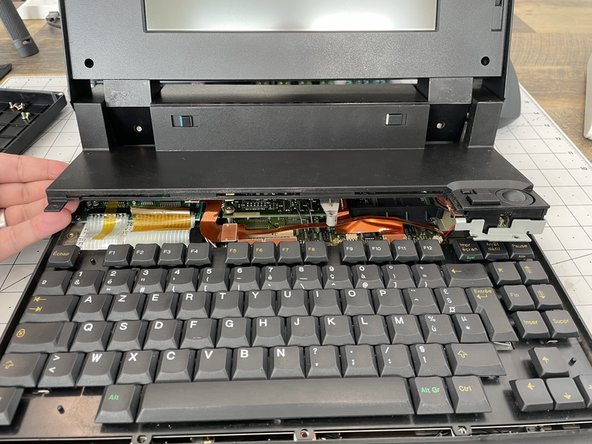
Moving the top right part of the keyboard out of the way, you can now gently lift the top back of the case, exposing the ribbon cables on the left.
-
Use the supplied tabs to pull them free. There are no bailers holding them in, just a pressure fit.
-
You can not lift the keyboard free and set aside.
-
-
-
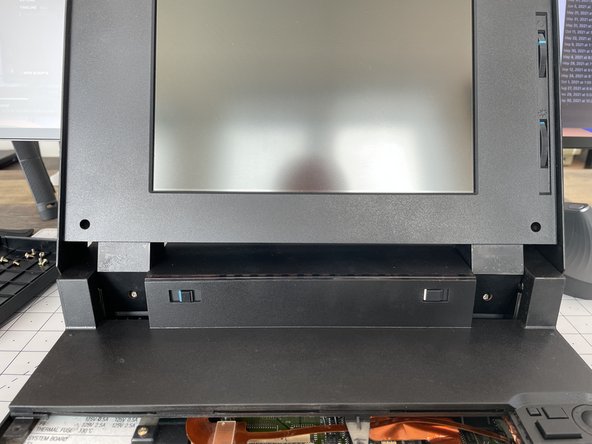
Remove the plastic covers to expose the lower screen mount screws.
-
Remove the two (2) 4.5mm screws from the lower mounts.
-
Remove the two (2) 11mm screws from the lower display bezel.
-
Remove the two (2) rubber stoppers on the top of the display bezel to expose the remaining screws. Remove the two 4.5mm screws behind.
-
-
-
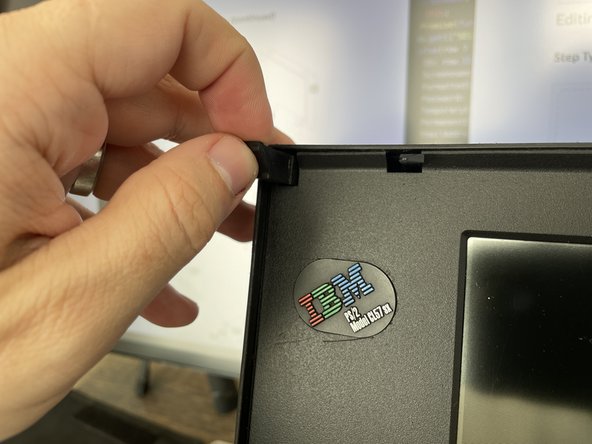
Unclip the three (3) clips at the top of the display.
-
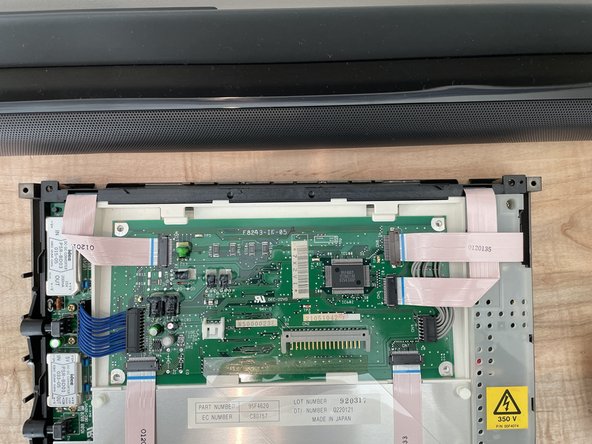
With the back of the display off, remove the two connectors to the display's PCB.
-
You can now remove the display from the base of the computer.
-
-
Tool used on this step:Tweezers$4.99
-
Remove the ribbon cable connected underneath the rear right display hinge cover. Use a plastic spudget or plastic tweezers to lift the connector up. You wil then need to slide the ribbon cable towards you and out from under the housing.
-
Disconnect the trackball ribbon cable from underneath the trackball assembly.
-
lift the top rear case back to expose two connectors for the power switch and volume control.
-
You can now lift off the top rear case and set asside.
-
-
-
-
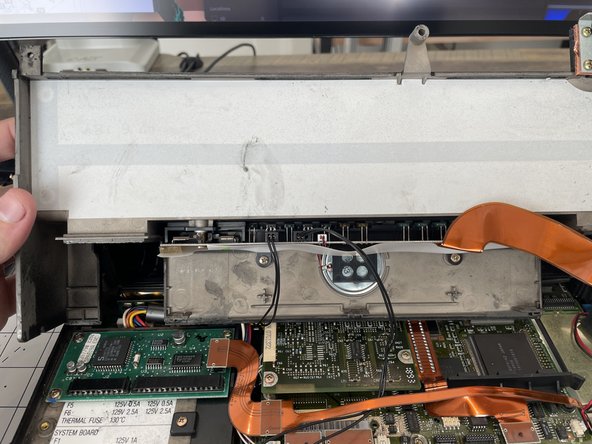
Disconnect the two (2) connectors from the main system board by pulling straight up using the hook end of a spudger, careful not to damage the connectors or ribbon cable.
-
Remove the three (3) 4.5mm screws from the case.
-
Lift out and remove the FDD drive from the lower case. Set aside.
-
-
-
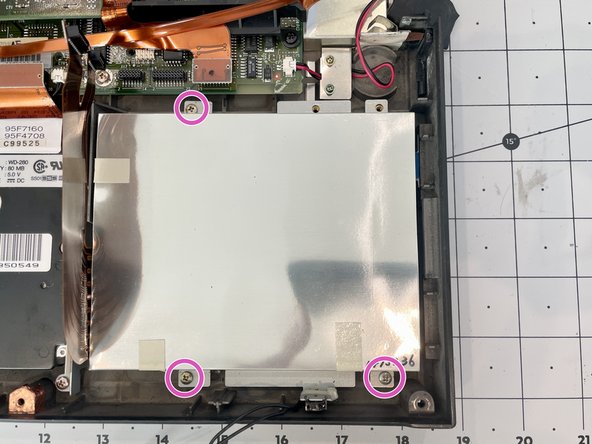
Remove the two connectors attaching the HDD to the main system board.
-
Remove the four (4) 4.5mm screws from the HDD metal case. Lift out HDD and set aside.
-
-
-
Remove the two 3.5mm screws securing the CMOS battery to the bottom of the case.
-
Disconnect the CMOS battery from the main system board and set asside.
-
-
-
Remove the single screw securing the grounded display cable bundle to the top shield.
-
Peel back the tape securing the cable bundle (if needed).
-
Disconnect the white power connector.
-
Disconnect the display cable from the daughter board.
-
You should now be able to remove the cable and set aside.
-
-
-
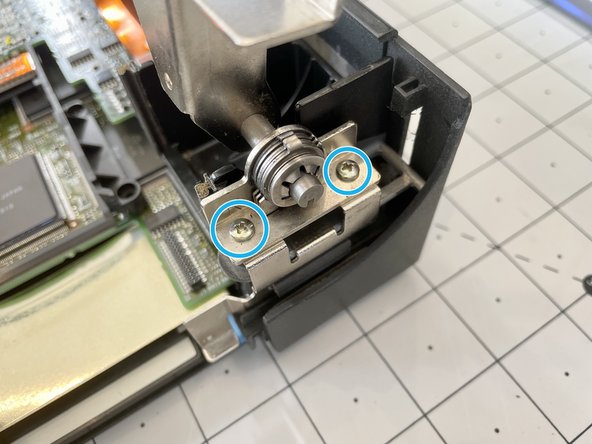
Remove the two (2) 17.5mm screws securing each display hinge.
-
Remove the two (2) 4.5mm screws securing the metal hinge support from the lower case.
-
Remove the two black 8.5mm screws securing the hinge support to the lower case.
-
Remove the two (2) 4.5mm screws holding the regulator card to the hinge support.
-
The metal hinge support can now be lifted off and set aside.
-
Unplug regulator card from the regulator board and set aside.
-
-
-
Disconnect the ribbon cable from the main system board using the hooked end of a plastic spudger by pulling up.
-
Remove the three (3) 3.5mm screws securing the trackball board to the top of the battery compartment.
-
Lift off (along with the ribon cable) and set asside.
-
-
-
Disconnect the ribon cable from the port controller card.
-
Remove the two (2) 4.5mm scews with a #1 philips bit.
-
Disconnect the display control card from the board below and set aside.
-
Disconnect the ribbon cable from the modem guide to the main board.
-
Remove the modem guide and the three (3) black long screws.
-
-
-
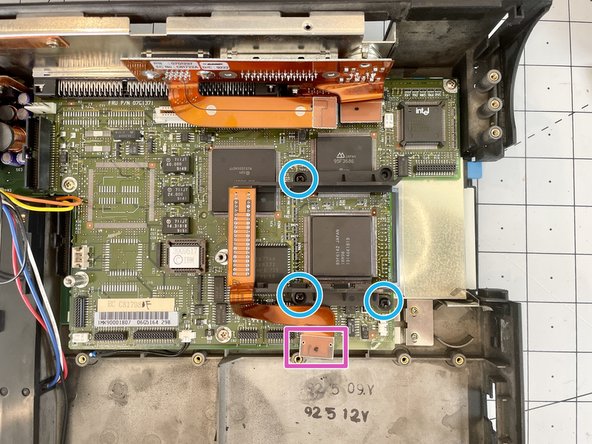
Remove the two (2) 10.5mm standoffs with a #4 flat head bit
-
Remove the three (3) 4.5mm screws with a #1 philips bit
-
Disconnect the power connector
-
tilt the board up from the left and slide the board up and out making sure not to damage the case and metal clips on the right.
-
-
-
disconnect the battery cable
-
remove six (6) 3.5mm screws with #1 philips bit
-
remove two (2) 8mm standoffs with a #4 flathead
-
-
-
Remove two (2) 4.5mm screws with #1 Philips bit
-


To reassemble your device, follow these instructions in reverse order.
