Introduction
The Magic Box modifies your existing Apple MagSafe Power Adapter for use with the HyperMac/HyperJuice External MacBook Batteries.
Key benefits:
- It takes only two minutes to attach two "Magic Box" adapters to MagSafe Power Adapter cord.
- Create your own MagSafe charging cable to charge any MacBook with the HyperMac External Battery or Car Charger.
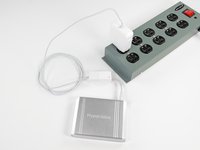
- Recharge HyperMac with Apple MagSafe Power Adapter. No need to carry separate HyperMac power adapters.
- Use as normal MagSafe Power Adapter to charge MacBooks.
What you need
-
-
IMPORTANT: PLEASE READ THIS FIRST
-
This is a modification kit that irreversibly modifies your Apple MacBook Power Adapter. Usage of this kit will void the warranty of your Apple MacBook Power Adapter from Apple Inc. While every effort is made to ensure safe usage of this product (including short-circuit and over current protection), this is still a DIY (Do-It-Yourself) kit.
-
Sanho shall not be liable for any special, incidental or consequential damages, including, but not limited to, lost revenues, lost profits, loss of use of software, loss or recovery of data, rental or replacement equipment, downtime, damage to property, and third- party claims, arising out of any theory of recovery, including warranty, contract, statutory or tort.
-
Notwithstanding the term of any limited warranty or any warranty implied by law, or in the event that any limited warranty fails of its essential purpose, in no event will Sanho's entire liability exceed the purchase price of this product. Please refer to our website for all terms and conditions.
-
By using this product, you indicate that you accept these terms and conditions. Otherwise please return this product in its original packaging to the seller.
 Ask FixBot
-
-
-
Before beginning, lay out the contents of the Magic Box kit. They should include (clockwise from the left):
-
Car Adapter
-
Large Magic Box
-
Small Magic Box
-
Wire Strippers
-
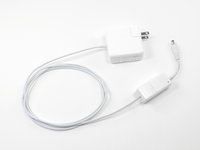
Also locate the MagSafe charger you wish to modify.
-
-
-
Use a pen to make a mark on the MagSafe cable about 4" (10 cm) from the MagSafe connector.
-
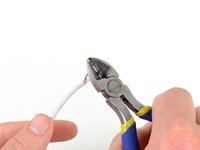
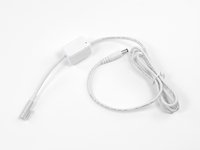
Use a pair of wire cutters or scissors to cut the cable at the mark you made about 4 inches from the MagSafe connector. Set aside the MagSafe connector wire for later.
-
-
-
Use a pen to make a mark about .75" (2 cm) from the cut end on the side of the cable attached to the power adapter.
-
-
-
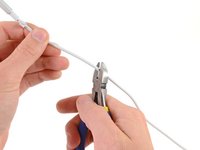
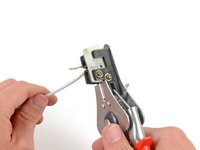
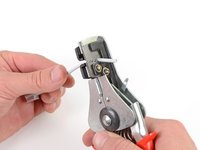
Carefully position the cable in the largest (innermost) hole on the wire stripper and line up the edge of the jaws with the mark you just made as seen in the first picture.
-
Squeeze the wire stripper to remove the outer cord tubing, revealing wire strands beneath.
-
-
-
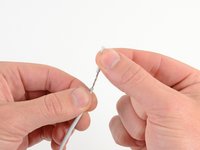
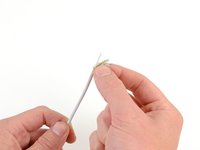
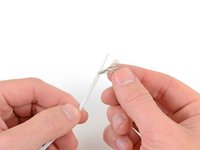
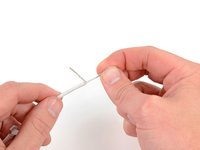
Gently move the fine wire strands aside to reveal an inner wire.
-
Twist the loose outer wire strands together into a single twisted strand.
-
-
-
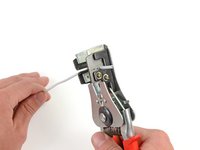
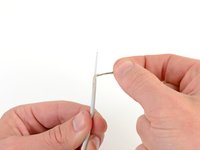
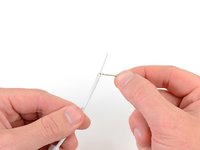
Use a pen to make a mark about 3/8" (1 cm) away from the end of the inner wire.
-
-
-
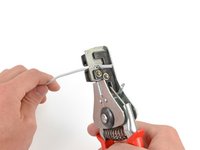
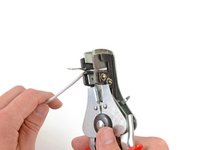
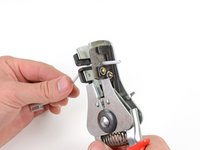
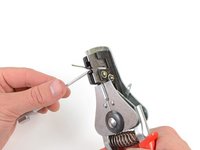
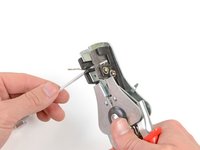
Using the wire stripper again, align the edge of its jaws with the second smallest hole on the pen mark made in the previous step.
-
Squeeze the wire stripper to strip off the insulation on the inner wire.
-
-
-
-
As before, twist the center wire strands tightly into a single twisted strand.
-
-
-
Line up the outer and inner twisted strands side by side and trim the ends of both wires to make them equal in length.
-
-
-
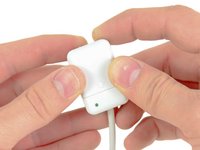
Locate the Large Magic Box.
-
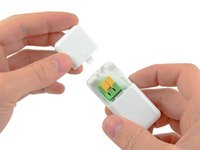
Remove the cover of the Large Magic Box and set it aside.
-
-
-
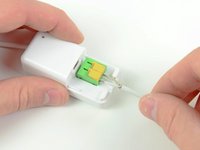
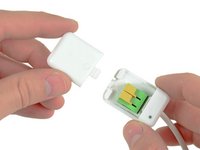
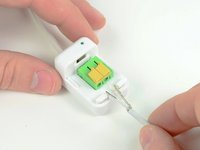
Use your thumb to push back the orange spring clamps on both terminals and insert both wires into their respective terminals. Insert the wires as far in as possible.
-
-
-
Congratulations! You just modified the MacBook Power Adapter to be capable of recharging the HyperJuice battery directly.
-
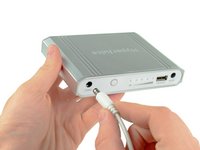
To charge a first generation HyperJuice battery, plug the male connector from the Large Magic Box into the CHARGE port on the HyperJuice battery.
-
To charge a HyperJuice 1.5 or HyperJuice 2 battery, use the short male to male cable that came in the kit to connect the Large Magic Box to the DC IN port on the HyperJuice Battery.
-
The female connector has the higher voltage required to change the newer batteries.
-
-
-
Now let's repeat the process with the MagSafe end of the cable and the Small Magic Box.
-
On the the cable with the MagSafe connector, as before, make a mark .75" (2 cm) from the cut end.
-
-
-
Again, use the largest (innermost) stripping hole to remove the outer cord tubing at the mark you just made.
-
-
-
Align the second smallest hole with the pen mark made in the previous step.
-
Strip off the inner tubing at the mark you just made to reveal the center wire strands.
-
-
-
Twist the center wire strands tightly into a single twisted strand.
-
Line up the outer and inner twisted strands side by side and trim the ends of both wires to make them equal in length.
-
-
-
Locate the Small Magic Box.
-
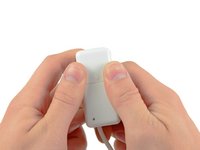
Remove the cover of the Small Magic Box and set it aside.
-
-
-
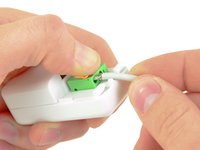
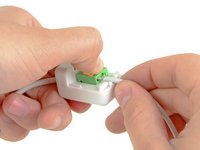
As in step 13, use your thumb to push back the orange spring clamps on both terminals and insert the center wire into the positive (+) terminal on the left and the outer wire into the negative (-) terminal on the right.
-
-
-
With that, you have successfully modified the Apple MacBook Power Adapter with the Magic Boxes.
-
-
-
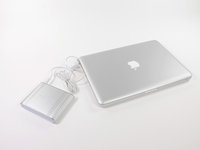
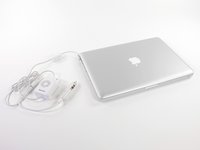
Use the modified MagSafe Cable to power and recharge your MacBook with HyperJuice external battery. The LED light on the Small Magic Box will light green during use.
-
Connect the modified MagSafe Cable to the MacBook Car Charger to power and recharge your MacBook in the car.
-
Connect the Small Magic Box to the socket in the Large Magic Box to regain the original functionality of the Apple MacBook Power Adapter, i.e. to power the MacBook. We hope you like our Magic Box solution.
-


Cancel: I did not complete this guide.
16 other people completed this guide.

6 Guide Comments
Any chance you could do a teardown of what's inside the magic boxes? It seems to me that there must be some actual magic in the large magic box (and the small is essentially just wiring straight through).
I tried soldering on some $1.50 DC power connectors instead of paying $50 for the magic box. The cable from the battery to the laptop works perfectly, but the HyperJuice battery doesn't charge from the Macbook power adaptor - there must be something more required. Any insights into what the large magic box does would be appreciated :)
It is good ida
*idea
is what you meant think :-)
I dont know what is that
I dont know what is