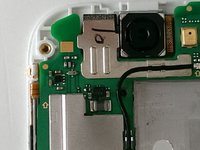
Huawei Ascend G7 Display Assembly Replacement

What you need

  1. Huawei Ascend G7 Display Assembly Replacement, Remove upper frame casing: step 1, image 1 of 3 Huawei Ascend G7 Display Assembly Replacement, Remove upper frame casing: step 1, image 2 of 3 Huawei Ascend G7 Display Assembly Replacement, Remove upper frame casing: step 1, image 3 of 3
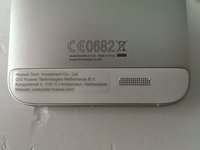
    • Under the top frame there are 3 screws. The frame is glued. Heat without exaggerating the frame and lever to disengage.

  2. Huawei Ascend G7 Display Assembly Replacement, Remove the 3 screws: step 2, image 1 of 1
    • Remove the 3 screws

  3. Huawei Ascend G7 Display Assembly Replacement, Removing lower frame casing: step 3, image 1 of 3 Huawei Ascend G7 Display Assembly Replacement, Removing lower frame casing: step 3, image 2 of 3 Huawei Ascend G7 Display Assembly Replacement, Removing lower frame casing: step 3, image 3 of 3
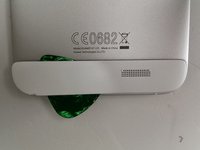
    • Under the Lower frame there are three screws. The frame is glued. Heat without exaggerating the frame and lever to disengage.

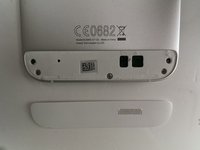
    • This is the same as removing as removing the upper frame casing

  4. Huawei Ascend G7 Display Assembly Replacement, Removing the screws of the lower casing: step 4, image 1 of 1
    • Removing the 3 screws

  5. Huawei Ascend G7 Display Assembly Replacement, Remove the sim and sd card: step 5, image 1 of 1
    • Remove the door of Sim

    • Remove the cover of the SD Card.

  6. Huawei Ascend G7 Display Assembly Replacement, Removing the bottom: step 6, image 1 of 3 Huawei Ascend G7 Display Assembly Replacement, Removing the bottom: step 6, image 2 of 3 Huawei Ascend G7 Display Assembly Replacement, Removing the bottom: step 6, image 3 of 3
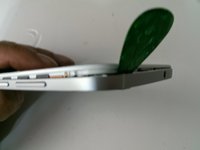
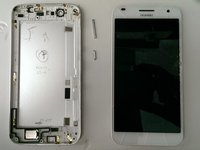
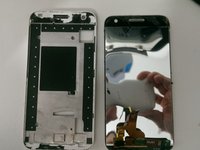
    • Use a prying tool to pry the display away from the back case.

    • Be careful not to lose the volume buttons and the power button.

  7. Huawei Ascend G7 Display Assembly Replacement: step 7, image 1 of 1
    • The disassembled smartphone with the aluminum back removed

  8. Huawei Ascend G7 Display Assembly Replacement, Removal Of Battery: step 8, image 1 of 2 Huawei Ascend G7 Display Assembly Replacement, Removal Of Battery: step 8, image 2 of 2
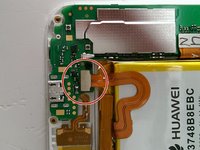
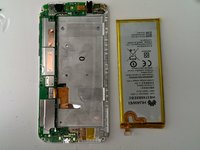
    • Disconnect the battery connector.

    • If The battery is stuck, remove it very carefully.

  9. Huawei Ascend G7 Display Assembly Replacement, Disconnect video connector: step 9, image 1 of 2 Huawei Ascend G7 Display Assembly Replacement, Disconnect video connector: step 9, image 2 of 2
    • Disconnect the video connector gently.

  10. Huawei Ascend G7 Display Assembly Replacement, Headphone Connector: step 10, image 1 of 1
    • Gently unplug the headphone connector.

  11. Huawei Ascend G7 Display Assembly Replacement, Remove screw: step 11, image 1 of 2 Huawei Ascend G7 Display Assembly Replacement, Remove screw: step 11, image 2 of 2
    • Remove the screw at the bottom.

  12. Huawei Ascend G7 Display Assembly Replacement, Remove the screw: step 12, image 1 of 2 Huawei Ascend G7 Display Assembly Replacement, Remove the screw: step 12, image 2 of 2
    • Remove screw from the top

  13. Huawei Ascend G7 Display Assembly Replacement, Remove the screw: step 13, image 1 of 2 Huawei Ascend G7 Display Assembly Replacement, Remove the screw: step 13, image 2 of 2
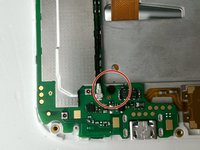
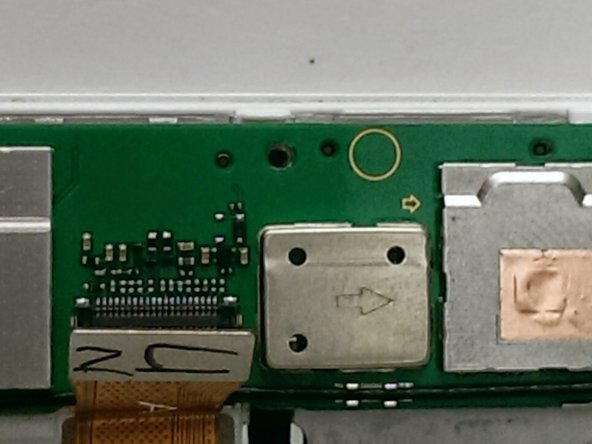
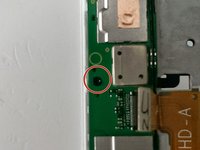
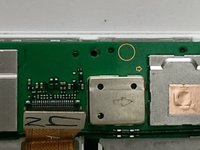
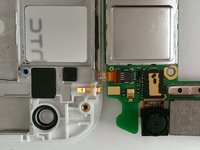
    • Remove the screw next to the video connector.

    • Your almost to the finish line! Just 3 more steps to go.

  14. Huawei Ascend G7 Display Assembly Replacement, Mainboard: step 14, image 1 of 1
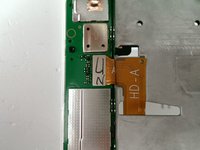
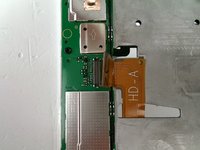
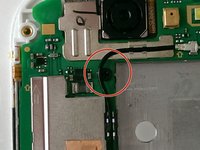
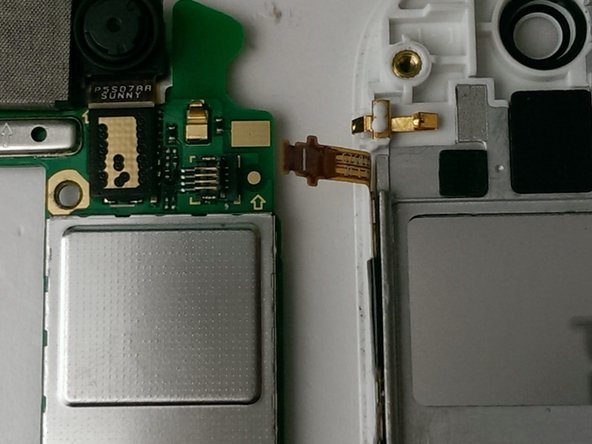
    • Gently rotate outside the motherboard, making sure not to break the little indicated connector

  15. Huawei Ascend G7 Display Assembly Replacement, Connector: step 15, image 1 of 2 Huawei Ascend G7 Display Assembly Replacement, Connector: step 15, image 2 of 2
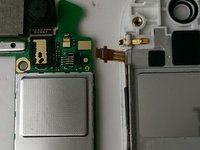
    • If your new display assembly comes with this ribbon cable already installed, disconnect the old one now.

    • If not, separate this part from the old display and transfer it to the new one.

  16. Huawei Ascend G7 Display Assembly Replacement, Removal of the display and the touch screen: step 16, image 1 of 2 Huawei Ascend G7 Display Assembly Replacement, Removal of the display and the touch screen: step 16, image 2 of 2
    • Heat the front.

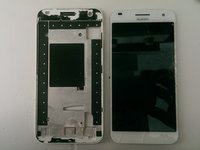
    • Using a plastic tool to separate the lock display / touch screen from the main body.

  17. Huawei Ascend G7 Display Assembly Replacement: step 17, image 1 of 1
    • You have completed the repair.

Conclusion

To reassemble your device, follow these instructions in reverse order.

36 other people completed this guide.

Andrea Murinu

Member since: 04/07/15

948 Reputation

1 Guide authored

4 Comments

donde puedo conseguir el remplazo de la pantalla completa, LCD + touch?

mnemcf95 - Reply

Hi , thanks this info is great . My G7 has a broken touch screen but works fine . I have seen replacement screens and units which include the digiboard ? So do I need to still remove the pcb or just the frame to get to the edge of the touch screen ? is it easy to replace the touch sreen alone ? look forward to your reply . Regards Carl.

carl anthony - Reply

Step 8 - the battery stock very much, I inserted a credit card in between the casing and the battery to detach it. I guess that bending the battery is very dangerous!

Step 15 - This part means the black flat cable with the three buttons ;-)

Step 16 - The new display needed a small film of glue

pacman0 - Reply

Hi, the power on connector on my main board has the plastic clip missing is there a way I can connect them together, they seem too small for soldering.

Andrina - Reply

Add Comment

View Statistics:

Past 24 Hours: 0

Past 7 Days: 3

Past 30 Days: 22

All Time: 21,420