Introduction
This fridge developed some trouble over the last few weeks. It started to click rhythmically from the control box and the fan inside the freezer part turned on and off. Both temperature and humidity inside the fridge weere higher than they should be. In order to keep food out of the Danger Zone, a fridge must be set between 32-40° F (0-4 degrees Celsius). This one showed 48 F (8 deg Celsius).
Assumption was made that this fridge did not go through its auto defrost routine. The order to check it for the defrosting is
1) Defrost heater
2) Defrost Thermostat
3) Control Circuitboard.
What you need
-
-
This is a run of the mill 12 year old Whirlpool Fridge. That started to develop cooling issues
-
Thermometer showed the fridge to be outside of parameter for food safety.
 Ask FixBot
-
-
-
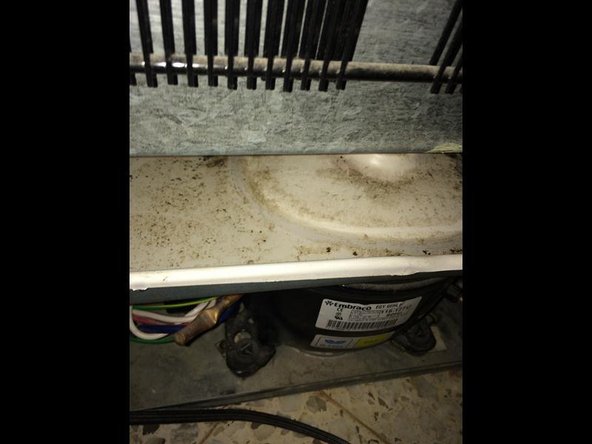
First thing to check is the drip pan in the back of the fridge to see if it defrosted. There should be water, or at least some signs of it. This pan was bone dry, which leads to the conclusion that the fridge is not defrosting. Insert wisdom here.
-
Removing the cover from the evaporator is the next step. This is accomplished by removing the floor from the fridge. Empty the freezer part and remove any shelves
-
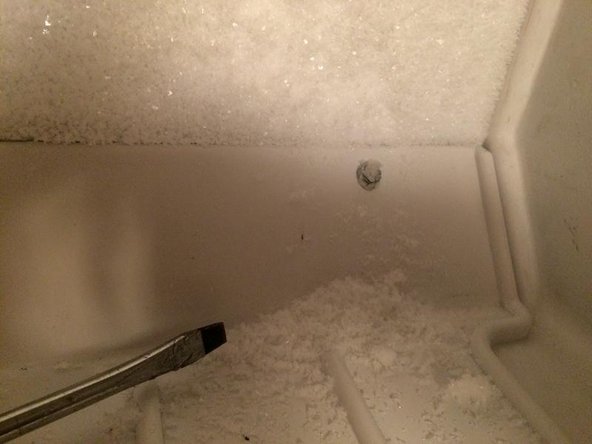
The floor is held in place by two snap-in fasteners in the front and two screws in the back. Remove the snap in fasteners first. Using a flat tip screwdriver to pop out the left fastener
-
-
-
-
After that remove the right one the same way.
-
Next is to remove the two screws on the back of the floor. Using a 1/4" socket and nutdriver remove the left and right screw
-
-
-
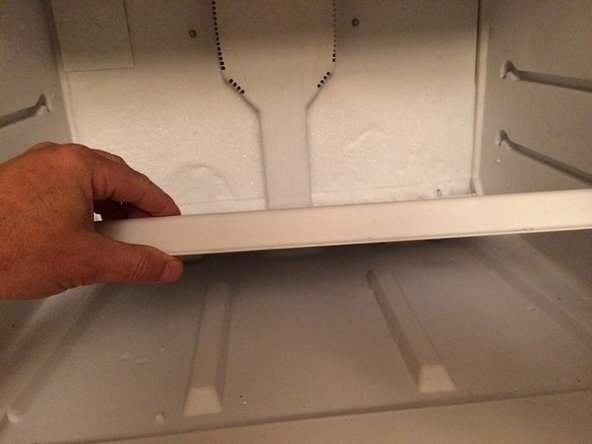
With the fasteners and screws out, remove the floor.
-
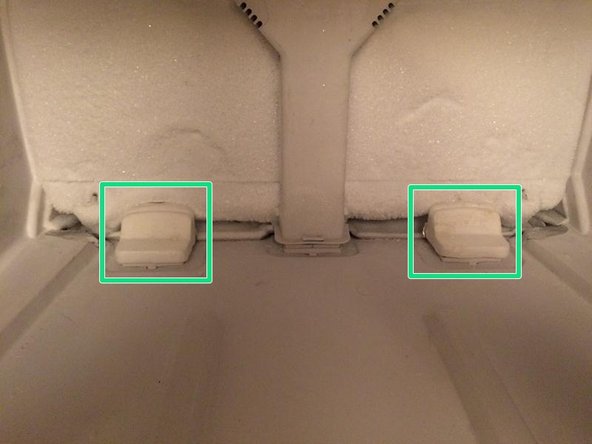
Remove the two styrofoam two air diffuser. Remove those by pulling them straight up.
-
Remove the cover from the evaporator by removing the three 1/4" screws.
-
-
-
With the screws removed, pull the cover slightly up to free the air inlet to the fridge and angle it to remove it.
-
The evaporator was absolutely covered in ice. The intake for two air diffusers is covered in ice and this is preventing airflow from the freezer to the fridge. The evaporator needs to be defrosted for further trouble shooting. In this case a hairdryer accomplished this in a relative short time.
-
-
-
Defrosted evaporator will make it easier to work on. Here is the connector for the defrost heater.
-
The defrost heater is located on the bottom of the evaporator
-
Unplug the connector to the heater.
-
A multimeter set to Ohm scale is now needed. Insert one probe into one pin each. If the defrost heater is working there will be continuity showing on the multimeter. This is a strict go-no go test. No numerical resistance values are really needed. Either it works or it does not.
-


To reassemble your device, follow these instructions in reverse order.
Cancel: I did not complete this guide.
One other person completed this guide.
