Introduction
This guide will describe how to disassemble the ChiliCube cooling unit and replace the fans.
Please look through my teardown guide for the ChiliCube as well. The teardown guide has additional info about ChiliCubes which did not fit in this repair/replacement guide.
Then completely read through this guide before ordering the parts. Go out of your way to read comments by other iFixiters. The user Spectacle in particular did things differently, and may save you time and/or grief. You have to look at the bottom of each step, and expand the comments to view them.
The part count is based on repairing a single cube, double the quantity of parts if you are replacing the fans on two cubes.
This fix is much more difficult than replacing a fan on your computer.
This is not as simple a fix as one might wish.
The ChiliCube is poorly designed from the perspective of fan replacement (or any other repair), making this replacement more difficult than one would expect.
Caution:
The directions for installing the 3-way switch include steps which breach or defeat the "moat" created by the deck separating the reservoirs and filler neck on top with the electronics on the bottom. The cut in the flange, and the holes for the cable tie described in later steps might allow internal spills or leaks to flow through to the electronics area. If you want to install quieter fans, but you want to retain the same level of safety, you may want to either skip installing the 3-way switch as described (or just use another model of fan without a switch.)
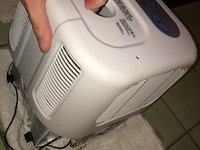
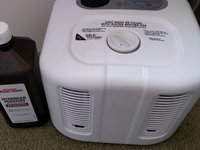
Note: This describes the heating/cooling unit which is part of 2nd generation ChiliPad / ChiliCube system (introduced in 2014(?), and not the first generation unit (mostly sold pre-2015) which was more squat, and had a handle on top.
What you need
-
-
If you decide to empty it, take cube to sink and unscrew cap and empty out water from unit.
-
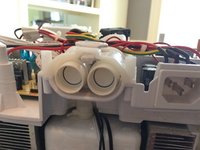
You may want to stick your fingers in the two circulating tube holes to open up those valves so that you can drain water from the pump side of the unit.
-
-
-
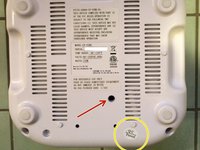
Flip unit over.
-
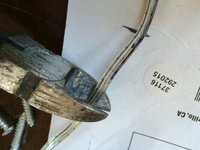
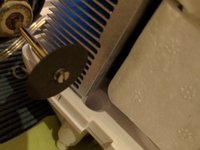
Slide razor blade under the QC sticker, it hides one of the screw holes. You should park it on top of one of the labels for future use. That is if you wish to pretend you have not opened a device you own.
-
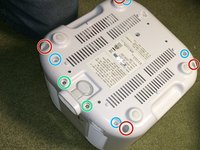
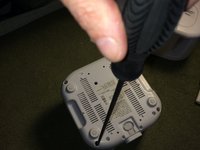
Remove 10 screws. Four of them are in deep narrow holes which presumably are intended to prevent casual repair like this. You will find most regular #2 philip's screwdrivers are not long and/or narrow enough.
-
-
-
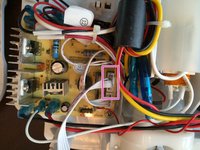
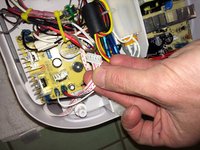
Unhook connector this small ribbon cable from the main circuit bord on the bottom of the unit (which is now facing you.)
-
-
-
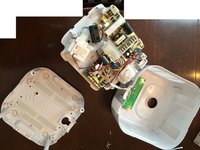
Flip the cube over again, so those circuit boards and pump are face-up again.
-
-
-
-
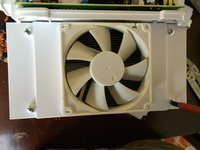
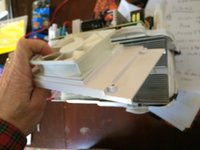
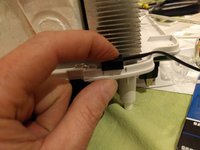
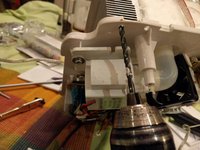
The 2 screws supporting the fan are on the heat sink side of the bracket/shroud, so we remove the bracket first, so we can get to those screws next.
-
Remove four screws holding the bracket/shroud to the heat sink.
-
Tilt the bracket/shroud out. It may take a little more force than you would like. Thats OK. Try sliding it side-to-side as well.
-
-
-
There will probably only be two of those stubby fan screws per fan.
-
-
-
You can either re-use the existing female 2-pin connector, or buy a new one. These instructions are written assuming you bought a new connector, and are wiring the fans with a new harness.
-
This method has the advantage that you can test the fans/harness assembly before you re-assemble the whole kazoo, fill it up with water, and then find it does not work. (...And rinse, and repeat, and rinse and repeat, in your author's case. )
-
-
-
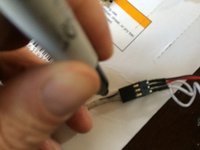
On this fan, I first attached the "dongle" that adapts the 3-pin connector on the fan to the 4-pin old-school molex connector. This is to help figure out which conductors are positive, negative, and speed sensor, because the new fans did not have color-coded conductors. (The speed sensor will not get used here)
-
Mark on you new fan which conductor is black (negative), and which is positive (red).
-
Once you have marked the cable, cut the 3-pin connector off.
-
-
-
Crude drawing of how you need to cable the fans up. I'll leave it up to you how you do it. Splice using crimps, or solder with shrink tubing to cover. Give yourself plenty of extra length on the cabling, you'll need more than you might think.
-
As written the 3-pin to 2-pin adapter in the parts list is going to be cannibalized, you only really need need the single 2-pin connector, and you will discard the 3-pin connectors.
-
You could leave the new fan's connectors attached, and rig this up so if one of the new fans fails, you only need to replace the fan without cutting wire, but then you will need to two 3-pin to 2-pin adapters per cube.
-
Once you have the two fans and connector assembled, test them to see if they are connected correctly by testing the resistance between black and red at the connector using a voltmeter. If you have got it cabled right, it should not be an open circuit, there should be some resistance there.
-
Of course, if you have got a 24V DC supply, you could test them that way too, or even hook them up to the cube, plug it in, and turn it on (it will have to have water in it, and be turned right-side up, and have the control board plugged back in.)
-
-
-
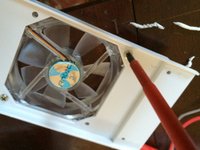
If you do go with the 3-speed fan used here, look ahead in instructions to see where the switch gets positioned, then attach fan appropriately to the bracket/shroud plate.
-
-
-
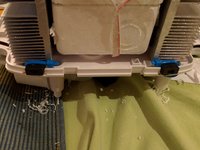
The 3-way switch will be positioned so that you can use a pencil point poked through the grill to change the setting after your ChiliCube is re-assembled.
-
You can use a dremel tool to cut part of the flange surrounding the deck. Position the switch and mark, it will be just behind the grill on the front-side of the cube when it is upright.
-
-
-
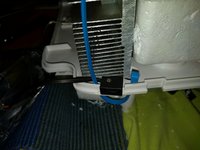
Drill two small holes on each end of the where the switch will go, and then loop a cable tie through to hold the switch in position.
-
-
-
If you have not tested the fans yet, it is recommended that you attach the connector to the fan header on the circuit board, put water in the tank, temporarily re-attach the connector for the ribbon cable to the control panel.
-
Having done all of that, when you plug it in, and turn it on using the control panel on the top, the fans should spin.
-
-
-
Unplug the unit after testing, disconnect the ribbon again, and turn it upside down again.
-
Tie down that new cable, so it does not wander.
-


To reassemble your device, follow these instructions in reverse order.
Cancel: I did not complete this guide.
41 other people completed this guide.

Team

44 Guide Comments
I was searching for information on the cube to try see if I could add some wifi or bluetooth control through an Ardiuno or something.. Good work on the guide.!!!
Would you share what connections you found/tried for connecting to Arduino type stuff? (Or didn't find)
Dan Bowen, I had not done anything with the WIFI / Bluetooth interfacing, but I just tore down my Cube2 I’ve had just over 2 years. The pump is making wierd sounds. Took it apart and found the shaft end that’s burried deep inside, is worn, but not evenly all around. It worn from 1 side to the center, if that makes sense. Almost like the magnetic pull was pulling the shaft/armature to one side. What I also found is a 433mhz receiver module that I was able to find online. It uses ASK (Amplitude Shift Keying) communication that uses a 433mhz carrier sine wave. To send 1’s and 0’s they send the carrier or not. A decoder is I found this video of a guy explaining it, and using Arduino’s do transmit/recieve a signal. I figure if I can decode the info being send by the Cube remote, I might be able to build a interface using a ESP8266 with built in wifi and a 433mhz transmitter module to send the codes to the cube. Here’s the video: https://www.youtube.com/watch?v=b5C9SPVl...
ron klo -
Also to note, my “good” cube that I bought from Chili has the 433mhz module, while the cube I bought off ebay has some other type module that I could not find info on.. and that ebay cube has a communication problem. It won’t connect with a remote (I have 3 remotes, all work on my good cube). 433mhz modules I bought (99 cents !!!) https://www.banggood.com/315MHz-433MHz-L...
ron klo -
Thanks for this guide! I'm just looking to replace the O-rings, but the photo's helped!