Introduction
Do you have a Karcher WV2 window cleaner that refuses to turn on?
Don't Panic!
Follow this step-by-step tutorial to fix your device.
What you need
-
-
First, check that your device is the correct model.
-
Remove the high nozzle.
-
Remove the wastewater tank.
-
Check if your model is WV2.
-
-
-
Remove the first five screws using a compatible torx bit or a flat-head screwdriver.
-
There is no specific length for each screw, so it doesn't matter if they get mixed up.
-
Don't use a screwdriver with a shaft that is too large as it could get stuck in the plastic part.
-
-
-
Using a flat-head screwdriver, you can carefully remove the bottom cover.
-
Do not force in this step, you could break the plastic towers
-
Once the bottom cover is removed, unscrew the last screw located behind the bottom cover.
-
-
-
-
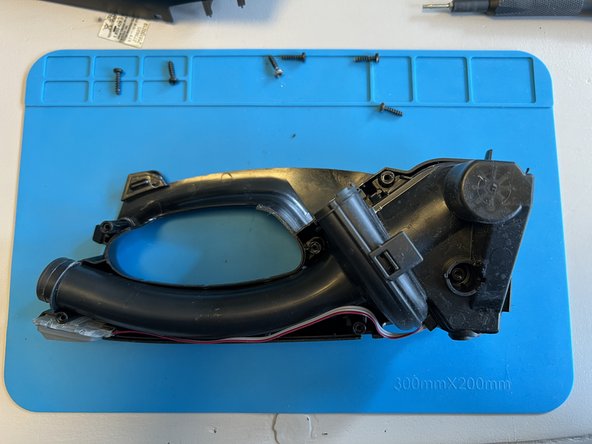
Using a flat-head screwdriver, or gently by hand, separate the two halves, right and left, of the device.
-
-
-
Gently remove the suction body and the On/Off button from the housing.
-
With your hand, and without forcing it, gently remove the two lugs on either side of the fan to separate it from the "nozzle".
-
-
-
Inspect the fan and its shaft. The flashing green light indicates that the fan is unable to start.
-
Rotate the fan by hand to check if there is any resistance.
-
If there isn't anything preventing the fan from spinning, there shouldn't be any resistance.
-
Press the button, your fan should spin again!
-
-
-
You can now take advantage of your window cleaner to clean all of your windows!
-


To reassemble your device, follow the instructions in reverse order.
Cancel: I did not complete this guide.
21 other people completed this guide.
Special thanks to these translators:
100%


These translators are helping us fix the world! Want to contribute?
Start translating ›
Attached Documents

18 Guide Comments
Merci beaucoup pour ce tutoriel.
Je ne sais pas réellement ce qui a bloqué le ventilateur, je l'ai tourné plusieurs fois à la main et d'un coup il a fonctionné de nouveau. Merci encore
Avec grand plaisir ! :)
Parfois les hélices sont bloquées par un micro organisme.
Et bien la pouasse! 😟 Merci pour le tuto démontage / test mais je relance le ventilo tout est ok j’allume impec mais ça s’éteint automatiquement après 3/4 secondes , donc ce ne serait pas le problème…
Lumière verte clignotante, puis parfois plus du tout , on sent une envie d’y aller mais obligé d’insister sur l’allumage avant que ça ne parte … je crains que ce ne soit plus sérieux 😟
Merci de votre aide .
Merci beaucoup, la garantie de mon appareil finissait en juin et panne début septembre.
J'ai suivi à la lettre votre tuto et c bon.
Même si je n'ai rien trouvé, sans doute qlq chose de minuscule.
A noter qu'il faut un tournevis étoilé de toute petite taille que je n'avais pas.
Mais je peux à nouveau profiter de l'appareil.