
How to fix Nintendo Switch Joy-Con_Drift

What you need

  1. How to fix Nintendo Switch Joy-Con_Drift, Before you start: step 1, image 1 of 1
    • Even if you don't touch the joystick, it will input directions.

  2. How to fix Nintendo Switch Joy-Con_Drift, Ver1: step 2, image 1 of 1
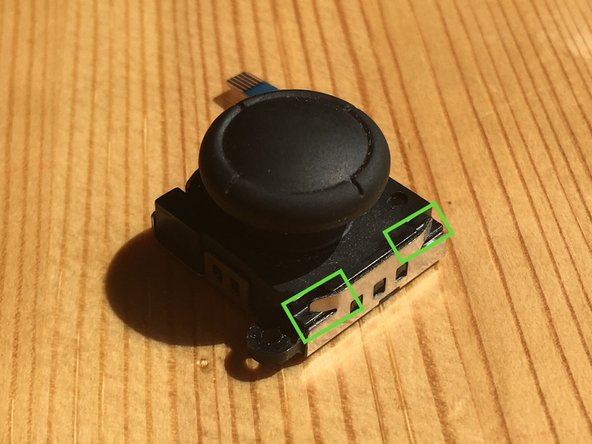
    • Raise the metal claw next to the joystick. This part will break due to metal fatigue when trying to restore it.

  3. How to fix Nintendo Switch Joy-Con_Drift, Ver1: step 3, image 1 of 1
    • The spring and white plastic parts come off when the back plate is removed.

  4. How to fix Nintendo Switch Joy-Con_Drift, Ver1: step 4, image 1 of 2 How to fix Nintendo Switch Joy-Con_Drift, Ver1: step 4, image 2 of 2
    • Location of metal ring and white plastic parts

  5. How to fix Nintendo Switch Joy-Con_Drift, Ver1: step 5, image 1 of 3 How to fix Nintendo Switch Joy-Con_Drift, Ver1: step 5, image 2 of 3 How to fix Nintendo Switch Joy-Con_Drift, Ver1: step 5, image 3 of 3
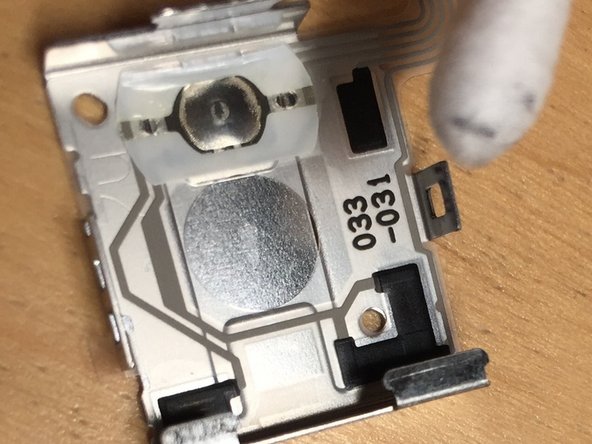
    • Clean the matte black areas with gloss with a cotton swab. *The change in the resistance value (black part) with the silver contact can be read with the position information.

  6. How to fix Nintendo Switch Joy-Con_Drift, Ver1: step 6, image 1 of 1
    • Put the metal parts back in their original positions with the springs and white plastic parts, and attach them to Joy-con. (The metal nails in the picture broke when I tried to restore them.)

  7. How to fix Nintendo Switch Joy-Con_Drift, Ver2: step 7, image 1 of 2 How to fix Nintendo Switch Joy-Con_Drift, Ver2: step 7, image 2 of 2
    • The metal press shape is different.

  8. How to fix Nintendo Switch Joy-Con_Drift, Ver2: step 8, image 1 of 3 How to fix Nintendo Switch Joy-Con_Drift, Ver2: step 8, image 2 of 3 How to fix Nintendo Switch Joy-Con_Drift, Ver2: step 8, image 3 of 3
    • Use sharp-nose pliers and straighten the bent hinge part.

  9. How to fix Nintendo Switch Joy-Con_Drift, Ver2: step 9, image 1 of 1
    • Use a precision screwdriver (minus) to remove it while raising the nail.

    • Remove without deforming, leaving the elasticity of the metal

  10. How to fix Nintendo Switch Joy-Con_Drift, Ver2: step 10, image 1 of 1
    • Insert the screwdriver slowly and remove the metal frame. Be careful because there is a spring

  11. How to fix Nintendo Switch Joy-Con_Drift, Ver2: step 11, image 1 of 1
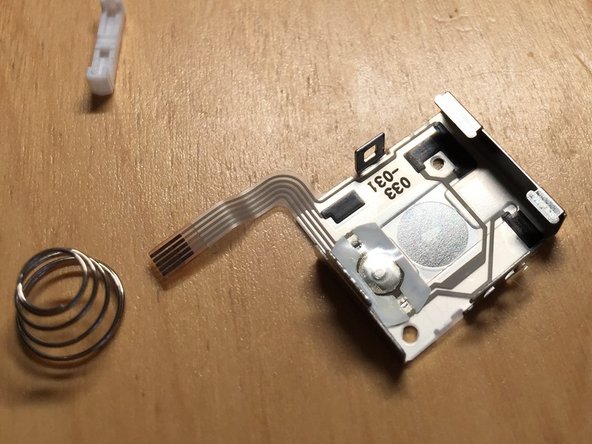
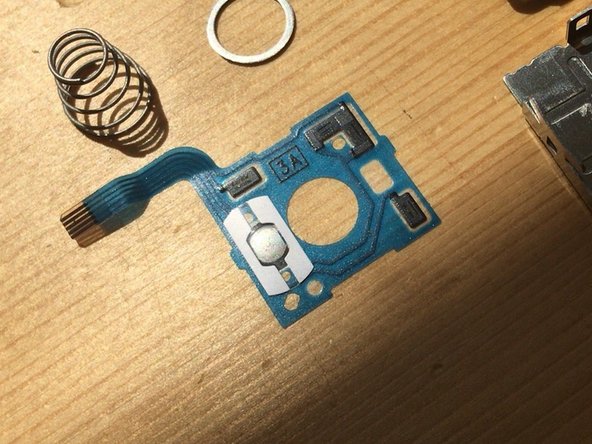
    • Disassembled parts springs, metal washers, parts for push button, film substrate, metal frame

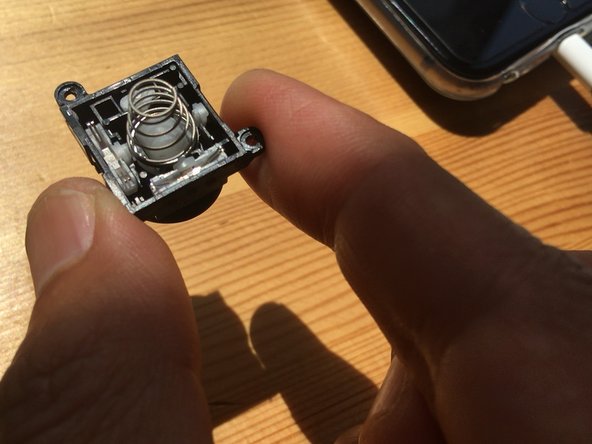
    • The metal frame is greased, so do not clean it here. (Wipe here to generate plastic powder.)

    • As expected, it may not be greased if it is not a genuine joystick. In that case, it is recommended to apply any grease.

  12. How to fix Nintendo Switch Joy-Con_Drift, Ver2: step 12, image 1 of 3 How to fix Nintendo Switch Joy-Con_Drift, Ver2: step 12, image 2 of 3 How to fix Nintendo Switch Joy-Con_Drift, Ver2: step 12, image 3 of 3
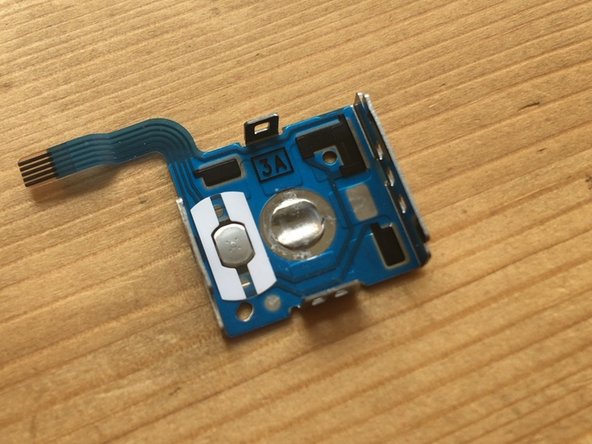
    • The black part is a sensor that reads the resistance value. There is a line-like gloss here, so use a cotton swab to clean it.

    • CAUTION Wipe the metal terminals with a cotton swab dipped in alcohol. Be careful as it bends easily.

  13. How to fix Nintendo Switch Joy-Con_Drift, Ver2: step 13, image 1 of 2 How to fix Nintendo Switch Joy-Con_Drift, Ver2: step 13, image 2 of 2
    • Attach the washer and push-button parts using tweezers.

  14. How to fix Nintendo Switch Joy-Con_Drift, Ver2: step 14, image 1 of 1
    • Place the spring on the washer

  15. How to fix Nintendo Switch Joy-Con_Drift, Ver2: step 15, image 1 of 1
    • Place the film substrate on the metal frame. Since there are two claws, please check the position and put it on.

  16. How to fix Nintendo Switch Joy-Con_Drift, Ver2: step 16, image 1 of 1
    • The part using the radio pliers at the beginning cannot be removed without doing anything, so let's leave it as it is so that it can be easily removed when disassembling next.

  17. How to fix Nintendo Switch Joy-Con_Drift: step 17, image 1 of 1
    • Since the metal frame is fixed with the plastic parts when returning it, it does not hinder the operation.

    • The photo is from Ver1

  18. How to fix Nintendo Switch Joy-Con_Drift, Photo after work: step 18, image 1 of 1
    • The joystick is back in action!

Conclusion

To reassemble your device, perform these steps in reverse order.

5 other people completed this guide.

Special thanks to these translators:

jp en

100%

These translators are helping us fix the world! Want to contribute?
Start translating ›

syusan

Member since: 05/25/20

528 Reputation

2 Guides authored

One Comment

Great Guide, works like a dream

lou reed - Reply

Add Comment

View Statistics:

Past 24 Hours: 0

Past 7 Days: 8

Past 30 Days: 36

All Time: 6,280