
How to disassemble and clean your Roomba 560

What you need

  1. How to disassemble and clean your Roomba 560, How to disassemble and clean your Roomba 560: step 1, image 1 of 1
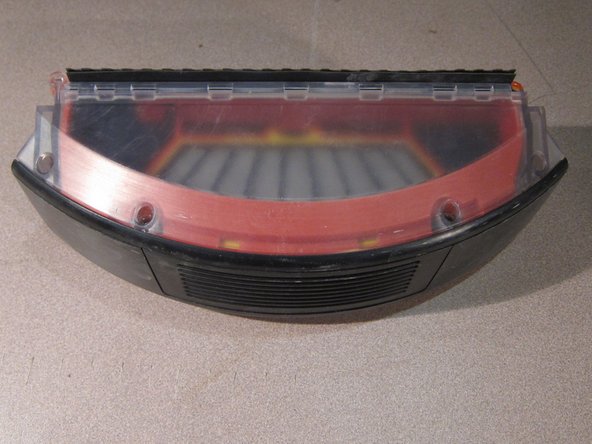
    • Remove dust bin from Roomba. This will be the first sub-assembly cleaned.

  2. How to disassemble and clean your Roomba 560: step 2, image 1 of 2 How to disassemble and clean your Roomba 560: step 2, image 2 of 2
    • Open red dust-bin cover. Remove debris from the dust-bin.

    • Remove the filter from the red dust-bin cover.

    • Remove the red dust-bin cover from the bin by gently pressing on the red cover near the hinge.

  3. How to disassemble and clean your Roomba 560: step 3, image 1 of 2 How to disassemble and clean your Roomba 560: step 3, image 2 of 2
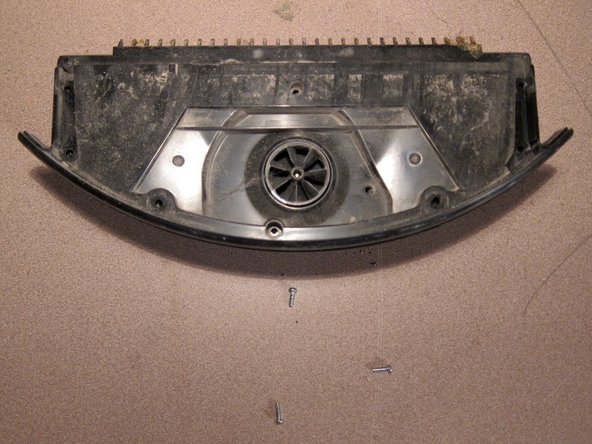
    • Turn over the dust-bin.

    • Remove 6 screws from the clear bottom dust-bin cover.

    • Remove the clear bottom dust-bin cover.

  4. How to disassemble and clean your Roomba 560: step 4, image 1 of 3 How to disassemble and clean your Roomba 560: step 4, image 2 of 3 How to disassemble and clean your Roomba 560: step 4, image 3 of 3
    • Remove three screws from the remaining dust-bin assembly.

    • Lift to remove middle plate from dust-bin assembly.

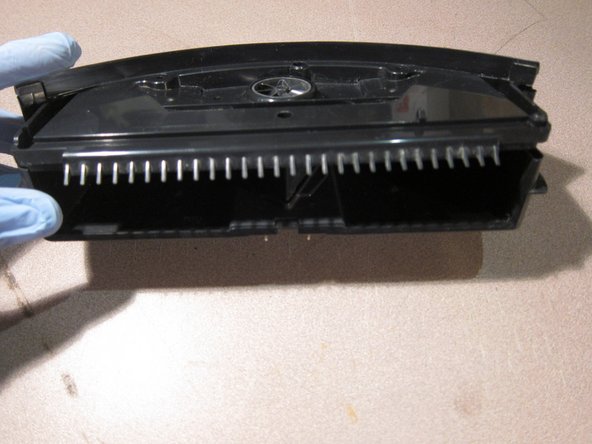
    • Slide out and remove exhaust grill from dust-bin assembly.

  5. How to disassemble and clean your Roomba 560: step 5, image 1 of 2 How to disassemble and clean your Roomba 560: step 5, image 2 of 2
    • Turn over top dust-bin plate so the release button is facing up.

    • Remove screw from top plate.

    • Remove blower assembly, push-button, and spring.

  6. How to disassemble and clean your Roomba 560: step 6, image 1 of 3 How to disassemble and clean your Roomba 560: step 6, image 2 of 3 How to disassemble and clean your Roomba 560: step 6, image 3 of 3
    • Remove two screws from blower assembly.

    • Clean dirt and debris from top of blower assembly.

    • Carefully lift top from blower assembly. DO NOT DETACH WIRES.

    • Clean underside of blower cover and around blower.

    • Replace blower cover with two screws.

  7. How to disassemble and clean your Roomba 560: step 7, image 1 of 3 How to disassemble and clean your Roomba 560: step 7, image 2 of 3 How to disassemble and clean your Roomba 560: step 7, image 3 of 3
    • Turn over blower assembly

    • Clean underside surface of blower assembly.

    • Clean fan blades using a cotton swab.

    • Turn blower assembly on its side.

    • Again, clean fan blades using a cotton swab.

  8. How to disassemble and clean your Roomba 560: step 8, image 1 of 1
    • Clean all surfaces of the top plate of the dust bin.

  9. How to disassemble and clean your Roomba 560: step 9, image 1 of 1
    • Clean all sides of vent grill and between grill slats.

  10. How to disassemble and clean your Roomba 560: step 10, image 1 of 1
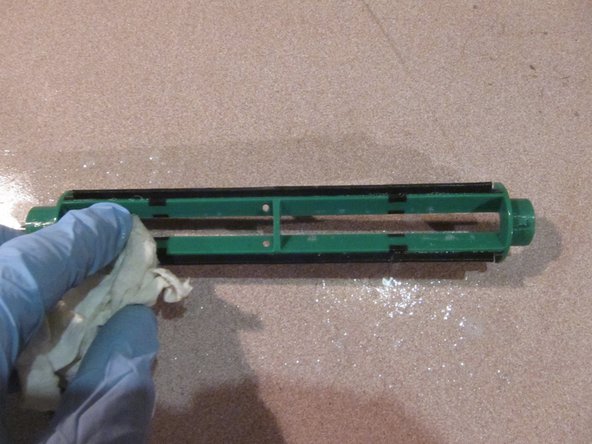
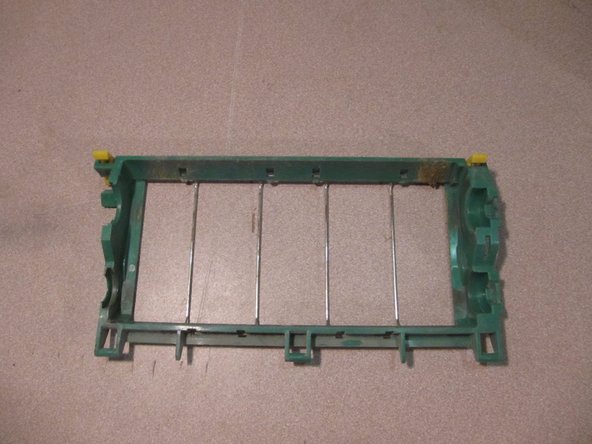
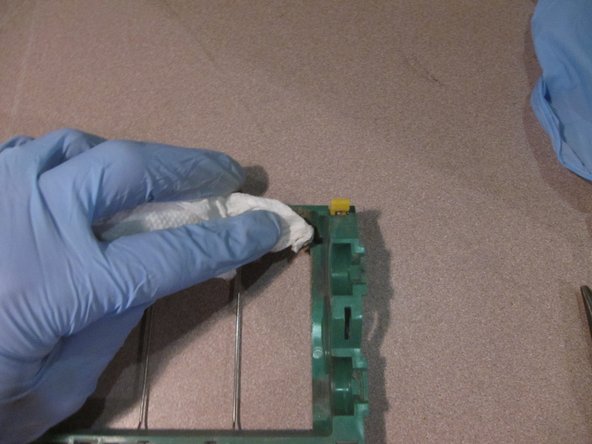
    • Clean all surface of the middle plate of the dust bin.

    • Clean between the teeth on the front edge of the plate.

  11. How to disassemble and clean your Roomba 560: step 11, image 1 of 3 How to disassemble and clean your Roomba 560: step 11, image 2 of 3 How to disassemble and clean your Roomba 560: step 11, image 3 of 3
    • Re-assemble the blower assembly, vent grill, button, button spring, and top & middle dust-bin plates.

    • Make sure blower assembly slides into the two channels.

    • Replace 3 screws on middle plate and 1 screw on top plate.

  12. How to disassemble and clean your Roomba 560: step 12, image 1 of 3 How to disassemble and clean your Roomba 560: step 12, image 2 of 3 How to disassemble and clean your Roomba 560: step 12, image 3 of 3
    • Clean all surfaces of the clear dust bin cover.

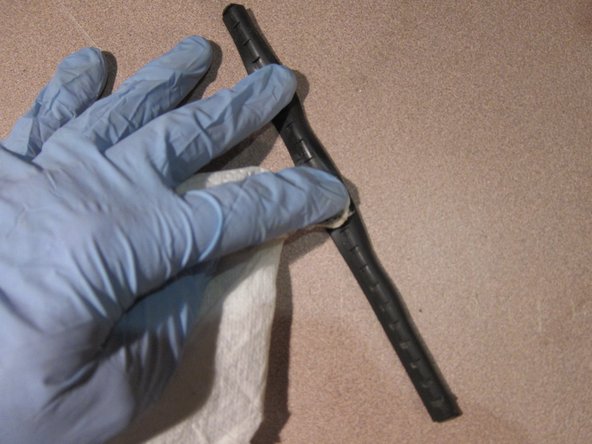
    • Pull off the rubber strip and clean under the rubber strip.

    • Clean all surfaces of the rubber strip.

    • Re-install rubber strip.

  13. How to disassemble and clean your Roomba 560: step 13, image 1 of 3 How to disassemble and clean your Roomba 560: step 13, image 2 of 3 How to disassemble and clean your Roomba 560: step 13, image 3 of 3
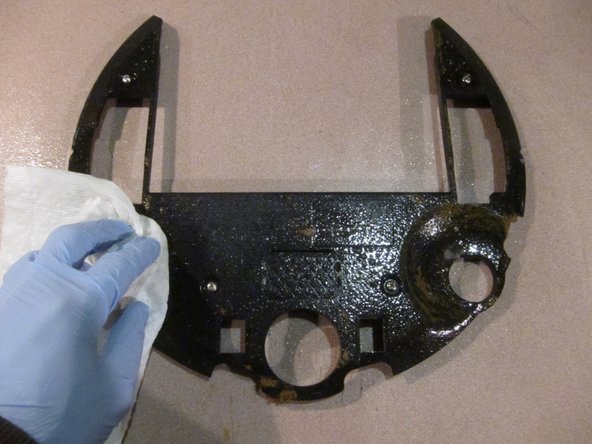
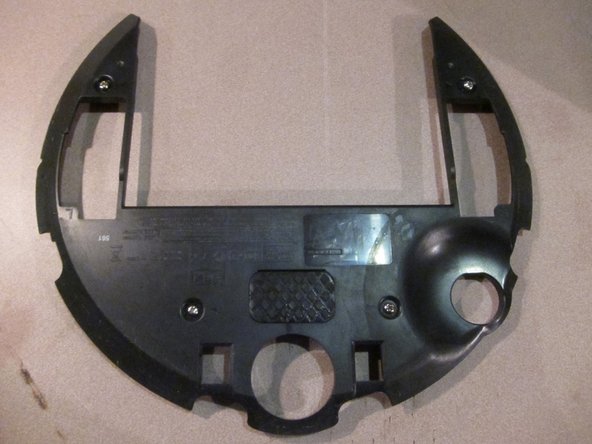
    • Clean all surfaces of the red dust-bin cover.

    • Use a small flathead screwdriver or pick to clean inside corners.

    • Replace filter with new filter for best results.

  14. How to disassemble and clean your Roomba 560: step 14, image 1 of 3 How to disassemble and clean your Roomba 560: step 14, image 2 of 3 How to disassemble and clean your Roomba 560: step 14, image 3 of 3
    • Re-attach clear dust-bin cover to dust-bin assembly (see step 11) with six screws.

    • Insert red dust-bin cover.

    • Set clean dust-bin aside.

  15. How to disassemble and clean your Roomba 560: step 15, image 1 of 3 How to disassemble and clean your Roomba 560: step 15, image 2 of 3 How to disassemble and clean your Roomba 560: step 15, image 3 of 3
    • Turn Roomba upside-down so the brushes are facing up.

    • Open brush cage by pressing on yellow tabs and pulling up on the green brush cage lid.

    • Remove both brushes, lifting from the right side of the brushes.

  16. How to disassemble and clean your Roomba 560: step 16, image 1 of 3 How to disassemble and clean your Roomba 560: step 16, image 2 of 3 How to disassemble and clean your Roomba 560: step 16, image 3 of 3
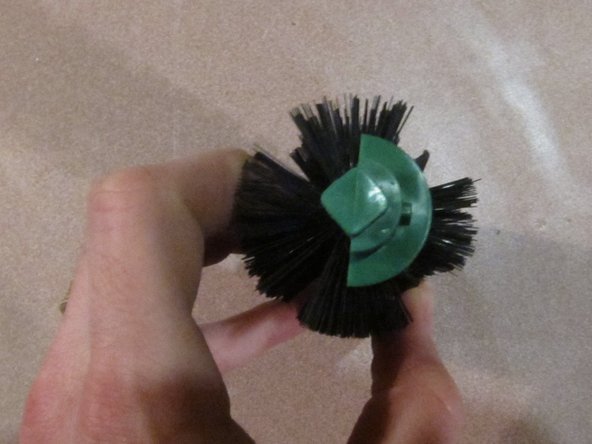
    • Remove the two yellow endcaps from the bristle brush.

    • Run the brush through the red bristle cleaning tool, included with your Roomba.

    • Repeat several times until the the cleaning tool no longer picks up hair/fibers.

  17. How to disassemble and clean your Roomba 560: step 17, image 1 of 3 How to disassemble and clean your Roomba 560: step 17, image 2 of 3 How to disassemble and clean your Roomba 560: step 17, image 3 of 3
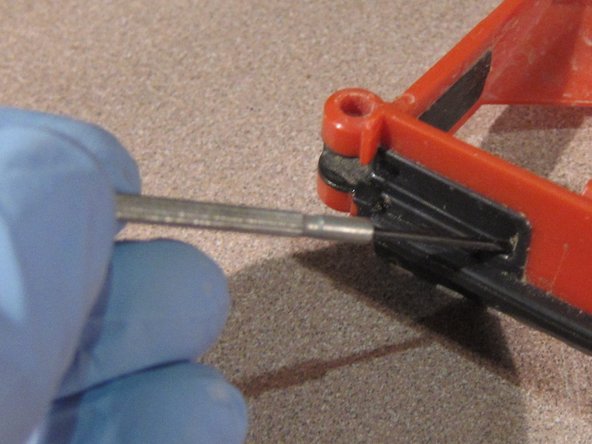
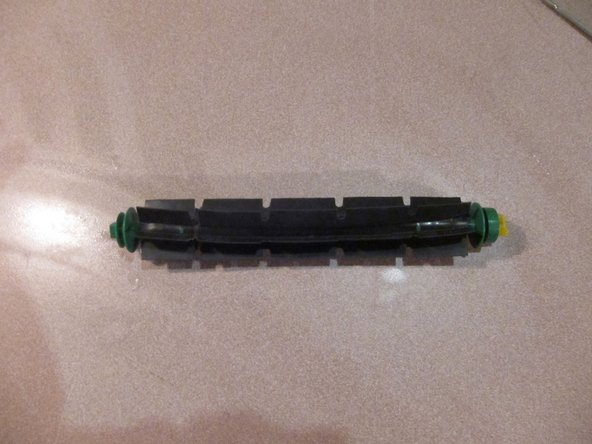
    • Clip the zip-tie with a pair of snips and remove the zip-tie from the brush.

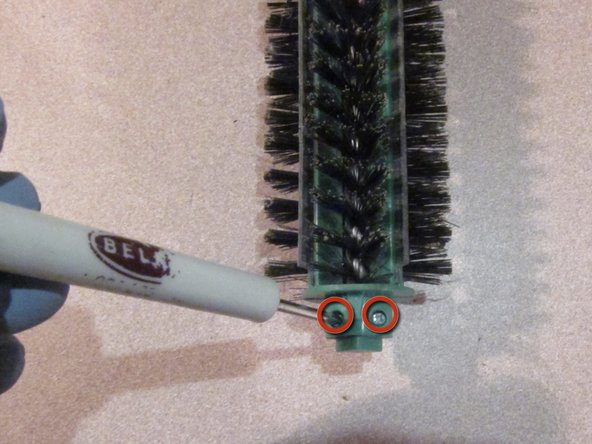
    • Remove four screws from the ends of the brush.

    • Pull apart green brush housing.

  18. How to disassemble and clean your Roomba 560: step 18, image 1 of 3 How to disassemble and clean your Roomba 560: step 18, image 2 of 3 How to disassemble and clean your Roomba 560: step 18, image 3 of 3
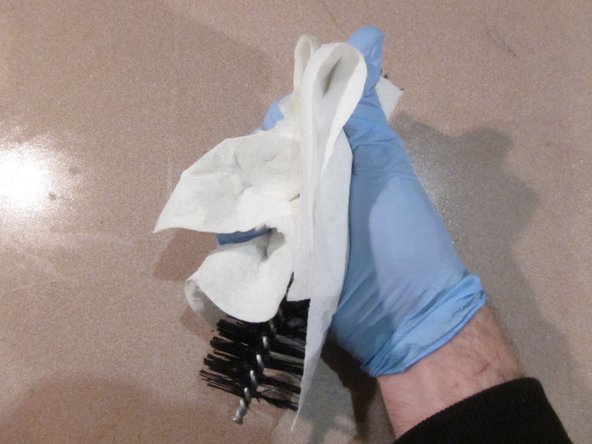
    • Spray bristles with an all-purpose cleaning solution.

    • Squeeze bristle rod with a paper towel and run bristle rod through paper towel.

    • Repeat several times until bristles are clean.

  19. How to disassemble and clean your Roomba 560: step 19, image 1 of 3 How to disassemble and clean your Roomba 560: step 19, image 2 of 3 How to disassemble and clean your Roomba 560: step 19, image 3 of 3
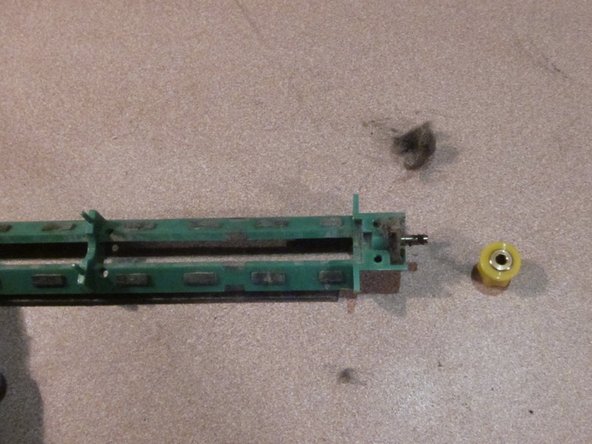
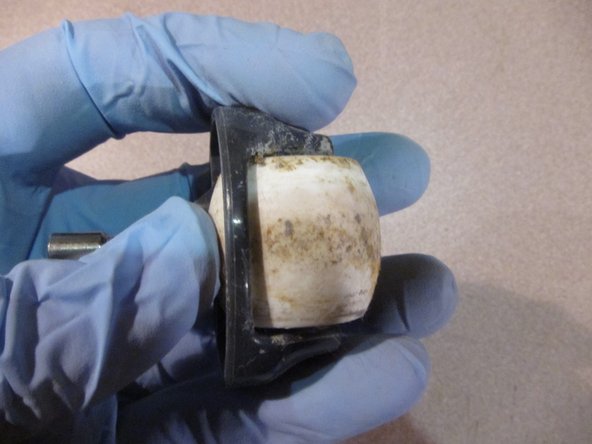
    • Remove yellow bearing from green bristle housing.

    • Clean yellow bearing and hair/fibers from the axle.

    • Clean all surfaces of both parts of the green bristle brush housing.

  20. How to disassemble and clean your Roomba 560: step 20, image 1 of 3 How to disassemble and clean your Roomba 560: step 20, image 2 of 3 How to disassemble and clean your Roomba 560: step 20, image 3 of 3
    • To re-assemble the green brush housing, push the green housing against the side of one row of bristles.

    • Push on the bristles until they no longer fan out and the bristle tips are lined up with the long slot in the green brush housing.

    • Rotate the green brush housing so the line of bristles goes through the slot in the green brush housing.

    • Repeat step for the other green brush housing.

  21. How to disassemble and clean your Roomba 560: step 21, image 1 of 2 How to disassemble and clean your Roomba 560: step 21, image 2 of 2
    • Replace 4 screws on the ends of the brush.

    • Run the zip-tie through holes near the center of the brush. Secure the zip tie and clip of any excess.

    • Re-attach yellow bearing and two yellow endcaps.

    • Set aside for later installation.

  22. How to disassemble and clean your Roomba 560: step 22, image 1 of 3 How to disassemble and clean your Roomba 560: step 22, image 2 of 3 How to disassemble and clean your Roomba 560: step 22, image 3 of 3
    • Remove plastic sweeper bar from brush housing.

    • Remove yellow plastic end-piece from axle.

    • Remove hair and debris from both ends of axle. You may need to use a small pick or manicuring scissors to remove hair from the axle.

  23. How to disassemble and clean your Roomba 560: step 23, image 1 of 2 How to disassemble and clean your Roomba 560: step 23, image 2 of 2
    • Spray all surfaces with cleaning solution. Wipe clean with paper towel. Follow up with smaller cleaning tools if necessary.

    • Clean yellow plastic end piece with cleaning solution and paper towel or cotton swab.

    • Replace yellow plastic end piece on axle.

    • Set aside for later installation.

  24. How to disassemble and clean your Roomba 560: step 24, image 1 of 3 How to disassemble and clean your Roomba 560: step 24, image 2 of 3 How to disassemble and clean your Roomba 560: step 24, image 3 of 3
    • With Roomba wheels-up, grab onto front wheel and firmly pull straight up to remove wheel.

    • From the underside of the wheel housing, push the wheel out of the housing.

  25. How to disassemble and clean your Roomba 560: step 25, image 1 of 3 How to disassemble and clean your Roomba 560: step 25, image 2 of 3 How to disassemble and clean your Roomba 560: step 25, image 3 of 3
    • Remove the axle from the wheel.

    • Thoroughly clean the axle and the wheel with a paper towel and cleaning solution.

    • Thoroughly clean wheel housing with paper towel, cotton swab, and cleaning solution.

    • Re-assemble wheel housing by inserting axle in wheel and pressing wheel with axle back into wheel housing.

    • DO NOT insert wheel housing back into Roomba body. That will be done later.

  26. How to disassemble and clean your Roomba 560: step 26, image 1 of 2 How to disassemble and clean your Roomba 560: step 26, image 2 of 2
    • Remove center screw from edge brush and set aside.

    • Remove brush from Roomba body by lifting on any set of bristles.

  27. How to disassemble and clean your Roomba 560: step 27, image 1 of 3 How to disassemble and clean your Roomba 560: step 27, image 2 of 3 How to disassemble and clean your Roomba 560: step 27, image 3 of 3
    • Place edge brush on paper towel and douse with cleaning solution.

    • Rub each set of bristles with paper towel until bristles appear clean and free of debris.

    • Place edge brush on a clean paper towel and douse with bleach water.

    • Rub each set of bristles with paper towel as you did earlier with the cleaning solution.

    • Set aside for later assembly.

  28. How to disassemble and clean your Roomba 560: step 28, image 1 of 3 How to disassemble and clean your Roomba 560: step 28, image 2 of 3 How to disassemble and clean your Roomba 560: step 28, image 3 of 3
    • Unscrew 4 screws from the underside of the Roomba. Screws will separate from underside plastic plate.

    • Spray with cleaning solution and clean with paper towel. Follow up with smaller cleaning tools if needed.

    • Set aside for later installation.

  29. How to disassemble and clean your Roomba 560: step 29, image 1 of 3 How to disassemble and clean your Roomba 560: step 29, image 2 of 3 How to disassemble and clean your Roomba 560: step 29, image 3 of 3
    • Unscrew 4 screws around the brush cage housing. Screws will not separate from brush cage housing.

    • Lift brush cage assembly from Roomba body.

  30. How to disassemble and clean your Roomba 560: step 30, image 1 of 3 How to disassemble and clean your Roomba 560: step 30, image 2 of 3 How to disassemble and clean your Roomba 560: step 30, image 3 of 3
    • Place the brush assembly with the blue housing facing down.

    • Open the cage lid

    • Remove the brush cage lid by firmly pulling up at the hinges. Remove one hinge at a time.

    • Clean all surfaces of the brush cage with cleaning solution, paper towels, and cotton swabs. You may need to use a pick to clean tight corners and slots.

  31. How to disassemble and clean your Roomba 560: step 31, image 1 of 3 How to disassemble and clean your Roomba 560: step 31, image 2 of 3 How to disassemble and clean your Roomba 560: step 31, image 3 of 3
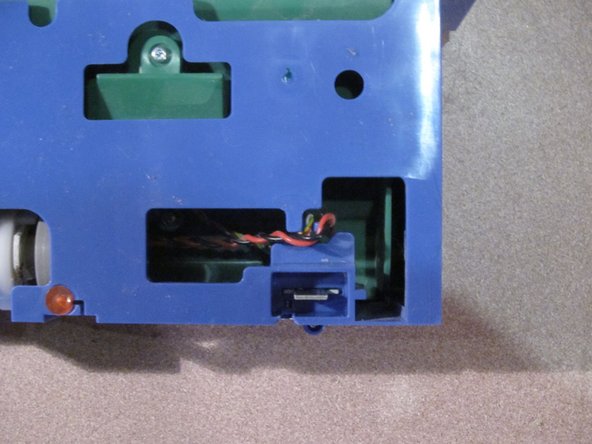
    • Place brush cage housing upside down (blue part up).

    • Remove screw securing daughtercard.

    • Move black and red wires inside the blue housing. This is required when separating the green brush cage assembly from the blue housing.

  32. How to disassemble and clean your Roomba 560: step 32, image 1 of 2 How to disassemble and clean your Roomba 560: step 32, image 2 of 2
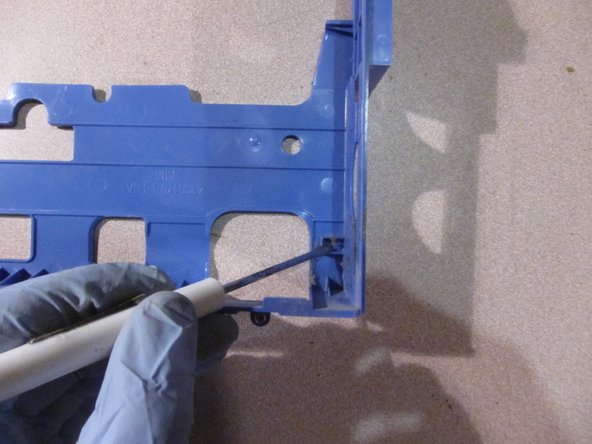
    • Remove red sticker. This is holding down a small, round, weight attached to a cable.

    • Pull the cable through the channel. This cable limits travel of the blue housing.

  33. How to disassemble and clean your Roomba 560: step 33, image 1 of 3 How to disassemble and clean your Roomba 560: step 33, image 2 of 3 How to disassemble and clean your Roomba 560: step 33, image 3 of 3
    • Flip the brush cage assembly over. Arrange so the two "arms" are facing you.

    • On one side, pull apart the green cage arm from the blue housing arm and lift out.

    • Repeat on the other arm. The green brush cage assembly will lift out of the blue housing.

  34. How to disassemble and clean your Roomba 560: step 34, image 1 of 3 How to disassemble and clean your Roomba 560: step 34, image 2 of 3 How to disassemble and clean your Roomba 560: step 34, image 3 of 3
    • Clean all surfaces of the blue housing with cleaning solution, paper towels, and cotton swabs. Use a pick to clean the debris out of tight spaces.

  35. How to disassemble and clean your Roomba 560: step 35, image 1 of 3 How to disassemble and clean your Roomba 560: step 35, image 2 of 3 How to disassemble and clean your Roomba 560: step 35, image 3 of 3
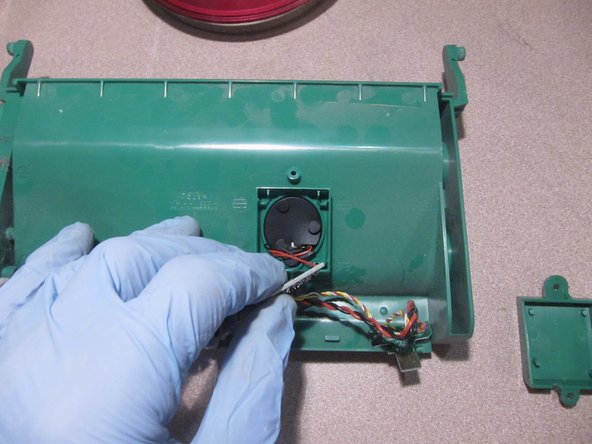
    • Place green brush cage upside down.

    • Remove 2 screws securing the square sensor cover. Set sensor cover aside.

    • Remove daughtercard from daughtercard mount.

  36. How to disassemble and clean your Roomba 560: step 36, image 1 of 2 How to disassemble and clean your Roomba 560: step 36, image 2 of 2
    • Flip the green brush cage over.

    • Remove the sensor by gently pressing on the silver disc.

  37. How to disassemble and clean your Roomba 560: step 37, image 1 of 3 How to disassemble and clean your Roomba 560: step 37, image 2 of 3 How to disassemble and clean your Roomba 560: step 37, image 3 of 3
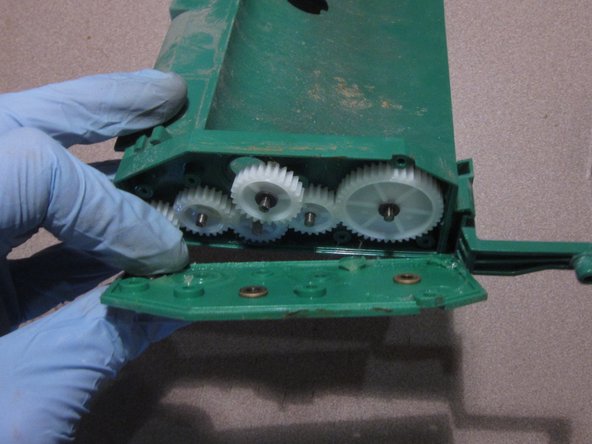
    • Turn green brush cage over so the motor is facing up.

    • Remove 2 screws securing the grey motor support to the green brush cage.

    • Pull the motor sideways out of the gearbox.

    • Remove the foam bushing and set aside.

  38. How to disassemble and clean your Roomba 560: step 38, image 1 of 3 How to disassemble and clean your Roomba 560: step 38, image 2 of 3 How to disassemble and clean your Roomba 560: step 38, image 3 of 3
    • Remove 6 screws from the gear housing.

    • Pull front cover away from the brush cage body.

  39. How to disassemble and clean your Roomba 560: step 39, image 1 of 1
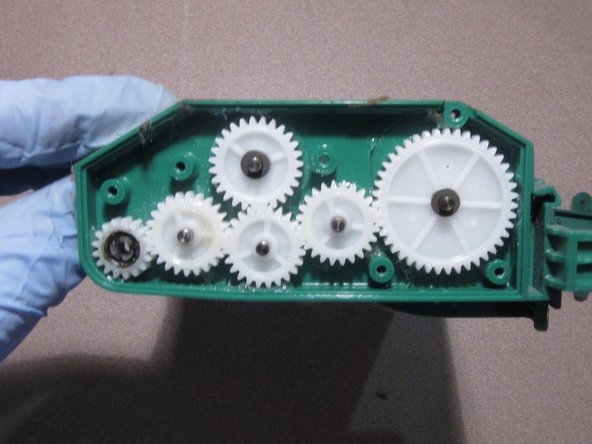
    • Clean all surfaces of the green housing with cleaning solution, paper towels, and cotton swabs. Use a pick to clean the debris out of tight spaces.

HoyeBoye

Member since: 06/14/10

1,312 Reputation

2 Guides authored

View Statistics:

Past 24 Hours: 6

Past 7 Days: 31

Past 30 Days: 119

All Time: 63,248