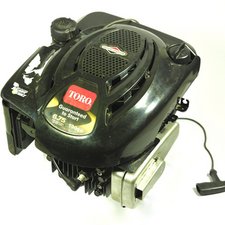
How to clean and maintain your Briggs and Stratton 675 Series Carburetor

What you need

  1. How to clean and maintain your Briggs and Stratton 675 Series Carburetor, How to clean and maintain your Briggs and Stratton 675 Series Carburetor: step 1, image 1 of 1
    • Make sure the the engine is off and the spark plug wire is removed and away from the spark plug before beginning.

    • Use a Flathead #4 screw driver to remove the 40mm screw that holds the air filter case in place.

  2. How to clean and maintain your Briggs and Stratton 675 Series Carburetor: step 2, image 1 of 1
    • Use your hands to pull the air filter case out of the hinge at the bottom.

  3. How to clean and maintain your Briggs and Stratton 675 Series Carburetor: step 3, image 1 of 2 How to clean and maintain your Briggs and Stratton 675 Series Carburetor: step 3, image 2 of 2
    • Use a socket wrench with a 5/16" hex bit to remove three 20mm bolts behind the air filter.

    • Use your hand to remove the plastic backing to the air filter, exposing the carburetor.

  4. How to clean and maintain your Briggs and Stratton 675 Series Carburetor: step 4, image 1 of 1
    • Note: There is a plastic washer that may come off when you take off the plastic backing. This is normal; just set it aside and save it for reassembly.

  5. How to clean and maintain your Briggs and Stratton 675 Series Carburetor: step 5, image 1 of 1
    • Use a socket wrench with a ½" hex bit to remove 11mm screw on the bottom of the tank.

  6. How to clean and maintain your Briggs and Stratton 675 Series Carburetor: step 6, image 1 of 2 How to clean and maintain your Briggs and Stratton 675 Series Carburetor: step 6, image 2 of 2
    • Once the bolt is removed from the bottom of the carburetor tank, gently pry open the tank with a metal prying spudger until it pops off. If you do not have a spudger, a flathead screwdriver will work.

    • Completely remove the tank so you can clean it or replace it.

  7. How to clean and maintain your Briggs and Stratton 675 Series Carburetor: step 7, image 1 of 1
    • Inspect the O-ring inside the carburetor tank. If it is dry and worn out, you may need to replace the O-ring before you reassemble your device.

Tim Wirtz

Member since: 01/30/15

1,058 Reputation

1 Guide authored

Team

Cal Poly, Team 6-31, Amido Winter 2015 Member of Cal Poly, Team 6-31, Amido Winter 2015

CPSU-AMIDO-W15S6G31

4 Members

15 Guides authored

View Statistics:

Past 24 Hours: 55

Past 7 Days: 466

Past 30 Days: 2,020

All Time: 130,178