
How to clean and maintain miele softtronic T8403c

What you need

  1. How to clean and maintain miele softtronic T8403c, cleaning the filters: step 1, image 1 of 2 How to clean and maintain miele softtronic T8403c, cleaning the filters: step 1, image 2 of 2
    • start with cleaning the filters inside the machine

    • unlock ( if possible , not all these machines inside filters are removable..) and clean out the filters using hot water and vinegar. there are tiny litlle holes in the filter , it is possible you will have to blow theme out with an compressor.

  2. How to clean and maintain miele softtronic T8403c: step 2, image 1 of 2 How to clean and maintain miele softtronic T8403c: step 2, image 2 of 2
    • after cleaning the two small filter and the door filter. we will start to clean the big filter at the bottom of the machine.

    • you need to use the orange plastic "spudger" from Miele itself. It is hidden at the watercollector.

  3. How to clean and maintain miele softtronic T8403c: step 3, image 1 of 3 How to clean and maintain miele softtronic T8403c: step 3, image 2 of 3 How to clean and maintain miele softtronic T8403c: step 3, image 3 of 3
    • remove the white plastic lid using the orange spudger.

    • when that is open use the second lid.

    • and eventualy the big steel "filter". see the next step.

  4. How to clean and maintain miele softtronic T8403c: step 4, image 1 of 3 How to clean and maintain miele softtronic T8403c: step 4, image 2 of 3 How to clean and maintain miele softtronic T8403c: step 4, image 3 of 3
    • and eventualy the "steel condensator.

    • to clean this out use the schowerhead and clean the condensator with hot water , let it dry for a day.

  5. How to clean and maintain miele softtronic T8403c: step 5, image 1 of 3 How to clean and maintain miele softtronic T8403c: step 5, image 2 of 3 How to clean and maintain miele softtronic T8403c: step 5, image 3 of 3
    • turn the machine and remove the big steel plate (there could be some adhessive ,.) use the torx screwdriver t20

    • when the machine is getting a little older the black rubber seal dacay over time... ( i am not sure this phrase is correct? ) . A new one costs 98 euro here in Belgium ...rediculous... , so be very carefull with older machines ( + 5 years..)

    • after cleaning the machine on the back ( 3 times over 5 years) the machine started leaking water , cause the rubber seal was comming loose.

    • Tip: you can replace the broken rubber seal with silicone ( waterproof silicone)

  6. How to clean and maintain miele softtronic T8403c: step 6, image 1 of 2 How to clean and maintain miele softtronic T8403c: step 6, image 2 of 2
    • clean out the back of the filterplace. use a wet and drycleaner to do this.

  7. How to clean and maintain miele softtronic T8403c: step 7, image 1 of 2 How to clean and maintain miele softtronic T8403c: step 7, image 2 of 2
    • at the left side there is a white plate with one T30 torx screw.

    • remove the plate an loose the white water tube.

  8. How to clean and maintain miele softtronic T8403c: step 8, image 1 of 2 How to clean and maintain miele softtronic T8403c: step 8, image 2 of 2
    • behind the plate you'll see the pump/ventilator.

    • clean it out with the wet and drycleaner.

  9. How to clean and maintain miele softtronic T8403c: step 9, image 1 of 3 How to clean and maintain miele softtronic T8403c: step 9, image 2 of 3 How to clean and maintain miele softtronic T8403c: step 9, image 3 of 3
    • remove the end of the waterhose( use the flathead screwdriver). and blow the hose out.

  10. How to clean and maintain miele softtronic T8403c: step 10, image 1 of 3 How to clean and maintain miele softtronic T8403c: step 10, image 2 of 3 How to clean and maintain miele softtronic T8403c: step 10, image 3 of 3
    • now we will clean out the bottom plate.

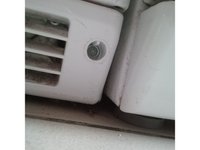
    • remove the plastic shell that is covering Torx screws.

    • remove it using a Stanley knife.

    • remove the screws ( at both sides ) and remove the plastic frame.

    • You'll see there will be a lot of dirt in the frame. blow (or vacuum clean) it. and put it back. also clean out the holes.

    • the machine is now clean and good to use again. I advise to do these hole guide one a year. Clean the "normal" filters everytime you use the machine. (just take out the fluff)

Conclusion

To reassemble your device, follow these instructions in reverse order.

3 other people completed this guide.

Kevin D

Member since: 05/02/14

7,276 Reputation

21 Guides authored

One Comment

Kevin D, thanks for the photos. I have a T8013C, which looks almost the same as this model. My dryer is in a small closet, so I can’t take it out to see the back…

In your photo 6, there is a hole next to the 4 bars. Accessing from the front of my dryer through the condenser housing, I can feel there is a lot of water in this hole. Is that normal? What is the purpose of this hole, shouldn’t the water be drained away? What happens when the water overflows the hole? Thanks.

Clayton New York - Reply

Add Comment

View Statistics:

Past 24 Hours: 4

Past 7 Days: 37

Past 30 Days: 214

All Time: 17,366