
How to Use a MarkerBot Replicator 3D printer

Jason Swearingen and 5 other contributors
Last updated on Jul 13, 2026
Views: 1.6K
View statistics:
- Past 24 Hours:
- 2
- Past 7 Days:
- 18
- Past 30 Days:
- 100
- All Time:
- 1,565
Comments: 0
No one has left comments on this guide. Will you be first?
Go to guide commentsCompleted: 3 4
3 people have marked this guide "completed." Will you be next?
4 people have marked this guide "completed." Including you — great job!
Favorites: 2 3
2 people have favorited (and subscribed to) this guide. Will you be next?
3 people have favorited (and subscribed to) this guide — including you!
Community-Contributed Guide
An awesome member of our community made this guide. It was not created by iFixit staff.
Introduction
Go to step 1 ↓You've created an amazing object on the Maker Bot software, and now it's time to print your objects. Follow these steps before you load your file into the 3D printer.
-
-
-
Make sure the filament is full
-
Pick the side you want to extrude from (You will need to input this information when you prepare your file)
-
Use the spray cleaner and paper towels to clean any leftover oil from the platform (Oil buildup may cause the plastic to stick)
 Ask FixBot
-
-
-
Press the menu button and scroll through the options
-
Click the Utilities option under the option box
-
Select Level Build Plate option
-
-
-
The plate on the maker bot must be made perfectly level
-
Turn the front leveling knob to change the angle from front to back
-
Turn the right knob to change the angle from left to right
-
-
-
Press the "Begin Set-up" button on the control panel to start the process of making sure the plate is level
-
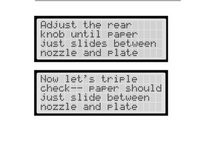
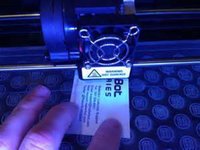
Slip a business card between the extruder and the plate, as extruder pauses at the four waypoints on the plate
-
-
-
On the control panel select Start Extrusion
-
Once you see filament start to come out of the tip, select Stop Extrusion on the control panel
-
-
-
Use the dial and select Test File 1 for a dragon and Test File 2 for a street cone
-
Push the dial and you will be taken to a file info page
-
Select Print
-
When the print is done, you should have a 1/2" plastic dragon or pyramid
-
Let the object cool before removing it
-
-
-
-
Notice the details of the object, if something does not look right, you should repeat the setup before you print off your design
-
If the test object looks perfect then it is time to print off your design
-
-
-
Insert a thumb drive that has the .makerbot file you want printed into the USB port on the right of the Control Panel
-
Select Upload File on the LCD Panel
-
The LCD panel will display all compatible files on the thumb drive
-
Select the file that you want to upload to the MakerBot
-
Repeat step 6 selecting the .makerbot file you want to print
-
-
-
When the object has cooled remove it from the 3D printer and admire it deeply
-
-




To reassemble your device, follow these instructions in reverse order.
Cancel: I did not complete this guide.
3 other people completed this guide.

