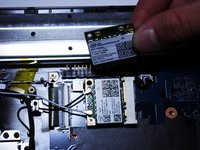
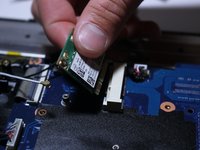
How to Replace the Wi-Fi Card for a Samsung NP300V5A-A08US Laptop

What you need

  1. How to Replace the Wi-Fi Card for a Samsung NP300V5A-A08US Laptop, Wi-Fi Card: step 1, image 1 of 1
    • Make sure the laptop is powered down and completely off before continuing.

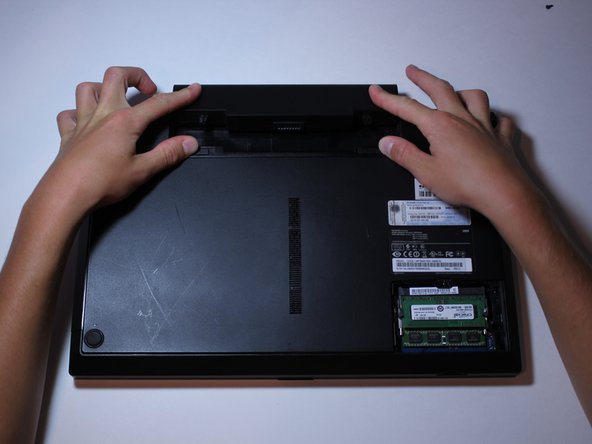
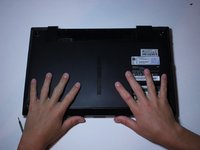
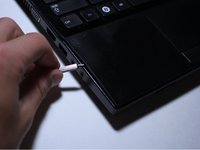
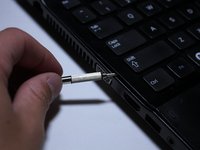
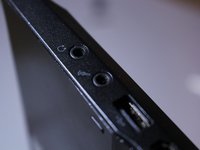
    • Unplug all power cords and USB devices that are connected to the computer.

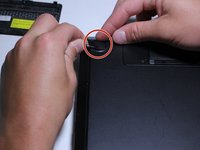
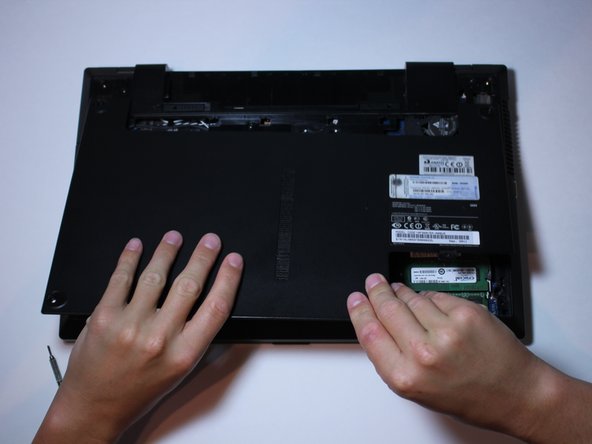
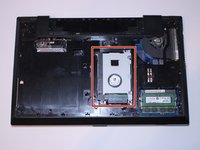
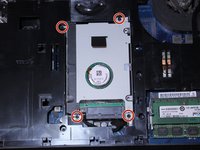
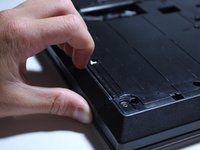
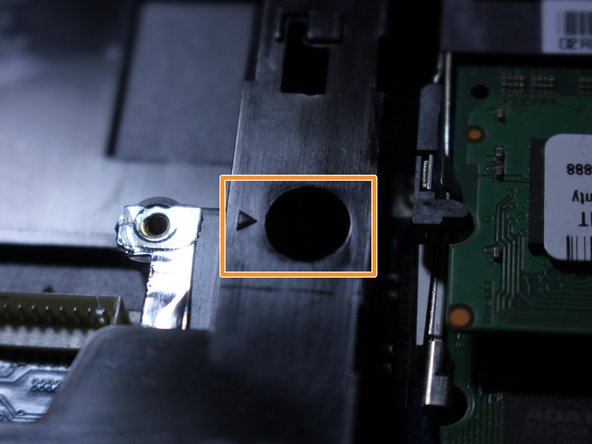
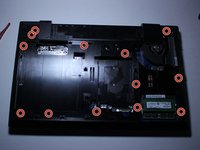
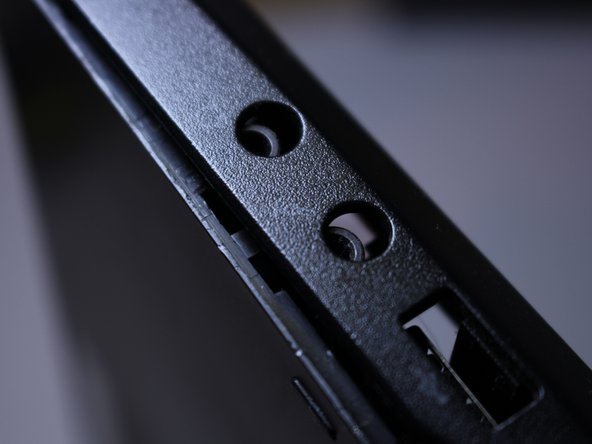
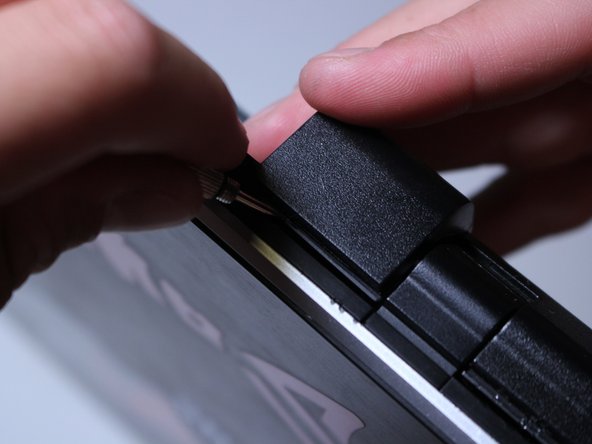
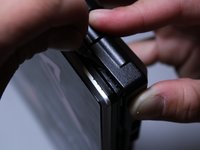
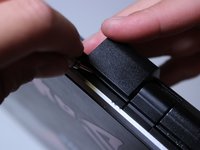
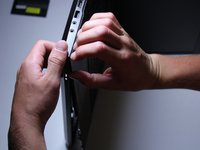
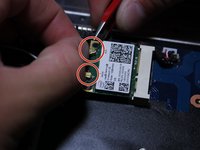
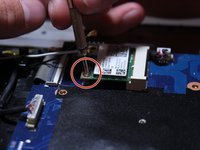
    • Using a Phillips #00 screwdriver, remove the 4.5mm screw on the panel located at the bottom right of the computer.

    • Make sure to place the parts you have removed in an organized manner so that you know what goes where when you are reassembling your computer.

  2. How to Replace the Wi-Fi Card for a Samsung NP300V5A-A08US Laptop: step 2, image 1 of 3 How to Replace the Wi-Fi Card for a Samsung NP300V5A-A08US Laptop: step 2, image 2 of 3 How to Replace the Wi-Fi Card for a Samsung NP300V5A-A08US Laptop: step 2, image 3 of 3
    • Pry apart the plastic clips near the screw hole using a plastic opening tool.

    • Use your finger and the opening tool to pry up the plastic cover.

    • It is normal to hear noises similar to that of plastic snapping when prying up the plastic cover.

  3. How to Replace the Wi-Fi Card for a Samsung NP300V5A-A08US Laptop: step 3, image 1 of 2 How to Replace the Wi-Fi Card for a Samsung NP300V5A-A08US Laptop: step 3, image 2 of 2
    • Pry off the rubber pads on the remaining three corners of the computer using the tip of the opening tool.

    • Adhesive glue is used to hold the rubber pads on. It may take more effort to take these off.

  4. How to Replace the Wi-Fi Card for a Samsung NP300V5A-A08US Laptop: step 4, image 1 of 2 How to Replace the Wi-Fi Card for a Samsung NP300V5A-A08US Laptop: step 4, image 2 of 2
    • Using a Phillips #00 screwdriver, remove the three 6.5mm screws.

  5. How to Replace the Wi-Fi Card for a Samsung NP300V5A-A08US Laptop: step 5, image 1 of 3 How to Replace the Wi-Fi Card for a Samsung NP300V5A-A08US Laptop: step 5, image 2 of 3 How to Replace the Wi-Fi Card for a Samsung NP300V5A-A08US Laptop: step 5, image 3 of 3
    • Remove the battery by sliding the small tabs in the directions of the arrows printed on the computer.

    • Push the battery in a forward motion to slide it out. Make sure to keep the tabs held in the direction of the arrows.

  6. How to Replace the Wi-Fi Card for a Samsung NP300V5A-A08US Laptop: step 6, image 1 of 3 How to Replace the Wi-Fi Card for a Samsung NP300V5A-A08US Laptop: step 6, image 2 of 3 How to Replace the Wi-Fi Card for a Samsung NP300V5A-A08US Laptop: step 6, image 3 of 3
    • Put your hands on the back panel and use pressure to slide the panel down a few millimeters (as shown in the photo).

    • Slide the back panel down and then lift it off.

  7. How to Replace the Wi-Fi Card for a Samsung NP300V5A-A08US Laptop: step 7, image 1 of 3 How to Replace the Wi-Fi Card for a Samsung NP300V5A-A08US Laptop: step 7, image 2 of 3 How to Replace the Wi-Fi Card for a Samsung NP300V5A-A08US Laptop: step 7, image 3 of 3
    • Shown in the red square is the hard drive. It must be removed in order to access the rest of the computer.

    • Using a Philips #00 screwdriver, remove the four screws holding the hard drive in place.

  8. How to Replace the Wi-Fi Card for a Samsung NP300V5A-A08US Laptop: step 8, image 1 of 3 How to Replace the Wi-Fi Card for a Samsung NP300V5A-A08US Laptop: step 8, image 2 of 3 How to Replace the Wi-Fi Card for a Samsung NP300V5A-A08US Laptop: step 8, image 3 of 3
    • While holding onto the black plastic tab, pull up and to the right to remove the hard drive.

    • Be careful not to damage the cable attached to the hard drive.

  9. How to Replace the Wi-Fi Card for a Samsung NP300V5A-A08US Laptop: step 9, image 1 of 3 How to Replace the Wi-Fi Card for a Samsung NP300V5A-A08US Laptop: step 9, image 2 of 3 How to Replace the Wi-Fi Card for a Samsung NP300V5A-A08US Laptop: step 9, image 3 of 3
    • Take note of how the wire harness is routed around the motherboard and the plastic casing.

    • Gently pull on the wire harness to get it out of the crevasse.

    • Carefully wiggle the white plastic connector on the computer back and forth until you are able to disconnect the wire harness.

    • Be careful to not pull on the wires themselves, as they may become disconnected from the white plastic connector.

  10. How to Replace the Wi-Fi Card for a Samsung NP300V5A-A08US Laptop: step 10, image 1 of 1
    • Using a Philips #00 screwdriver, remove the 6.5mm screw located next to the "ODD" print as indicated in the photo.

  11. How to Replace the Wi-Fi Card for a Samsung NP300V5A-A08US Laptop: step 11, image 1 of 3 How to Replace the Wi-Fi Card for a Samsung NP300V5A-A08US Laptop: step 11, image 2 of 3 How to Replace the Wi-Fi Card for a Samsung NP300V5A-A08US Laptop: step 11, image 3 of 3
    • Stick your fingernails between where the optical disk drive slides out and the plastic frame of the computer.

    • Using your hand (you might need to use both), pull outwards to slowly remove the optical disk drive from the computer.

  12. How to Replace the Wi-Fi Card for a Samsung NP300V5A-A08US Laptop: step 12, image 1 of 3 How to Replace the Wi-Fi Card for a Samsung NP300V5A-A08US Laptop: step 12, image 2 of 3 How to Replace the Wi-Fi Card for a Samsung NP300V5A-A08US Laptop: step 12, image 3 of 3
    • Using a Phillips #00, remove the thirteen 6.5mm screws.

    • Each screw location is designated by an arrow icon as shown in the second picture.

    • Use your tweezers to remove loosened screws.

  13. How to Replace the Wi-Fi Card for a Samsung NP300V5A-A08US Laptop: step 13, image 1 of 3 How to Replace the Wi-Fi Card for a Samsung NP300V5A-A08US Laptop: step 13, image 2 of 3 How to Replace the Wi-Fi Card for a Samsung NP300V5A-A08US Laptop: step 13, image 3 of 3
    • The next several steps will show you how to remove the outer shell of the computer.

    • Locate the discrete line between the two pieces of plastic on the side of the keyboard.

    • Starting near the headphone jack, use a plastic opening tool to pry apart the two pieces of plastic.

    • A popping or snapping sound in the next couple steps is normal.

  14. How to Replace the Wi-Fi Card for a Samsung NP300V5A-A08US Laptop: step 14, image 1 of 3 How to Replace the Wi-Fi Card for a Samsung NP300V5A-A08US Laptop: step 14, image 2 of 3 How to Replace the Wi-Fi Card for a Samsung NP300V5A-A08US Laptop: step 14, image 3 of 3
    • Slowly start making your way around the edge of the keyboard, prying the two pieces apart.

  15. How to Replace the Wi-Fi Card for a Samsung NP300V5A-A08US Laptop: step 15, image 1 of 3 How to Replace the Wi-Fi Card for a Samsung NP300V5A-A08US Laptop: step 15, image 2 of 3 How to Replace the Wi-Fi Card for a Samsung NP300V5A-A08US Laptop: step 15, image 3 of 3
    • Continue prying apart the two pieces of plastic around the back corners of the computer.

  16. How to Replace the Wi-Fi Card for a Samsung NP300V5A-A08US Laptop: step 16, image 1 of 2 How to Replace the Wi-Fi Card for a Samsung NP300V5A-A08US Laptop: step 16, image 2 of 2
    • You also have to get the skinny area where the battery port is.

    • This is easiest to get to by closing the computer shut.

    • When you start to get most of the two plastic pieces disconnected, you can just use your hands to pop-it apart.

  17. How to Replace the Wi-Fi Card for a Samsung NP300V5A-A08US Laptop: step 17, image 1 of 3 How to Replace the Wi-Fi Card for a Samsung NP300V5A-A08US Laptop: step 17, image 2 of 3 How to Replace the Wi-Fi Card for a Samsung NP300V5A-A08US Laptop: step 17, image 3 of 3
    • Open the computer back up and work your way around to the other side of the computer where the Optical Disk Drive was.

  18. How to Replace the Wi-Fi Card for a Samsung NP300V5A-A08US Laptop: step 18, image 1 of 1
    • Continue prying apart the two pieces of plastic at the front of the computer.

  19. How to Replace the Wi-Fi Card for a Samsung NP300V5A-A08US Laptop: step 19, image 1 of 3 How to Replace the Wi-Fi Card for a Samsung NP300V5A-A08US Laptop: step 19, image 2 of 3 How to Replace the Wi-Fi Card for a Samsung NP300V5A-A08US Laptop: step 19, image 3 of 3
    • Gently pry around the edges with your fingers or a plastic separator to separate the middle layer from the base.

  20. How to Replace the Wi-Fi Card for a Samsung NP300V5A-A08US Laptop: step 20, image 1 of 2 How to Replace the Wi-Fi Card for a Samsung NP300V5A-A08US Laptop: step 20, image 2 of 2
    • Locate the Wi-Fi card.

    • Double check that the WiFi card you bought is the same as the one in your computer by comparing the model numbers on the old and new WiFi cards.

  21. How to Replace the Wi-Fi Card for a Samsung NP300V5A-A08US Laptop: step 21, image 1 of 3 How to Replace the Wi-Fi Card for a Samsung NP300V5A-A08US Laptop: step 21, image 2 of 3 How to Replace the Wi-Fi Card for a Samsung NP300V5A-A08US Laptop: step 21, image 3 of 3
    • Remove the snap-on cables from the Wi-Fi card using the tips of your fingernails and the assistance of your tweezers.

    • Take note which snap-on cable goes where on the Wi-Fi card.

  22. How to Replace the Wi-Fi Card for a Samsung NP300V5A-A08US Laptop: step 22, image 1 of 3 How to Replace the Wi-Fi Card for a Samsung NP300V5A-A08US Laptop: step 22, image 2 of 3 How to Replace the Wi-Fi Card for a Samsung NP300V5A-A08US Laptop: step 22, image 3 of 3
    • Using a Phillips #00 screwdriver, remove the single 4.5mm screw that secures the Wi-Fi card.

    • The Wi-Fi card will spring up when the the screw is removed.

  23. How to Replace the Wi-Fi Card for a Samsung NP300V5A-A08US Laptop: step 23, image 1 of 3 How to Replace the Wi-Fi Card for a Samsung NP300V5A-A08US Laptop: step 23, image 2 of 3 How to Replace the Wi-Fi Card for a Samsung NP300V5A-A08US Laptop: step 23, image 3 of 3
    • Free the Wi-Fi card from its mount by gently pulling the Wi-Fi card upward and outward.

  24. How to Replace the Wi-Fi Card for a Samsung NP300V5A-A08US Laptop: step 24, image 1 of 1
    • Insert your new Wi-Fi card into the mount.

    • Secure the new Wi-Fi card by replacing the 4.5mm screw using a Phillips #00 screwdriver.

    • Reconnect the two snap-on cables to the Wi-Fi card.

    • Make sure to reconnect the cables exactly as they were originally positioned.

Conclusion

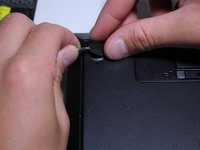
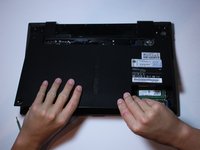
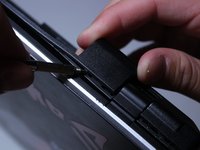
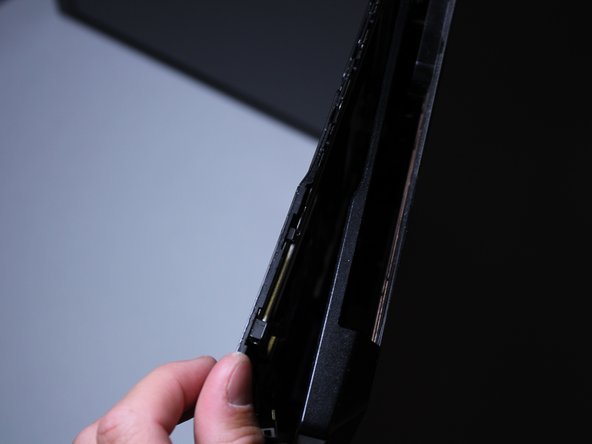
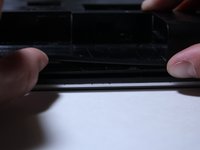
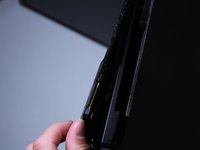
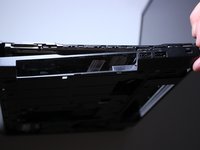
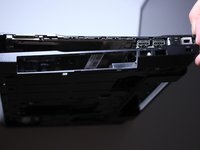
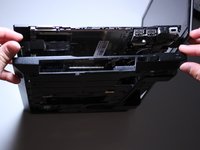
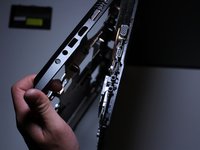
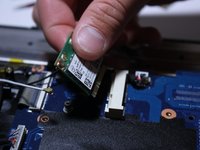
To reassemble your device, follow these instructions in reverse order. Getting the plastic shell to snap back over the back of the motherboard may take some time to get it on correctly. Start at one side of the laptop and work your way to the other.

10 other people completed this guide.

Ryan Miller

Member since: 09/29/15

391 Reputation

1 Guide authored

Team

Cal Poly, Team 15-4, Green Fall 2015 Member of Cal Poly, Team 15-4, Green Fall 2015

CPSU-GREEN-F15S15G4

4 Members

4 Guides authored

One Comment

This guide is quite good, and it will also be helpful to someone replacing other parts on a Samsung NP300. The WiFi card is buried deep, and many other components are removed along the way. So if you only wanted to swap hard drives or optical drives, this may be the best guide available. Thanks for all the clear photos and descriptions, Ryan Miller!

tai viinikka - Reply

Add Comment

View Statistics:

Past 24 Hours: 0

Past 7 Days: 12

Past 30 Days: 31

All Time: 4,298