Introduction
If your Sanyo MCH 900F is having display issues, or is having trouble reading discs, a faulty ribbon cable might be the cause. This guide will walk you through the steps to safely replace the CD drive ribbon cable, restoring your device's functionality.
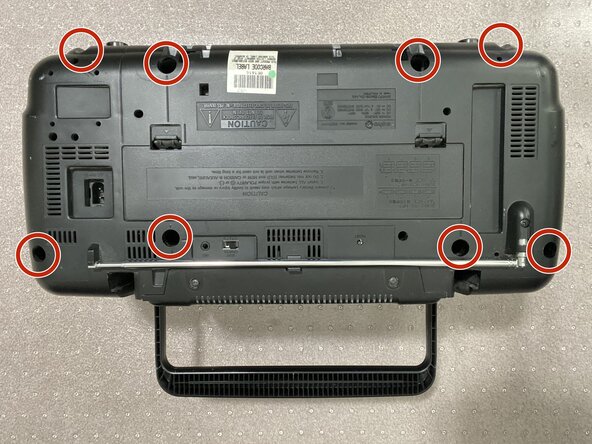
There are no specialized skills or knowledge needed to perform this repair. However, this specific model of CD Player needs a long screwdriver or long screwdriver bits in order to remove the backing, a regular screwdriver will not work for this.
Before you begin the repair, make sure to turn off the device and unplug it from the outlet. Finally, make sure to work on a solid surface and not on carpet to avoid static build-up. This can further damage the device if you are not careful.
What you need


To reassemble your device, follow these instructions in reverse order.

Team

York University, Team 3-4, Woodhouse Winter 2025 Member of York University, Team 3-4, Woodhouse Winter 2025
YORK-WOODHOUSE-W25S3G4
2 Members
1 Guide authored