How to Replace a Bathroom Countertop

What you need

  1. How to Replace a Bathroom Countertop, Countertop: step 1, image 1 of 2 How to Replace a Bathroom Countertop, Countertop: step 1, image 2 of 2
    • Prepare all the tools necessary for this fix.

    • Remove the old bathroom countertop. Be aware and careful not to damage the cabinet's structure.

  2. How to Replace a Bathroom Countertop: step 2, image 1 of 2 How to Replace a Bathroom Countertop: step 2, image 2 of 2
    • Ensure your replacement bathroom countertop is measured appropriately.

    • The dimensions depend on one's personal preference

  3. How to Replace a Bathroom Countertop: step 3, image 1 of 1
    • Analyze the cabinet's structure and clean it to the best of one's abilities.

    • Cleaning the structure will ensure that the wood is fresh, and there will be no issue installing the new countertop.

  4. How to Replace a Bathroom Countertop: step 4, image 1 of 1
    • Set the new bathroom countertop on top of the cabinet structure. This will allow one to visualize the finished product.

    • Once ready, prepare your L-shaped brackets

    • Fix the position of the countertop to one's desired look.

  5. How to Replace a Bathroom Countertop: step 5, image 1 of 2 How to Replace a Bathroom Countertop: step 5, image 2 of 2
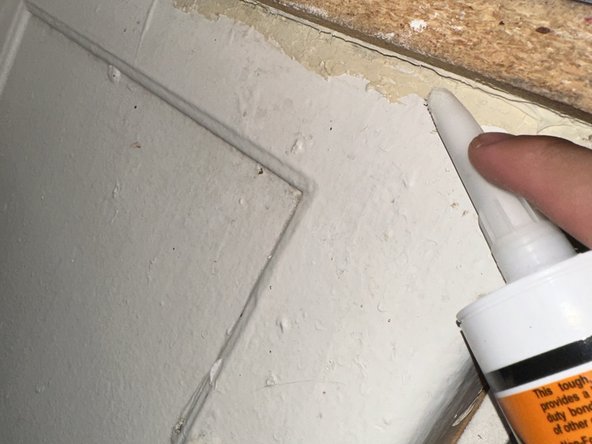
    • Proceed with putting a coat of gorilla glue along the edges of the cabinet and countertop.

    • Allow for the first coating to dry. Wait approximately 5-10 minutes, or until it is deemed ready.

    • Proceed to add more glue to ensure it is sturdy.

    • Make sure to do the same on the inside of the cabinet.

  6. How to Replace a Bathroom Countertop: step 6, image 1 of 3 How to Replace a Bathroom Countertop: step 6, image 2 of 3 How to Replace a Bathroom Countertop: step 6, image 3 of 3
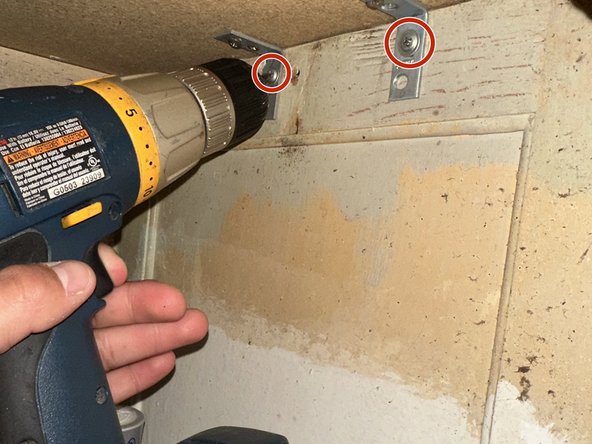
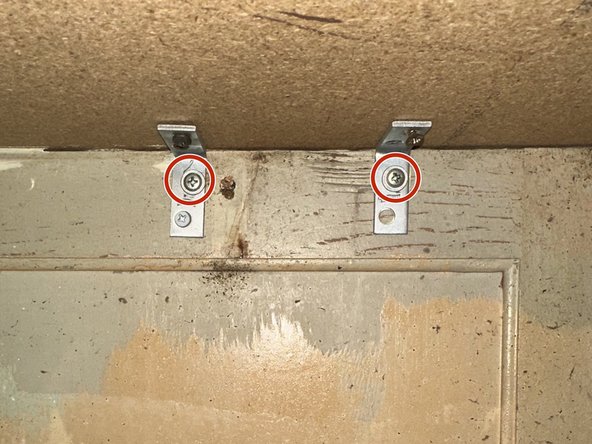
    • From the inside of the cabinet, add the L-shaped brackets. This will require two screws for each bracket.

    • One can add as many brackets as they want until they feel the desired secureness is fulfilled.

    • Ensure there are brackets and screws on both sides.

    • Utilizing a power drill, drill the screws into the side of the cabinet and on the bottom of the countertop.

    • Repeat this process several times, depending how many brackets there are.

  7. How to Replace a Bathroom Countertop: step 7, image 1 of 1
    • If the countertop does not feel sturdy, ensure that the screws are drilled entirely and the brackets are not loose.

    • The bathroom countertop has been successfully replaced.

    • Enjoy your new countertop!

Conclusion

Utilizing these materials will ensure the bathroom countertop replacement operates smoothly and appropriately. Thank you for volunteering your time to read this fast fix.

Luis Sanchez

Member since: 08/24/23

145 Reputation

1 Guide authored

Team

0 Comments

Add Comment

View Statistics:

Past 24 Hours: 3

Past 7 Days: 8

Past 30 Days: 25

All Time: 92