
How to Repair LED Strip Lights

Jacob and 5 other contributors
Last updated on Oct 27, 2025
Views: 167K
View statistics:
- Past 24 Hours:
- 47
- Past 7 Days:
- 276
- Past 30 Days:
- 1,037
- All Time:
- 166,790
Comments: 14
6 comments on steps, 8 guide comments.
Go to guide commentsCompleted: 19 20
19 people have marked this guide "completed." Will you be next?
20 people have marked this guide "completed." Including you — great job!
Favorites: 4 5
4 people have favorited (and subscribed to) this guide. Will you be next?
5 people have favorited (and subscribed to) this guide — including you!
Needs More Images
A few more images would make this guide's procedures crystal clear.
Introduction
Go to step 1 ↓If your LED light strips are malfunctioning, then this guide may be what you need. Light strips malfunction when there is a faulty connection or wiring between two sections of the strips. These faulty connections can hinder the power flow and deactivate other working strips that are connected to the faulty strip.
The best way to fix this problem is to replace the faulty section with a new working strip. This guide will walk you through the steps of replacing your faulty light strips. You will learn how to identify which strip is in need of replacing, as well as how to remove that strip from the working strip. You will also see how to replace and reconnect the two working strips so that they are secured and working properly.
Reconnecting the strips will be completed by soldering the two working strips together by their corresponding connections.
If soldering is not a skill you are familiar with, you should first check out another guide on the basics of soldering. It is called “How to Solder and Desolder Connections.”
Before attempting this guide, remember to turn off the power to the strips that will be handled.
What you need
Parts
Tools


-
-
-
Find the spot where the lights stop working and where there are four connections labeled in descending order, "12V, R, G, B" with a scissor "cut here" marking and a copper colored backing.
 Ask FixBot
-
-
-
With a scissor, cut along the "cut here" line, separating the faulty strip from the working strip.
-
-
Tool used on this step:FixHub Smart Soldering Iron$79.95
-
Align the new strip next to the working strip and keep them steady. Look at the four connections like a mirror image. R to R, G to G, etc.
-
Use a soldering iron to solder all four connections.
-
-
-
-
Once the four connections are soldered securely, plug in the strip and turn the lights to all three colors to ensure that the connections are steady. Now you may place the lights where so desired.
-
-


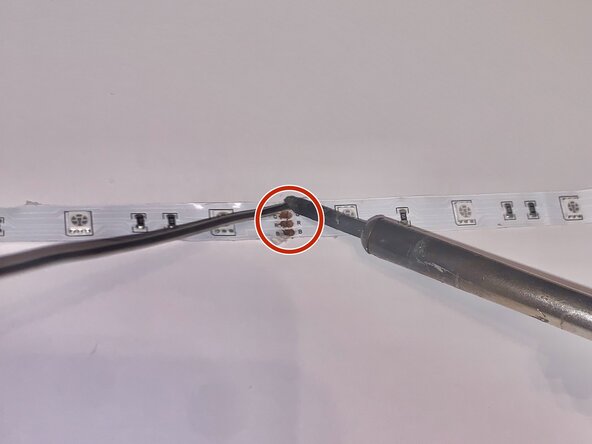


A solder and soldering iron are fairly common and easy to acquire at a hardware store. Extra length of lights may be left over from initial use, use these first before buying more in order to lower costs; be sure you only cut the lights for repair where these 4 pads are they are likely marked by a dotted line across them, this is also where you'll solder them together. In order to put the lights back where they originally were, some form of an adhesive agent may need to be utilized. On the rear side of connection spot you can glue a small piece of cardboard to hold them together.
Cancel: I did not complete this guide.
19 other people completed this guide.

Team

University of Memphis, Team S52-G14, Kim Spring 2021 Member of University of Memphis, Team S52-G14, Kim Spring 2021
UM-KIM-S21S52G14
1 Member
12 Guides authored
8 Guide Comments
I dont know why this tutorial is rated as difficult, it really isnt.
Thet step 4 was just weird
Huh, I needed this exact guide. That's nuts.
El autor dice: Si la soldadura no es una habilidad con la que estés familiarizado, primero debes consultar otra guía sobre los conceptos básicos de la soldadura. Se llama [guía|750|“Cómo soldar y desoldar conexiones”.] el autor no leyó esa guia la soldadura del paso 4 parecen cagadas de paloma
