
Dell Inspiron 15 5584 Battery Replacement

Sam Vorn and 5 other contributors
Last updated on May 27, 2025
Views: 4.9K
View statistics:
- Past 24 Hours:
- 7
- Past 7 Days:
- 22
- Past 30 Days:
- 103
- All Time:
- 4,949
Comments: 2
2 guide comments.
Go to guide commentsCompleted: 1 2
1 person has marked this guide "completed." Will you be next?
2 people have marked this guide "completed." Including you — great job!
Favorites: 0 1
No one has favorited (and subscribed to) this guide. Will you be the first?
1 person has favorited (and subscribed to) this guide — and that's you!
Featured Student Guide
This guide has been the hard work of our awesome students and is found to be exceptionally cool by the iFixit staff.
Introduction
Go to step 1 ↓Use this guide for assistance in replacing the battery in your Dell Inspiron 15 5584.
The battery acts as the power supply for all components of the laptop. Without a battery, the laptop will not function. An old or damaged battery may not hold as much charge as it previously had, and can also possibly not provide enough charge to other components of the device.
Before tampering with your device, make sure to drain the battery and turn off your laptop. Working with live electricity is a fire hazard and can cause injury/damage to electrical components. Furthermore, ensure the laptop is not plugged into any external power sources prior to starting this removal.
What you need
Fix Kit
This kit contains all the parts and tools needed to complete this guide.

Parts

Tools


-
-
-
Turn over the laptop so that the bottom is facing upwards, and the Inspiron logo is upside-down.
 Ask FixBot
-
-
-
Remove the seven 7 mm screws from the bottom using a Phillips #0 screwdriver.
-
Loosen the two captive back corner screws using a Phillips #0 screwdriver.
-
-
-
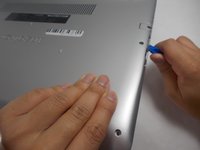
Slide an iFixit opening tool underneath the right side USB port and the keyboard.
-
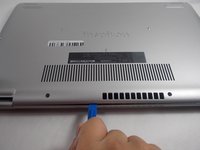
Gently trace the iFixit opening tool along the entire outer rim of the laptop, carefully applying an upwards pressure.
-
-
-
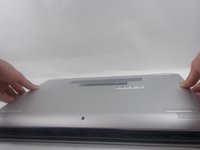
Gently pry off the bottom cover from the laptop.
-
Use the iFixit opening tool to loosen any spots you may have missed from Step 3.
-
-
-
-
-
-
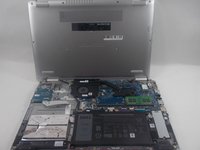
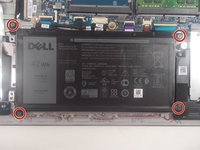
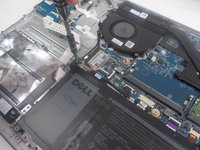
Remove the four 3.5 mm screws holding the battery down with a JIS #0 screwdriver.
-
-
-
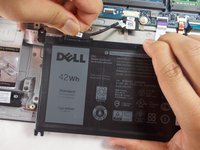
Detach the motherboard connector tab from the top left of the battery.
-
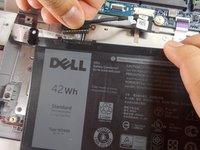
Remove the battery from the device.
-
-








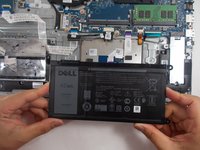
To reassemble your device, follow these instructions in reverse order.
Cancel: I did not complete this guide.
One other person completed this guide.

Team

UMass Dartmouth, Team 1-1, Mellen Spring 2022 Member of UMass Dartmouth, Team 1-1, Mellen Spring 2022
UMASSD-MELLEN-S22S1G1
3 Members
120 Guides authored
2 Guide Comments
I used this guide for a Dell Inspiron 5579 and it was close enough. The 5579 is larger. There were 10 screws instead of 9, and the back corner screws were removable. For the battery there were only the 2 left screws to remove as the 2 right battery mounts were also case-mounting screws. Was easy peazy. Now just need to charge it! Thanks!
Thanks for this guide! I discovered right away that I bought the battery for the 5548 accidentally and had to ship it back. I got the battery for the 5584, and by following this guide, I got it up and running within minutes.
One concern: the new battery has a closer port for the motherboard connector tab, which means the cable for that tab has to bend a bit. Hopefully I haven't introduced a problem with heat or anything.
