
How to Remove Stock Stereo Head Unit in a Toyota Tacoma

What you need

  1. How to Remove Stock Stereo Head Unit in a Toyota Tacoma, Bezel Removal: step 1, image 1 of 2 How to Remove Stock Stereo Head Unit in a Toyota Tacoma, Bezel Removal: step 1, image 2 of 2
    • Ensure that the vehicle is off and the battery is disconnected.

    • Remove the plastic trim pieces by pulling them straight back.

    • Pulling from behind the vents on each side one at a time is the smoothest way to pull the panel off.

  2. How to Remove Stock Stereo Head Unit in a Toyota Tacoma, Unbolting the Unit: step 2, image 1 of 2 How to Remove Stock Stereo Head Unit in a Toyota Tacoma, Unbolting the Unit: step 2, image 2 of 2
    • Unscrew the four bolts on the sides of the stereo using a 10 mm socket with a ratchet or an impact driver.

  3. How to Remove Stock Stereo Head Unit in a Toyota Tacoma, Removing the Stereo from the Dash: step 3, image 1 of 1
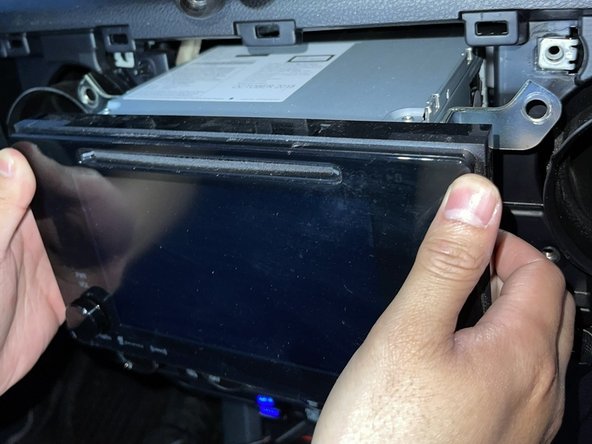
    • Carefully remove the stereo out of the dash to expose the wires in the back of the unit.

  4. How to Remove Stock Stereo Head Unit in a Toyota Tacoma, Disconnecting the Wiring: step 4, image 1 of 3 How to Remove Stock Stereo Head Unit in a Toyota Tacoma, Disconnecting the Wiring: step 4, image 2 of 3 How to Remove Stock Stereo Head Unit in a Toyota Tacoma, Disconnecting the Wiring: step 4, image 3 of 3
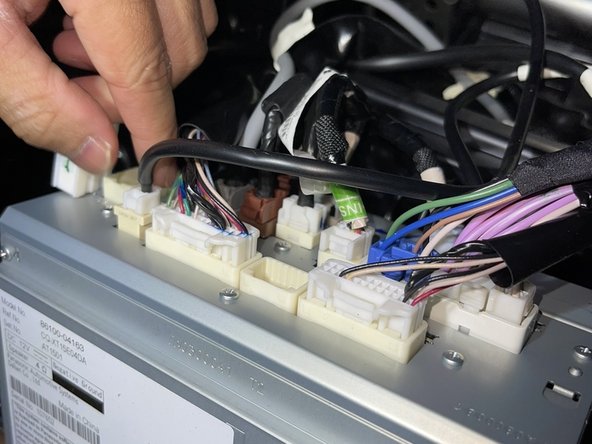
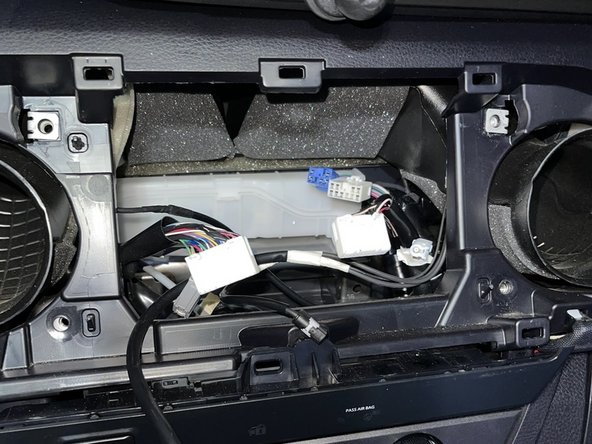
    • Remove all 9 wires from the back of the stereo by pushing down the safety clips and set the unit aside.

    • Have someone hold the stereo while disconnecting the wires.

Conclusion

To reassemble your device, follow these instructions in reverse order.

One other person completed this guide.

Sean

Member since: 04/23/21

139 Reputation

1 Guide authored

0 Comments

Add Comment

View Statistics:

Past 24 Hours: 3

Past 7 Days: 11

Past 30 Days: 53

All Time: 1,260