Introduction
This guide will show you how to patch a structured garment, such as a corset. Do not use polyester thread for repairs. Polyester dry-rots over time, and it rots faster in an undergarment like a corset worn against the skin that is meant to absorb sweat. Dry-rotted thread will snap and break, ruining your repair efforts.
Silk thread is best because it is very strong and very smooth, but cotton is also good for sewing repairs because it is sturdy and easy to find. Only use wool thread on a woolen garment.
Fabric type and thread color will depend on the garment being repaired and how you want the patch to look. If you want an invisible patch, color matching and fabric matching is best. If you want it to stand out and look artsy, other colors and fabrics are fine.
What you need
-
-
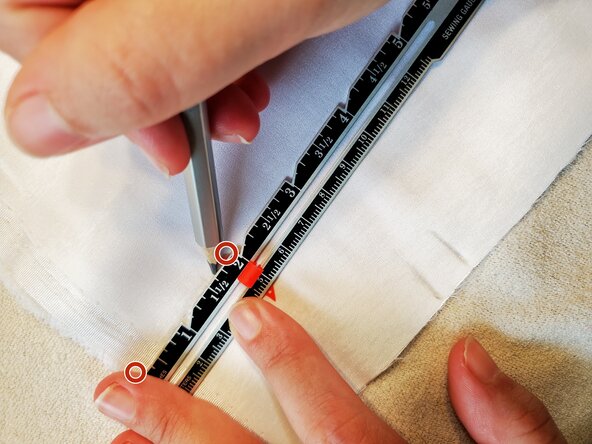
Measure the area to be patched using a ruler with a sliding bead or sewing measurement tape.
-
Round up the measurements to ensure the patch is slightly larger than the area that needs to be patched.
-
-
-
-
Wet or wax the end of your thread to make it easier to pull it through the eye of the needle. Do this even if your thread isn't frayed.
-
Draw out a long length of thread (I usually do between a foot and a yard depending on how much I need). Wax the length of the thread if using wax.
-
Take the two ends of the thread (with the needle in the middle) and knot the ends together. Your needle should be trapped in a tied loop of thread. This prevents the thread from getting lost while sewing.
-
-
-
Pick one corner of the area to be repaired. Place the patch cloth on the area (pin it if necessary) and bring the needle up through the garment fabric and through the bottom of the patch. Pull the thread all the way through until the knot at the end of the line catches and holds fast. Continue with the next stitch.
-
Rethread the needle if you run out of thread/the thread breaks. Tie a new knot at the end. Start resewing from the bottom just as before, slightly behind your most recent stitch to create overlap. Then continue sewing.
-
Fold over raw edges to sew them under the patch before beginning. Use a whip stitch, an overcast stitch, or a catch stitch to keep the patch secure and ensure lasting stitches.
-
-
-
When patching on a garment's edge, you will have two sides to sew up. Complete the first side.
-
Fold the patch over the edge until it covers the back of the torn area. If the patch fabric is too long/large on this side, trim it with the sewing scissors.
-
Fold the trimmed edges underneath just like the other side and continue sewing. Sew around corners using the same line and a crosshatch stitch at corners.
-
-
-
To complete a line of stitches, create a loose stitch. Loop the needle several times around the inside of the looped stitch and then pull the thread all the way through. Pull this tight to make a knot. Trim all loose threads with the sewing scissors after you are done to remove visible loose threads.
-
Finish trimming and repairs. Smooth over the edges and examine for any other flaws. Now the patching is complete!
-


Once the repairs are complete, try on your structured garment and wear it doing the sorts of movements you would normally do in the garment. If any threads snap, you will need to resew the broken section more securely. If not, enjoy the extended life of your repaired garment!
Team

University of North Alabama, Team 1-7, Winner Fall 2025 Member of University of North Alabama, Team 1-7, Winner Fall 2025
UNA-WINNER-F25S1G7
2 Members
1 Guide authored