
How to Mend a Snapped Elastic

What you need

  1. How to Mend a Snapped Elastic, Snapped Elastic: step 1, image 1 of 1
    • Secure one piece of the elastic.

    • A piece of tape or a heavy object, like a book, are both great options.

  2. How to Mend a Snapped Elastic: step 2, image 1 of 1
    • Thread the needle with your desired thread.

    • Tie the thread off at both ends.

  3. How to Mend a Snapped Elastic: step 3, image 1 of 2 How to Mend a Snapped Elastic: step 3, image 2 of 2
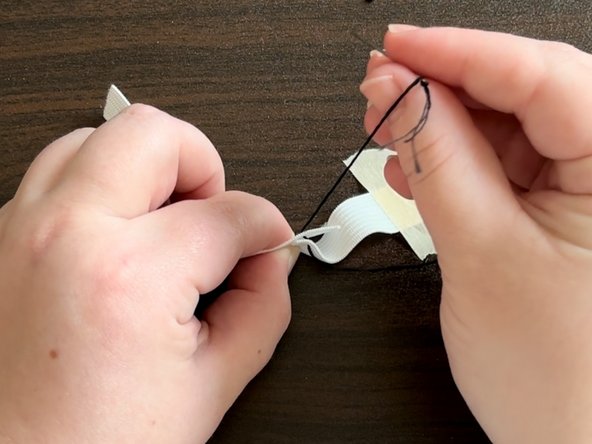
    • Poke the needle through the back side of your elastic.

    • Thread all of the thread through.

    • Be cautious of where the needle is at all times!

  4. How to Mend a Snapped Elastic: step 4, image 1 of 2 How to Mend a Snapped Elastic: step 4, image 2 of 2
    • Continue to thread the needle through, securing the elastic together.

    • Keep track of which side you want to be the back and which side will be the front.

  5. How to Mend a Snapped Elastic: step 5, image 1 of 2 How to Mend a Snapped Elastic: step 5, image 2 of 2
    • Experiment with different designs to secure the pieces together.

    • Use same-colored thread and simple lines to achieve a concealed repair, or use a colorful thread and a fun shape for a statement.

  6. How to Mend a Snapped Elastic: step 6, image 1 of 1
    • Once the elastic is secure, finish the thread by snipping off the excess and tying the end into a knot.

  7. How to Mend a Snapped Elastic: step 7, image 1 of 1
    • Secure the end of the thread with glue if desired.

    • If you choose to complete this step, check the glue's cure time. Wait until this cure time is over to proceed to the next step.

  8. How to Mend a Snapped Elastic: step 8, image 1 of 1
    • Test the elastic to make sure it is secure.

Conclusion

Show off your newly repaired elastic with pride!

Claire Jones

Member since: 09/19/24

157 Reputation

1 Guide authored

0 Guide Comments

Add Comment

View Statistics:

Past 24 Hours: 1

Past 7 Days: 5

Past 30 Days: 37

All Time: 346