
Blueair 311 Auto: Disassembly and disconnection of ionizer

photocyte and one other contributor
Last updated on Jul 6, 2023
Views: 5.4K
View statistics:
- Past 24 Hours:
- 15
- Past 7 Days:
- 59
- Past 30 Days:
- 205
- All Time:
- 5,422
Comments: 1
1 comment on steps.
Completed: 2 3
2 people have marked this guide "completed." Will you be next?
3 people have marked this guide "completed." Including you — great job!
Favorites: 0 1
No one has favorited (and subscribed to) this guide. Will you be the first?
1 person has favorited (and subscribed to) this guide — and that's you!
Community-Contributed Guide
An awesome member of our community made this guide. It was not created by iFixit staff.
Introduction
Go to step 1 ↓The Blueair 311 Auto air filter has a built in high voltage ionizer. The high voltage ionizer presumably greatly increases the performance of the filter with very small (smoke-like) particles. But, if you are concerned about the long term health and indoor air quality impact of the ionizer, but want to still use the filter otherwise, follow this guide to disassemble, internally disconnect & disable the high voltage ionizer, and then reassemble the filter.
What you need
Tools

-
-
-
Unplug the power adapter of the air filter
-
Grab the top (white) housing, rotate it counter-clockwise, and lift it to detach it from the base.
 Ask FixBot
-
-
-
Rotate the filter top to be upside down.
-
Remove the 4 phillips head screws (red)
-
Remove the 4 phillips head screws (blue). These screws need a long/skinny screwdriver to reach, as they are sunk into plastic holes. But, they seem to be the same screws as the red screws.
-
Optionally, you can remove the 1 screw holding on the LED for the indicator on the front, and the plastic tab for the (presumably) particle sensing, but it is easier to reassemble if you do not remove those fasteners.
-
-
-
Lift the black top from the white housing. Lift from the side where the white clips are.
-
-
-
-
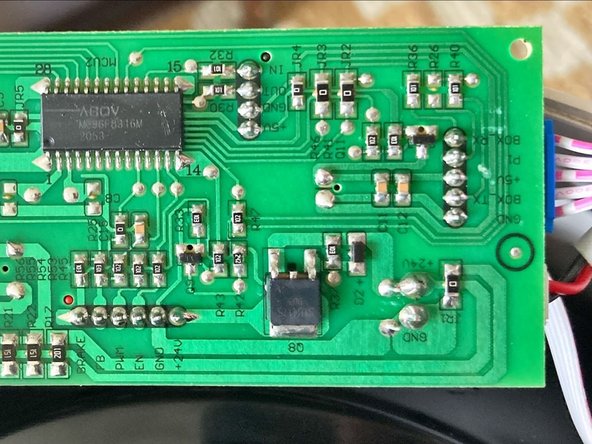
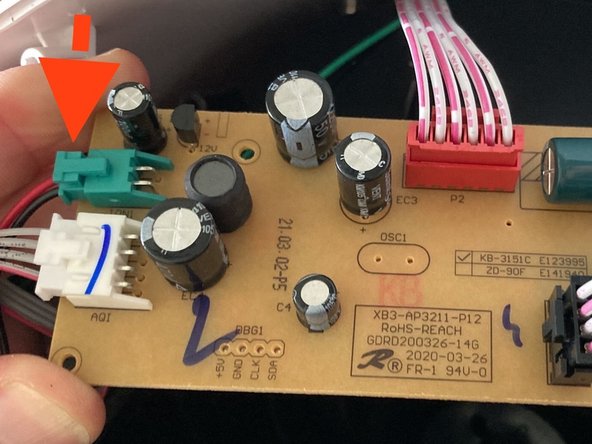
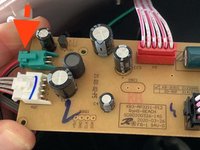
Unclip the connector for the 2-wire ionizer power cable, and disconnect if from the printed circuit board (PCB)
-
Note: It is possible & easier to unclip the connector, without fully removing the PCB, i.e. by reaching behind the PCB, and applying pressure purely by the feeling of the clip, to unclip it. These photos are just for clarity.
-
-


To reassemble your device, follow these instructions in reverse order.
Cancel: I did not complete this guide.
2 other people completed this guide.

