
Black and Decker Toast R Oven TRO405 Dissasembly

Caroline and 3 other contributors
Last updated on Dec 15, 2021
Views: 2.2K
View statistics:
- Past 24 Hours:
- 3
- Past 7 Days:
- 23
- Past 30 Days:
- 89
- All Time:
- 2,212
Comments: 0
No one has left comments on this guide. Will you be first?
Go to guide commentsCompleted: 1 2
1 person has marked this guide "completed." Will you be next?
2 people have marked this guide "completed." Including you — great job!
Favorites: 0 1
No one has favorited (and subscribed to) this guide. Will you be the first?
1 person has favorited (and subscribed to) this guide — and that's you!
Introduction
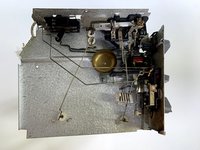
Go to step 1 ↓This disassembly guide is for the Black and Decker Toast R Oven TRO405. In addition to it’s toast, bake, and broil features, users who take a peek inside may appreciate its entirely analog internal mechanisms. But watch out, these internal systems can be a bit complex. Many of the analog components are riveted in place, meaning that if you want to explore them further than the teardown steps you see here, you’ll risk doing irreparable damage to your toaster oven. This particular model of toaster oven is quite dated and therefore may be very worn down. This is why a repair may be very very useful for this particular model as it deals with wear and tear. We encountered no hazards when disassembling this toaster oven, however when disassembling we should always be mindful of sharp or dangerous parts of the device. Additionally cleaning the device with a wet cloth can make the disassembly more sanitary and safer.
What you need
Tools


-
-
-
Open the toaster oven door and remove the shelf.
 Ask FixBot
-
-
-
Turn the toaster upside down so that you are looking at the bottom of the toaster oven.
-
Use a 1/4 inch nut driver to remove the 15.7 mm screw on the dark brown plastic wire cover.
-
Take off the wire cover.
-
-
-
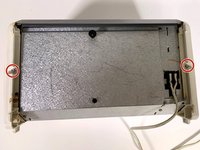
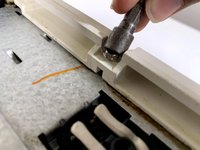
Still using the 1/4 inch nut driver, remove the pointy 19 mm screw on each white plastic side panel.
-
-
-
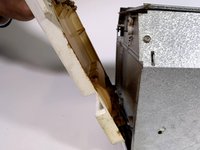
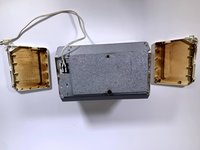
Once the screws are removed, take off the side panels by pulling them up and away from the toaster oven. It may take a little bit of wiggling to get them free.
-
-
-
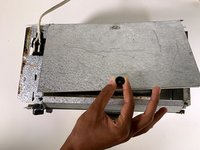
Remove the gray piece of metal on the bottom front (it will be on the top though because the toaster oven is upside down).
-
-
-
Use the knob on the crumb tray to lift it up.
-
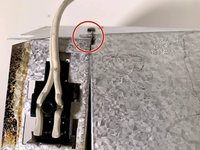
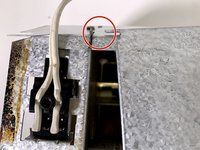
Slide the thin metal tab on the bottom of the tray out of the ring on the toaster oven.
-
-
-
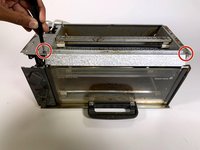
Use a Phillips #1 screwdriver to remove the two pointy 10 mm screws on both ends of the metal bar under the toaster oven door (currently on top because the device is upside down).
-
-
-
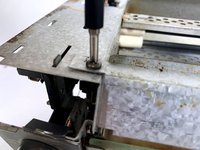
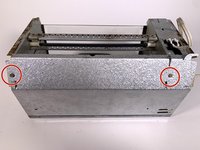
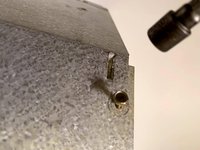
Using a 1/4 inch nut driver, remove the 10 mm screws on the back of the toaster oven.
-
Turn the toaster oven so it is right side up
-
-
-
-
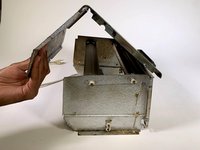
Grabbling the bottom of the piece of metal you just removed the screws from, lift that piece up until it comes away from the toaster oven.
-
-
-
On the side of the toaster oven with the majority of the internal mechanisms, there is a spring. Remove the spring by unhooking each end from the toaster oven.
-
-
-
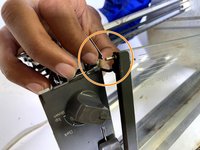
On the side of the door away from the controls, slide the tab away from the side of the toaster oven.
-
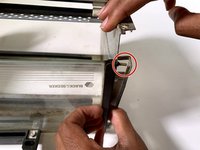
On the same side as the controls, slide the ring on the door along the wire that holds it to the toaster oven until it comes free.
-
-
-
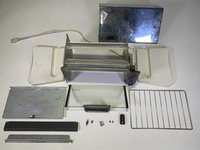
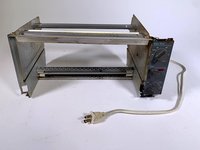
Congratulations, you have successfully completed a teardown of a Black and Decker Toast R Oven TRO405.
-
-














Cancel: I did not complete this guide.
One other person completed this guide.
Attached Documents

Team

Tufts University School of Engineering, Team 36-13, Bell Fall 2021 Member of Tufts University School of Engineering, Team 36-13, Bell Fall 2021
TUFTS-BELL-F21S36G13
3 Members
12 Guides authored
