How to Clean a Nikon D750 Image Sensor

What you need

  1. How to Clean a Nikon D750 Image Sensor, How to Clean a Nikon D750 Image Sensor: step 1, image 1 of 1
    • Power on the camera by moving the switch to the "On" position.

  2. How to Clean a Nikon D750 Image Sensor: step 2, image 1 of 1
    • Turn the dial on the left side of the camera to the letter A. This sets the camera mode to “shutter priority.”

  3. How to Clean a Nikon D750 Image Sensor: step 3, image 1 of 2 How to Clean a Nikon D750 Image Sensor: step 3, image 2 of 2
    • Make the aperture (the hole in the lens) small by turning the wave wheel to the right. The wave wheel is located in front of the camera and beneath the “Off/On” button. Turn the wheel until it reaches “F16” on the screen.

    • Confirm the Location of the Stain: Press the shutter against a plain white surface and take a picture. If the camera sensor has dust or debris covering it, then there will be darker spots on the image.

  4. How to Clean a Nikon D750 Image Sensor: step 4, image 1 of 1
    • Lower the reflector mirror of the camera.

    • Go to the “Set-up Menu” and select the “Cleaning” option.

  5. How to Clean a Nikon D750 Image Sensor: step 5, image 1 of 2 How to Clean a Nikon D750 Image Sensor: step 5, image 2 of 2
    • Select “Lock Mirror Up for Cleaning.”

    • Select “Clean Image Sensor” for automatic cleaning.

  6. How to Clean a Nikon D750 Image Sensor: step 6, image 1 of 1
    • Move the power switch to the "Off" position to turn the camera off.

  7. How to Clean a Nikon D750 Image Sensor: step 7, image 1 of 1
    • Press and hold the button on the right side of the lens, and while doing so, gently twist the lens to the right in order to remove the lens.

  8. How to Clean a Nikon D750 Image Sensor: step 8, image 1 of 1
    • Locate the white dot on the lens and on the right side of the camera. Rotate the lens until the both dots line up to each other.

  9. How to Clean a Nikon D750 Image Sensor: step 9, image 1 of 2 How to Clean a Nikon D750 Image Sensor: step 9, image 2 of 2
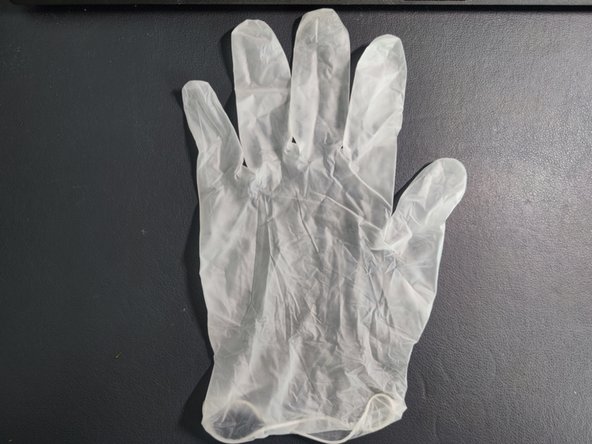
    • Prepare a pair of safety gloves to continue the cleaning process.

  10. How to Clean a Nikon D750 Image Sensor: step 10, image 1 of 3 How to Clean a Nikon D750 Image Sensor: step 10, image 2 of 3 How to Clean a Nikon D750 Image Sensor: step 10, image 3 of 3
    • Cleaning for small amounts of dry ash particles: Use the “automatic cleaning” function 5-10 times to achieve removal

    • Use manual cleaning for the other stains that were not removed during the automatic cleaning process.

  11. How to Clean a Nikon D750 Image Sensor: step 11, image 1 of 2 How to Clean a Nikon D750 Image Sensor: step 11, image 2 of 2
    • Use the “air blow” tool to remove particles from the camera sensor. Do not allow the nozzle to enter too deep inside the camera. This is to avoid any damage.

    • For tougher stains on the sensor, blow air on the stain to remove any particles. Then, clean the stains with an alcohol wipe.

  12. How to Clean a Nikon D750 Image Sensor: step 12, image 1 of 3 How to Clean a Nikon D750 Image Sensor: step 12, image 2 of 3 How to Clean a Nikon D750 Image Sensor: step 12, image 3 of 3
    • The “air blow” tool can also be used to clean the lens. The third photo depicts a clean lens.

  13. How to Clean a Nikon D750 Image Sensor: step 13, image 1 of 3 How to Clean a Nikon D750 Image Sensor: step 13, image 2 of 3 How to Clean a Nikon D750 Image Sensor: step 13, image 3 of 3
    • When the cleaning is finished, reinstall the lens. Angle the lens so that the white dots align. Turn the lens to the left until the white dot on the lens reaches to the top.

Conclusion

The Nikon d750 I introduced is a full frame camera developed by Nikon in 2014. Although the CMOS of this professional camera is very valuable, it is far from as fragile as it is now. Compared with CMOS, SLR reflector and focus screen camera are actually more fragile. The width of the full CMOS frame is different from that of the full CMOS frame of 35mm / 4 inches. Choosing an appropriate width can reduce the number of wipes.Therefore, the ideal effect can be achieved by selecting appropriate tools according to the appropriate frame size of the camera

One other person completed this guide.

CHUNYU SHEN

Member since: 01/12/22

217 Reputation

1 Guide authored

0 Comments

Add Comment

View Statistics:

Past 24 Hours: 3

Past 7 Days: 27

Past 30 Days: 118

All Time: 2,690