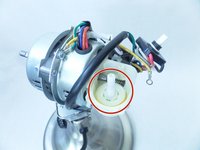
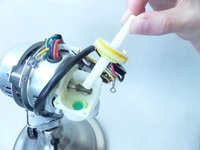
Free Shipping on Domestic Orders $75+

Insignia NS-F12R6-SS Upper Oscillation Gear Replacement

What you need

    1. Insignia NS-F12R6-SS Upper Oscillation Gear Replacement, Front Cage: step 1, image 1 of 2 Insignia NS-F12R6-SS Upper Oscillation Gear Replacement, Front Cage: step 1, image 2 of 2
      • Unplug your fan.

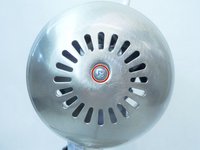
      • Remove the 20 mm bolt that fastens the fan ring located at the bottom of the fan cage with a Phillips #3 screwdriver.

      Ask FixBot

      Add Comment

    2. Insignia NS-F12R6-SS Upper Oscillation Gear Replacement: step 2, image 1 of 1
      • Remove the ring that runs around the edge of the fan cage.

      Ask FixBot

      Add Comment

    3. Insignia NS-F12R6-SS Upper Oscillation Gear Replacement: step 3, image 1 of 1
      • Remove the front of the fan cage.

      Ask FixBot

      Add Comment

    1. Insignia NS-F12R6-SS Upper Oscillation Gear Replacement, Fan Blade: step 4, image 1 of 1
      • Remove the 8 mm bolt fastening the fan blades to the rotor with a Phillip #3 screwdriver.

      Ask FixBot

      Add Comment

    2. Insignia NS-F12R6-SS Upper Oscillation Gear Replacement: step 5, image 1 of 1
      • Take caution when removing the fan blades. They can be sharp!

      • Slide the fan blade off the end of the rotor.

      Ask FixBot

      Add Comment

    1. Insignia NS-F12R6-SS Upper Oscillation Gear Replacement, Back Cage: step 6, image 1 of 1
      • Unscrew the four 8 mm bolts that fasten the back of the fan cage back to the motor housing with a Phillips #3 screwdriver.

      Ask FixBot

      Add Comment

    2. Insignia NS-F12R6-SS Upper Oscillation Gear Replacement: step 7, image 1 of 1
      • Pull the back cage off.

      Ask FixBot

      Add Comment

    1. Insignia NS-F12R6-SS Upper Oscillation Gear Replacement, Oscillation Button: step 8, image 1 of 2 Insignia NS-F12R6-SS Upper Oscillation Gear Replacement, Oscillation Button: step 8, image 2 of 2
      • Unscrew the 10 mm screw in the center hole of the oscillation knob with a Phillips #3 screwdriver.

      Ask FixBot

      Add Comment

    2. Insignia NS-F12R6-SS Upper Oscillation Gear Replacement: step 9, image 1 of 1
      • Remove the oscillation knob.

      Ask FixBot

      Add Comment

    1. Insignia NS-F12R6-SS Upper Oscillation Gear Replacement, Motor Housing: step 10, image 1 of 1
      • Use your fingers to gently pull the power knob directly away from the motor housing.

      Ask FixBot

      Add Comment

    2. Insignia NS-F12R6-SS Upper Oscillation Gear Replacement: step 11, image 1 of 1
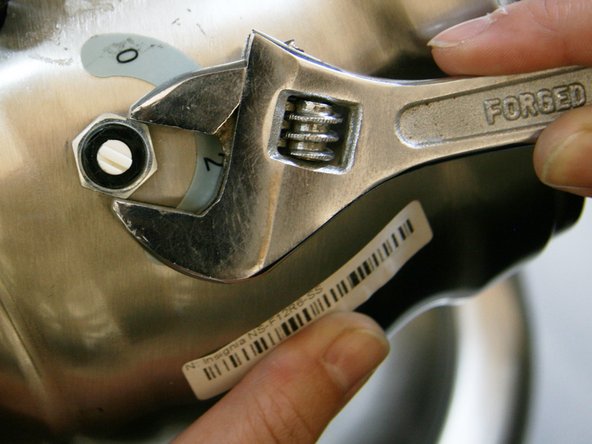
      • Unscrew the flat 17 mm nut fastened at the bottom of the power knob with a small crescent wrench.

      Ask FixBot

      Add Comment

    3. Insignia NS-F12R6-SS Upper Oscillation Gear Replacement: step 12, image 1 of 2 Insignia NS-F12R6-SS Upper Oscillation Gear Replacement: step 12, image 2 of 2
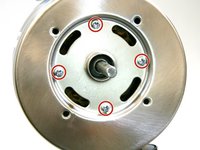
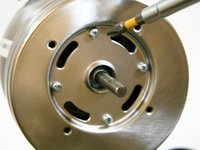
      • Remove the four 6 mm bolts and small washers that secure the front face of the motor housing with a Phillips #3 screwdriver and remove the washers.

      Ask FixBot

      Add Comment

    4. Insignia NS-F12R6-SS Upper Oscillation Gear Replacement: step 13, image 1 of 1
      • Pull the front face of the motor housing off toward the front of the rotor.

      Ask FixBot

      Add Comment

    5. Insignia NS-F12R6-SS Upper Oscillation Gear Replacement: step 14, image 1 of 2 Insignia NS-F12R6-SS Upper Oscillation Gear Replacement: step 14, image 2 of 2
      • Remove the 10 mm triangular-headed bolt with a Phillips #3 screwdriver.

      Ask FixBot

      Add Comment

    6. Insignia NS-F12R6-SS Upper Oscillation Gear Replacement: step 15, image 1 of 1
      • Slide the back end of the motor housing away from the front of the rotor.

      Ask FixBot

      Add Comment

    7. Insignia NS-F12R6-SS Upper Oscillation Gear Replacement: step 16, image 1 of 1
      • Remove the small piece of paper hanging on the power button.

      Ask FixBot

      Add Comment

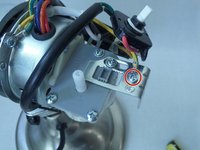
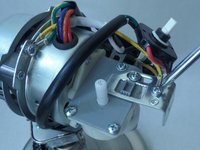
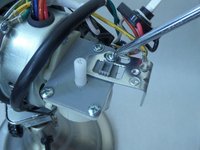
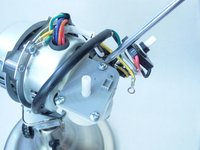
    1. Insignia NS-F12R6-SS Upper Oscillation Gear Replacement, Upper Oscillation Gear: step 17, image 1 of 3 Insignia NS-F12R6-SS Upper Oscillation Gear Replacement, Upper Oscillation Gear: step 17, image 2 of 3 Insignia NS-F12R6-SS Upper Oscillation Gear Replacement, Upper Oscillation Gear: step 17, image 3 of 3
      • Using a Phillips #3 screwdriver, unscrew and remove the 7 mm long bolt and small washer fastening the yellow and green wire to the motor housing support.

      Ask FixBot

      Add Comment

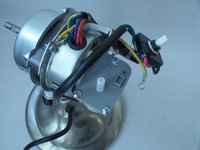
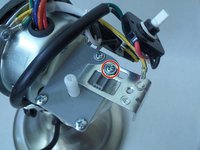
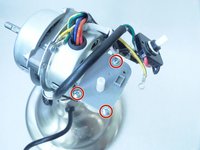
    2. Insignia NS-F12R6-SS Upper Oscillation Gear Replacement: step 18, image 1 of 2 Insignia NS-F12R6-SS Upper Oscillation Gear Replacement: step 18, image 2 of 2
      • Using a Phillips #3 screwdriver unscrew the 13 mm long screw fastening the motor housing support to the oscillation gear box.

      Ask FixBot

      Add Comment

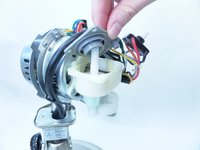
    3. Insignia NS-F12R6-SS Upper Oscillation Gear Replacement: step 19, image 1 of 3 Insignia NS-F12R6-SS Upper Oscillation Gear Replacement: step 19, image 2 of 3 Insignia NS-F12R6-SS Upper Oscillation Gear Replacement: step 19, image 3 of 3
      • Using a Phillips #3 screwdriver, unscrew the three 13 mm long screws fastening the grey plate to the top of the oscillation gear box.

      • Remove the grey cap covering the oscillation gear box.

      Ask FixBot

      Add Comment

    4. Insignia NS-F12R6-SS Upper Oscillation Gear Replacement: step 20, image 1 of 2 Insignia NS-F12R6-SS Upper Oscillation Gear Replacement: step 20, image 2 of 2
      • Remove the upper oscillation gear.

      Ask FixBot

      Add Comment

Conclusion

To reassemble your device, follow these instructions in reverse order.

Cancel: I did not complete this guide.

One other person completed this guide.

Hank

Member since: 09/17/18

1,142 Reputation

8 Guides authored

Team

CSU Fullerton, Team S2-G1, Bruce Fall 2018 Member of CSU Fullerton, Team S2-G1, Bruce Fall 2018

CSUF-BRUCE-F18S2G1

4 Members

96 Guides authored

0 Guide Comments

Add Comment

View Statistics:

Past 24 Hours: 2

Past 7 Days: 15

Past 30 Days: 43

All Time: 1,018