Introduction
This repair guide was authored by the iFixit staff and hasn’t been endorsed by Google. Learn more about our repair guides here.
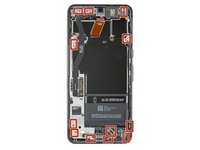
Follow this guide to replace the screen adhesive and install the screen on your Google Pixel 8 Pro.
Before starting this guide, make sure you've completed your repair and have reassembled your phone up until the screen. Return to your guide and do so if you haven't already.
What you need
-
-
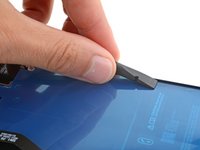
Use the flat end of a spudger to scrape up and remove all the old screen adhesive from the perimeter of the frame.
-
-
Tool used on this step:Microfiber Cleaning Cloths$3.99
-
Once you've removed all the old adhesive, apply a few drops of highly-concentrated (greater than 90%) isopropyl alcohol to any residue left on the frame and wipe it away with a microfiber or lint-free cloth.
-
-
-
Repeat the cleaning procedure to remove all the old adhesive and its residue from the perimeter of the screen.
-
-
-
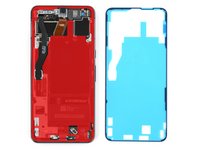
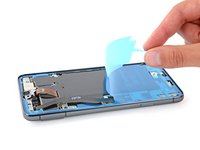
Hold the adhesive sheet so the clear liner is on the bottom and place it over your phone to find the proper alignment.
-
The blue liner has a large cutout for the cable on the left side of the phone and cutouts along the bottom for the spring contacts.
-
-
-
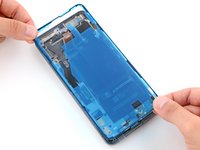
Remove the larger clear liner from the back of the sheet to expose the adhesive.
-
-
-
-
Gently place the bottom edge of the adhesive onto the frame. Use the frame's lip to help position the sheet.
-
Press down gently to secure the bottom corners and carefully lay the rest of the adhesive onto the frame.
-
-
-
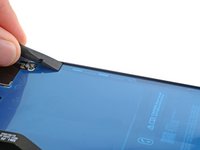
Press down firmly and slide the flat end of a spudger around the entire perimeter of the frame to secure the adhesive.
-
-
-
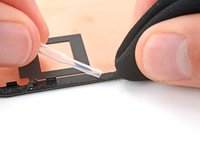
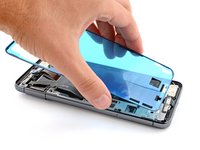
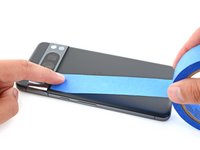
Use the pull tab near the top of the phone to gently peel up and remove the larger blue liner.
-
-
-
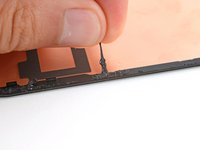
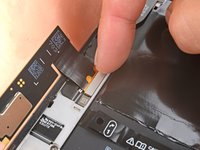
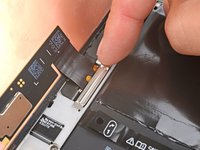
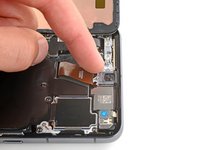
Reconnect the screen cable press connector.
-
Reinstall the screen cable cover.
-
-
-
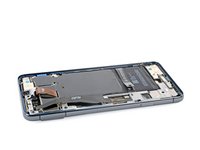
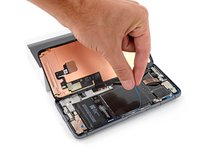
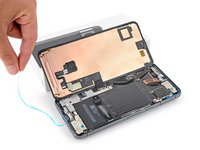
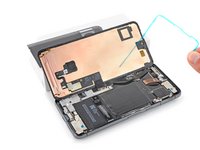
Use a small box or stack of books to prop up the screen.
-
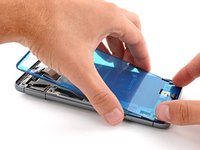
Use the two pull tabs on the upper right edge of the phone to remove the remaining blue liners.
-
-
-
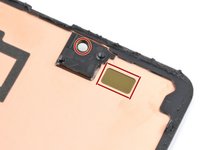
Before securing the screen, make sure the front facing camera is snug in its recess.
-
If you replaced your screen, check the front-facing camera hole and the sensor cutout on your replacement screen, and remove any remaining liners.
-
-
-
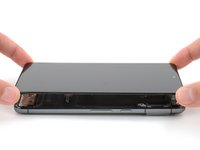
Firmly press the screen into place on the frame. You should feel the clips "pop" into place.
-
Press firmly around the perimeter or the screen to secure it with the new adhesive.
-
-
-
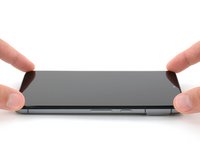
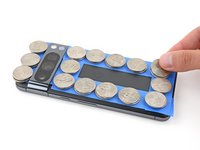
Lay your phone screen side down on a clean, flat surface.
-
Put tape around the perimeter of your phone to protect the rear cover.
-
Place coins or similarly thick objects around the perimeter of the back cover. Make sure they're as thick or thicker than the camera bump.
-
Place heavy objects such as books on your phone and leave them for 30 minutes or longer. Ideally, leave them stacked overnight.
-


Repair didn’t go as planned? Try some basic troubleshooting, or ask our Answers community for help.
Cancel: I did not complete this guide.
5 other people completed this guide.


2 Guide Comments
Hey, I recently removed a broken screen from a Google pixel 8 Pro. It was in two pieces and the frame came off along with the actual glass and the foil piece with the fingerprint sensor on it. I wanted to reuse that fingerprint sensor on a quality screen and basically clean up any excess glue and go from there. I did the install. I made sure the screen worked and all was good. When I did install the screen I used a very small piece of double-sided tape which must have been a little too thick to basically get the fingerprint sensor to stick. I didn't want to use glue or any type of material like that so I figured a thin layer of tape even if I had to remove it later. If it didn't work would work. I installed everything and the screen worked and believe it or not the fingerprint sensor worked. The only thing that didn't work was pulling down from the top was a problem. It wouldn't let me scroll down from the top and pull down the control menu with Wi-Fi, Bluetooth airplane mode, etc. That was the first problem.
My second problem was Dad at the bottom of the phone when the screen was off. I guess there's a piece called the buffer which is black in color and I believe controls the three buttons on the screen, the menu button, the back button, and the pull-up app button. What would happen is when I would press one of those buttons. It would do a long press and anywhere where I would press on the touch screen would do a long press. I did use a very small piece of double-sided tape. Like I said to put the fingerprint sensor to the screen which I figured was the problem. Joe, I've heard of people getting their phone and screen to work without the fingerprint sensor at all. So I figured take off the fingerprint sensor and go from there. But I found out the hard way that basically any small wrinkle or press or touching of the back of the screen will ruin It. And that's what happened. Just wondering how to go about using the original print sensor with the correct adhesive and the buffer for the three buttons. Any help?