Introduction
We have a Hitachi ED-A101 projector. It has a moving mirror, i.e. when it turns on, the mirror opens, and when it turns off, the mirror closes. For this to work, the projector has a DC motor, plastic gears and a metal axe for one of the gears. It is not a good combination, that plastic gear easily wears out because of the sharp edges of the axe. This is a typical problem with this projector.
We tried to repair the gears (it is not easy to replace the gearbox), we even printed that gear, but it did not work for too long. So we tought of solving this problem in a different way: fix the mirror and simulate the opening/closing process for the projector.
What you need
Featured Document
-
-
There are two limit switches on the axe of the mirror reporting the opening and the closing of the mirror to the projector's processor (shown with our cables soldered to it).
-
-
-
-
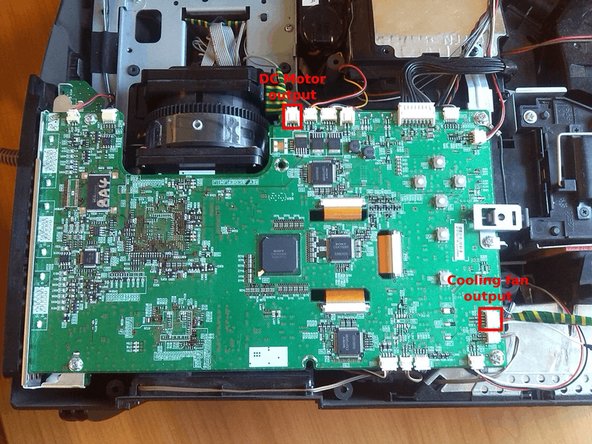
Also, the DC motor's and the cooling fan's output pins are marked on this image.
-
The cooling fan output is used to power the Arduino: it outputs 7-12V depending on the cooling needed. Although Arduino Pro Micro has a RAW input which should handle this range, it turned out that it is too much for it. So we connected the cooling fan's output to Arduino's RAW input through a voltage regulator, which outputs 5.25V.
-
The DC motor output is used to detect when the projector tries to open or close the mirror: it outputs 12V and changes the sides of the + and - depending on the direction. We connected the two diode-protected stepdown converters' input to the red and black cables of the DC motor output, and the converters' output to the input pins of the Arduino.
-