
Hisense Chromebook C11 Hard Drive Replacement

What you need

  1. Hisense Chromebook C11 Hard Drive Replacement, Back Panel: step 1, image 1 of 1
    • Remove the front two hub caps.

    • When finished, you should be able to remove the back cover.

  2. Hisense Chromebook C11 Hard Drive Replacement: step 2, image 1 of 1
    • Unscrew the screws with the Phillips #00 screwdriver.

  3. Hisense Chromebook C11 Hard Drive Replacement: step 3, image 1 of 1
    • Pry the perimeter of the case open with the plastic opening tool.

    • Remove the back panel.

  4. Hisense Chromebook C11 Hard Drive Replacement, Battery: step 4, image 1 of 1
    • Be careful not to puncture the battery with the screwdriver or any sharp instrument.

    • Unscrew the screws with the Phillips #000 screwdriver.

  5. Hisense Chromebook C11 Hard Drive Replacement: step 5, image 1 of 1
    • Use the tweezers to unplug the battery.

  6. Hisense Chromebook C11 Hard Drive Replacement: step 6, image 1 of 1
    • Remove the battery.

  7. Hisense Chromebook C11 Hard Drive Replacement, Hard Drive: step 7, image 1 of 2 Hisense Chromebook C11 Hard Drive Replacement, Hard Drive: step 7, image 2 of 2
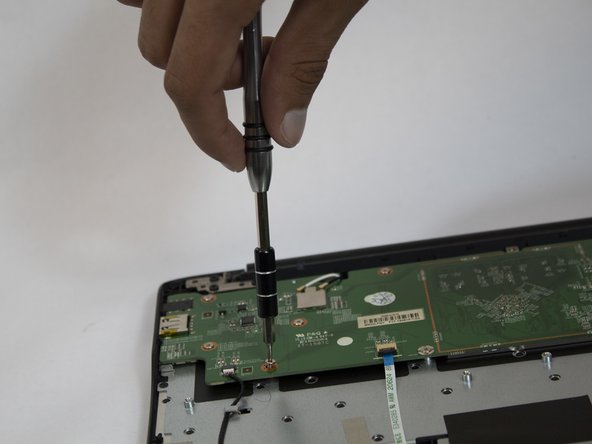
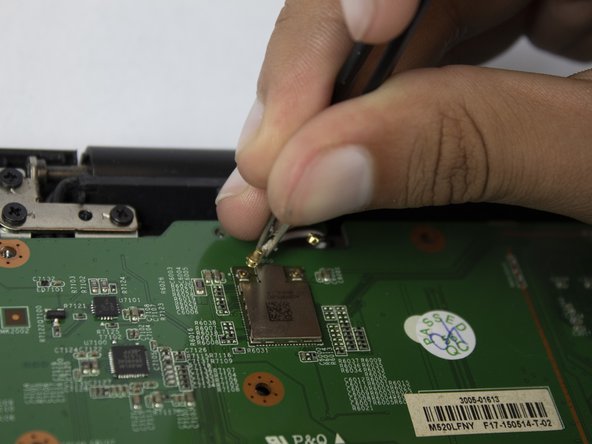
    • Unscrew all of the screws that you can access on the hard drive.

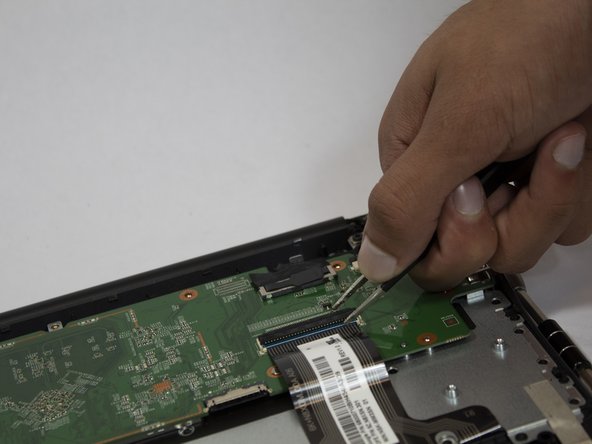
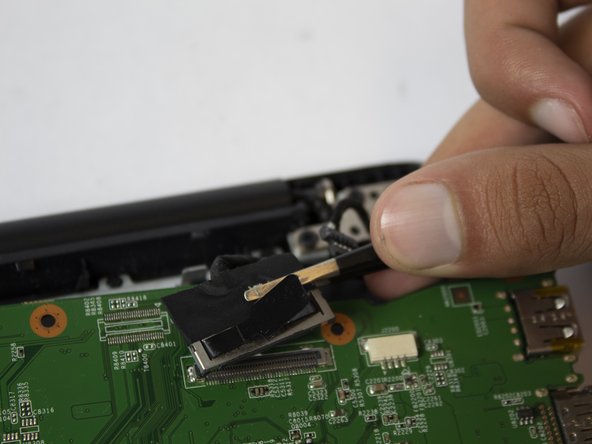
    • If you cannot reach the screw beneath the black strip, move on to the next step.

  8. Hisense Chromebook C11 Hard Drive Replacement: step 8, image 1 of 3 Hisense Chromebook C11 Hard Drive Replacement: step 8, image 2 of 3 Hisense Chromebook C11 Hard Drive Replacement: step 8, image 3 of 3
    • Remove the black strip using the tweezers.

  9. Hisense Chromebook C11 Hard Drive Replacement: step 9, image 1 of 1
    • Unscrew the screw beneath the black strip if you haven't done so already.

  10. Hisense Chromebook C11 Hard Drive Replacement: step 10, image 1 of 2 Hisense Chromebook C11 Hard Drive Replacement: step 10, image 2 of 2
    • Remove the ribbon with the tweezers.

  11. Hisense Chromebook C11 Hard Drive Replacement: step 11, image 1 of 2 Hisense Chromebook C11 Hard Drive Replacement: step 11, image 2 of 2
    • Using the tweezers, carefully remove the latches attaching the silver computer chip.

  12. Hisense Chromebook C11 Hard Drive Replacement: step 12, image 1 of 2 Hisense Chromebook C11 Hard Drive Replacement: step 12, image 2 of 2
    • Continue gently removing all remaining points of attachment.

  13. Hisense Chromebook C11 Hard Drive Replacement: step 13, image 1 of 1
    • Carefully remove the hard drive.

Conclusion

To reassemble your device, follow these instructions in reverse order.

One other person completed this guide.

Chelsea Charles

Member since: 10/09/18

422 Reputation

2 Guides authored

Team

USF Tampa, Team S1-G3, Leahy Fall 2018 Member of USF Tampa, Team S1-G3, Leahy Fall 2018

USFT-LEAHY-F18S1G3

3 Members

10 Guides authored

0 Comments

Add Comment

View Statistics:

Past 24 Hours: 0

Past 7 Days: 1

Past 30 Days: 17

All Time: 1,136