
Epson Stylus Photo 820 Buttons Replacement

Brandon Ivy and 8 other contributors
Last updated on Jan 10, 2025
Views: 1.6K
View statistics:
- Past 24 Hours:
- 1
- Past 7 Days:
- 17
- Past 30 Days:
- 38
- All Time:
- 1,595
Comments: 0
No one has left comments on this guide. Will you be first?
Go to guide commentsCompleted: 0 1
No one has marked this guide "completed." Will you be the first?
1 person has marked this guide "completed." It's you — great job!
Favorites: 2 3
2 people have favorited (and subscribed to) this guide. Will you be next?
3 people have favorited (and subscribed to) this guide — including you!
Incorrect Tools
Help make this guide better by using the correct tools in images and/or text.
Introduction
Go to step 1 ↓This guide will show you how to replace the plastic buttons on the Epson Stylus Photo 820 printer, a common fix for when button presses fail to trigger the printer's actions. This problem can be due to worn-out buttons, dirt accumulation, or internal damage. While this repair often resolves non-responsive button issues, it's important to note that other factors, such as electrical faults or software glitches, could also be at play.
Before you begin, ensure you have a small screwdriver handy to remove the printer’s top cover. This involves accessing internal components, so extra care is needed to avoid damaging delicate parts. Additionally, remember to work in a well-lit area to clearly see the small components.
Hazards to be aware of include potential static discharge and the risk of damaging the printer’s internal electronics. Always take precautions, such as grounding yourself, before handling internal components.
IMPORTANT: Before starting, unplug the printer's power cord from the wall to avoid electric shock or damage to the printer.
What you need
Tools
-
Flathead 3/32" or 2.5 mm Screwdriver$5.495
A skinny flathead screwdriver easily replaces the tool above.


-
-
-
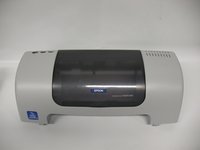
To remove the top cover of the printer, you have to first release it from several tabs.
-
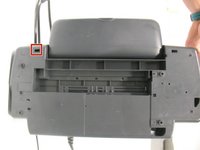
These three are the easiest tabs to remove. They are located on the back side of the printer.
 Ask FixBot
-
-
-
Push the tab in with one of the plastic opening tools.
-
Keep the tab pushed in by leveraging the tool between the tab and the hole. Pull up on the case so that the tab doesn't lock back into place.
-
Repeat this process with the furthermost right tab, then proceed with the middle tab.
-
-
-
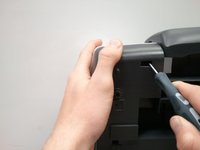
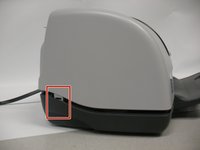
Insert the pointed end of a spudger into the hole on the bottom left corner of the printer and pry out the tab.
-
-
-
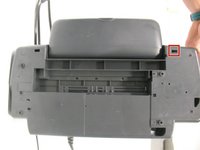
Insert the pointed end of a spudger into the hole on the bottom right corner of the printer and pry out the tab.
-
-
-
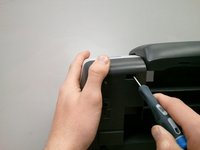
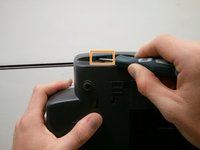
The final two tabs can be more difficult to release. Viewing from the front, they are located in the back left and right corners of the printer.
-
The release points for the tabs are located in holes on the depressed area of the base (darker piece).
-
Use the pointed end of a spudger to pry out the tab.
-
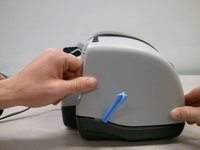
Use one of the plastic tools to keep the tab pried out. Once it releases, push in towards the printer (viewing from the side) and pull up on the case.
-
-
-
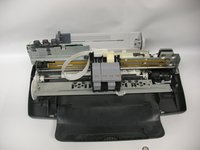
All of the tabs have now been released.
-
When trying to completely remove the cover, it gets caught on these two back components. Maneuvering around these can be tricky.
-
Push the cover to the right slightly and then push it backwards (out of the screen in this picture). This should give it some wiggle room. Repeat this as necessary.
-
-
-
-
-
-
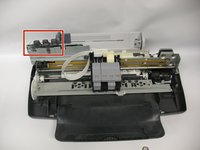
Locate the buttons.
-
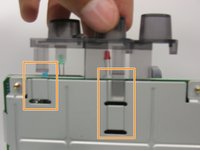
Push the tabs in and pull up on the whole button piece to remove it.
-
-


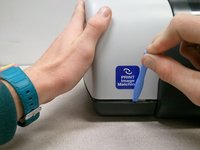








To reassemble your device, follow these instructions in reverse order.

Team

Cal Poly, Team 20-68, Walters Spring 2011 Member of Cal Poly, Team 20-68, Walters Spring 2011
CPSU-WALTERS-S11S20G68
4 Members
72 Guides authored
