
Hasbro Furby 2012 Switch Replacement

What you need

  1. Hasbro Furby 2012 Switch Replacement, Outer Shell: step 1, image 1 of 3 Hasbro Furby 2012 Switch Replacement, Outer Shell: step 1, image 2 of 3 Hasbro Furby 2012 Switch Replacement, Outer Shell: step 1, image 3 of 3
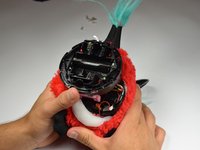
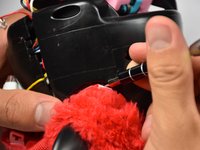
    • Use a flathead screwdriver to remove the two 10mm screws on the base of the Furby.

  2. Hasbro Furby 2012 Switch Replacement: step 2, image 1 of 3 Hasbro Furby 2012 Switch Replacement: step 2, image 2 of 3 Hasbro Furby 2012 Switch Replacement: step 2, image 3 of 3
    • Use a Phillips #0 driver to unscrew the eight 10mm screws.

    • Remove the base ring after unscrewing all the screws.

    • Be careful when lifting the base ring from the Furby. There are sharp edges that hold the base ring in place.

  3. Hasbro Furby 2012 Switch Replacement: step 3, image 1 of 2 Hasbro Furby 2012 Switch Replacement: step 3, image 2 of 2
    • Unhook the white ribbon from the tab on the base.

  4. Hasbro Furby 2012 Switch Replacement: step 4, image 1 of 3 Hasbro Furby 2012 Switch Replacement: step 4, image 2 of 3 Hasbro Furby 2012 Switch Replacement: step 4, image 3 of 3
    • Roll the Furby's fur downward.

    • Disconnect the now exposed red wire.

  5. Hasbro Furby 2012 Switch Replacement: step 5, image 1 of 3 Hasbro Furby 2012 Switch Replacement: step 5, image 2 of 3 Hasbro Furby 2012 Switch Replacement: step 5, image 3 of 3
    • Locate the two middle clips first.

    • Locate the two remaining clips on Furby's sides, they are opposite each other.

    • Orient the Furby upside down with the tail facing away from you.

  6. Hasbro Furby 2012 Switch Replacement: step 6, image 1 of 3 Hasbro Furby 2012 Switch Replacement: step 6, image 2 of 3 Hasbro Furby 2012 Switch Replacement: step 6, image 3 of 3
    • Insert a metal prying tool directly into the clip opening.

    • Press upward into the clip. At the same time, use your other hand to pull away the plastic seam from the Furby's body.

    • Repeat the previous step to remove the remaining three clips.

  7. Hasbro Furby 2012 Switch Replacement: step 7, image 1 of 3 Hasbro Furby 2012 Switch Replacement: step 7, image 2 of 3 Hasbro Furby 2012 Switch Replacement: step 7, image 3 of 3
    • Locate the two 10mm screws and remove them with the Phillips #0 head screwdriver.

    • Lift up on the fur covering until the face of the Furby is exposed.

  8. Hasbro Furby 2012 Switch Replacement: step 8, image 1 of 3 Hasbro Furby 2012 Switch Replacement: step 8, image 2 of 3 Hasbro Furby 2012 Switch Replacement: step 8, image 3 of 3
    • Orient the Furby on its side to where the beak is facing left and locate the edge of the aluminum tape.

    • Lift tape gently and peel back until the tape is nearly removed.

    • Do not pull on the yellow wire located on the opposite end of the tape.

  9. Hasbro Furby 2012 Switch Replacement: step 9, image 1 of 2 Hasbro Furby 2012 Switch Replacement: step 9, image 2 of 2
    • Locate the four 10mm screws. Two on either side of body, and two on top of back plate, around the tape.

    • Remove the 10mm screws with the Phillips#0 screwdriver.

  10. Hasbro Furby 2012 Switch Replacement: step 10, image 1 of 1
    • Peel the tape gently, grabbing it from the bottom edge and folding the tape upward.

    • Peel the tape up until it is nearly detached from the black case.

  11. Hasbro Furby 2012 Switch Replacement: step 11, image 1 of 2 Hasbro Furby 2012 Switch Replacement: step 11, image 2 of 2
    • Orient the Furby face down, with the base facing away from you.

    • Locate the clips below the ears.

    • Repeat the technique used in Step 6. Create leverage using a metal prying tool to press upward into the clip, while also pulling back on the clip itself.

  12. Hasbro Furby 2012 Switch Replacement: step 12, image 1 of 2 Hasbro Furby 2012 Switch Replacement: step 12, image 2 of 2
    • Remove the loose, plastic back panel by pulling the panel away from Furby's body.

  13. Hasbro Furby 2012 Switch Replacement, Switch: step 13, image 1 of 2 Hasbro Furby 2012 Switch Replacement, Switch: step 13, image 2 of 2
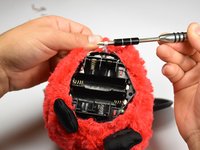
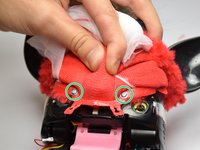
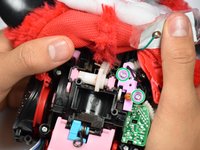
    • Locate and remove the two screws holding in the switch using J0 Phillips Head Screw Driver.
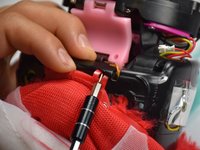
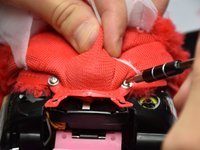
  14. Hasbro Furby 2012 Switch Replacement: step 14, image 1 of 2 Hasbro Furby 2012 Switch Replacement: step 14, image 2 of 2
    Tool used on this step:
    Tweezers
    $4.99
    Buy
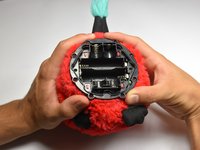
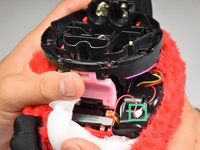
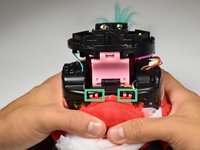
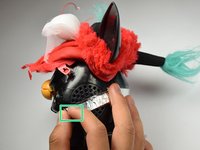
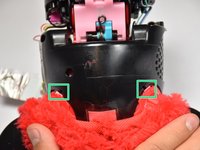
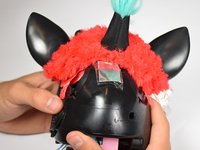
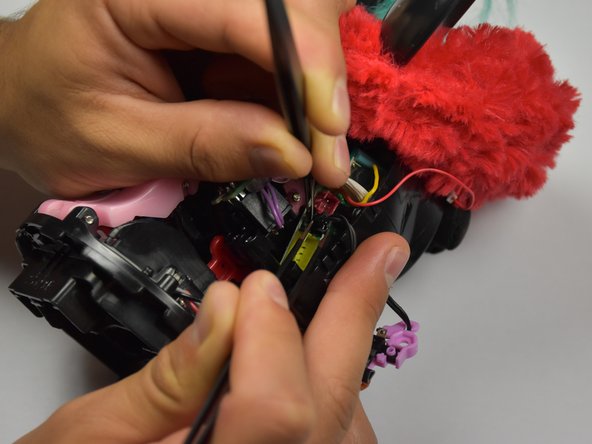
    • Orient the Furby with the beak facing right.

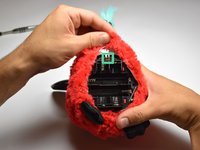
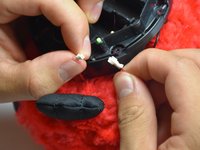
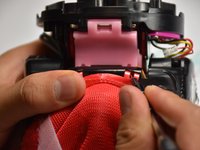
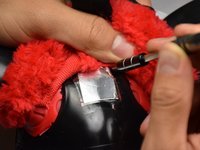
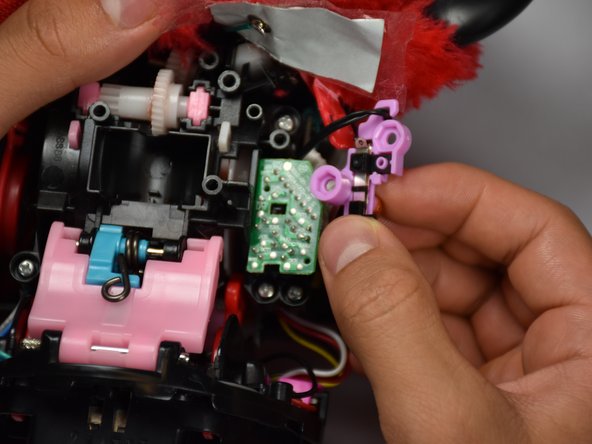
    • Using the blunt and pointed tweezers, remove the black connector.

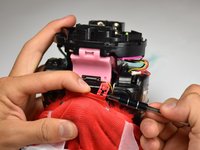
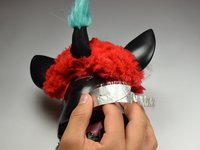
    • Insert the new switch in place of where the previous connector was located.

Conclusion

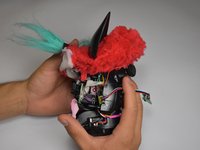
To reassemble your device, follow these instructions in reverse order.

One other person completed this guide.

Jordan Castillo

Member since: 10/06/16

912 Reputation

5 Guides authored

Team

Cal Poly, Team 15-5, Livingston Fall 2016 Member of Cal Poly, Team 15-5, Livingston Fall 2016

CPSU-LIVINGSTON-F16S15G5

4 Members

9 Guides authored

One Comment

Did someone find a replacement furby switch? Or found a way to repair the one inside the furby already?

Frubyx - Reply

Add Comment

View Statistics:

Past 24 Hours: 0

Past 7 Days: 5

Past 30 Days: 17

All Time: 1,310