Shop the Holiday Gift Guide
Free Shipping on Domestic Orders $75+

Hard Drive

Views: 683

View statistics:

Past 24 Hours:
5
Past 7 Days:
27
Past 30 Days:
78
All Time:
683
Comments: 0

No one has left comments on this guide. Will you be first?

Go to guide comments
Completed: 1

1 person has marked this guide "completed." Will you be next?

Favorites: 0

No one has favorited (and subscribed to) this guide. Will you be the first?

Time Required: 5 - 15 minutes
Difficulty: Easy
Bullets!

Better coordination with markups and the color/type of bullets will help make this guide more clear!

Community-Contributed Guide

An awesome member of our community made this guide. It was not created by iFixit staff.

Hard Drive

Introduction

Go to step 1 ↓

Warning!

According to the specific model, the hard drive can be located in two different places or there can be two hard drives in the same two places as mentioned in the guide.

What you need

Tools

    1. Hard Drive, Battery: step 1, image 1 of 1
      • Before proceeding, power down your Laptop and remove the power cable.

      • Close the display and lay it on a flat surface, top-side down.

      Ask FixBot

      Add Comment

    2. Hard Drive: step 2, image 1 of 1
      • Unlock the battery by sliding the battery lock to the unlock part.

      Ask FixBot

      Add Comment

    3. Hard Drive: step 3, image 1 of 1
      • Slide the middle lock to the right and the battery will pop up.

      Ask FixBot

      Add Comment

    4. Hard Drive: step 4, image 1 of 1
      • If you want to replace the battery and nothing else then now is the time to do so.

      • Once the battery hatch is unlocked you can now safely remove the battery.

      Ask FixBot

      Add Comment

    1. Hard Drive, Hard Drive: step 5, image 1 of 1
      • Use a Philips J1 driver to remove two screws securing the hard drive cover.

      Ask FixBot

      Add Comment

    2. Hard Drive: step 6, image 1 of 1
      • If the hard drive is not located here, then it will be located in the next step.

      • Now you can remove, replace or upgrade the hard drive to an SSD if you need to.

      Ask FixBot

      Add Comment

    3. Hard Drive: step 7, image 1 of 1
      • If your hard drive was not located in the previous spot or you have two drives then this one is located here.

      • Use a Philips J1 driver to remove eight screws securing the bottom case.

      Ask FixBot

      Add Comment

    4. Hard Drive: step 8, image 1 of 1
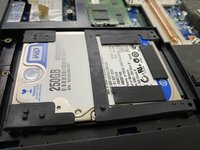
      • After removing the bottom panel cover, then you should spot the hard drive right here.

      Ask FixBot

      Add Comment

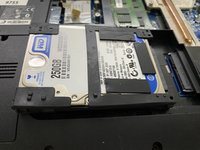
    5. Hard Drive: step 9, image 1 of 2 Hard Drive: step 9, image 2 of 2
      • While removing the hard drive, try to be gentle.

      • Now you can simply upgrade, replace or remove the hard drive right here. To remove it, push it from the two corners and it should come off like in the next picture.

      Ask FixBot

      Add Comment

Conclusion

To reassemble your device, follow these instructions in reverse order.

Cancel: I did not complete this guide.

One other person completed this guide.

Author

with

Regome

Member since: 01/20/23

866 Reputation

7 Guides authored

0 Guide Comments

Add Comment

View Statistics:

Past 24 Hours: 5

Past 7 Days: 27

Past 30 Days: 78

All Time: 683