Introduction
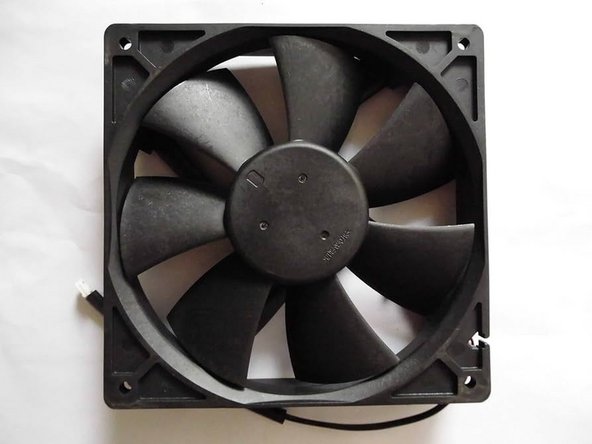
Projectors are a valuable tool for presentations and home entertainment but they can encounter issues over time. A malfunction in the cooling fan caused by overheating and resulting in powering down at random times is a common problem. This guide will guide you step-by-step on how to safely and effectively replace the cooling fan of a projector.
Projector Model: Happrun H1
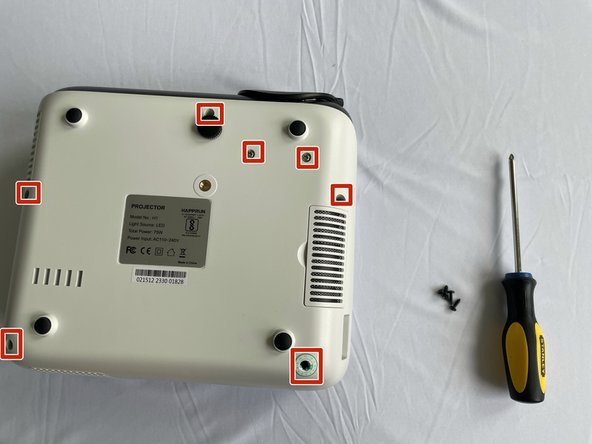
Note: The projector may be hot, so ensure it cools down before you start disassembling it to avoid burning yourself. Make sure the projector is fully turned off and not plugged in. Allow up to 20 minutes for the projector to cool down.
What you need
Video Overview
-
-
Flip the device upside down so that the projector's air filter is facing up.
-
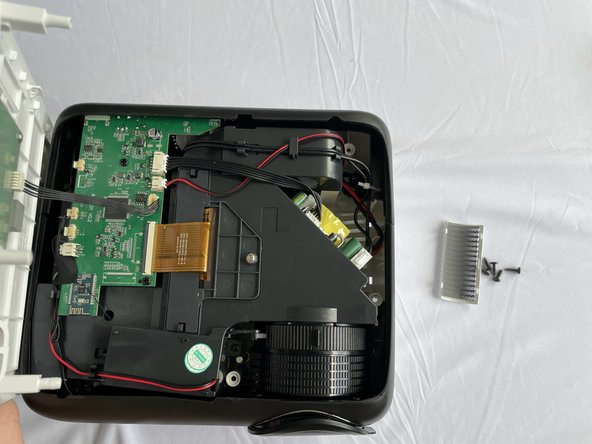
Remove the filter by gently pulling it out until it pops out.
-
-


To reassemble your device, follow these instructions in reverse order.
To reassemble your device, follow these instructions in reverse order.
Cancel: I did not complete this guide.
One other person completed this guide.
Team

York University, Team 2-15, O'Regan Fall 2023 Member of York University, Team 2-15, O'Regan Fall 2023
YORK-O'REGAN-F23S2G15
1 Member
1 Guide authored
3 Comments
Hi Tulika, thank you for the guide!
Is there a chance you can provide me with the messurements of the fan and maybe you know the voltage and RPM's it runs on?
I want to replace it with a quitter one like from Noctua or so.
Thanks!
Any luck doing that? I'm looking for the same solution.
@rudyazoulay, I jsut took apart my projector and this guide is just something weird.
There are 2 turbine type fans
DC Brushless Fan, Model: DFM7530S, DC 12V - 0.25A.
Just put it into google and you will see that one specific. I didn't find the quite one yet.