
Hamilton Beach 70740 Motor Replacement

What you need

  1. Hamilton Beach 70740 Motor Replacement, Bowl and Lid: step 1, image 1 of 2 Hamilton Beach 70740 Motor Replacement, Bowl and Lid: step 1, image 2 of 2
    • Turn the bowl counterclockwise and lift.

  2. Hamilton Beach 70740 Motor Replacement, Gears: step 2, image 1 of 2 Hamilton Beach 70740 Motor Replacement, Gears: step 2, image 2 of 2
    • Use the nylon spudger to remove the plastic screw covers.

  3. Hamilton Beach 70740 Motor Replacement: step 3, image 1 of 3 Hamilton Beach 70740 Motor Replacement: step 3, image 2 of 3 Hamilton Beach 70740 Motor Replacement: step 3, image 3 of 3
    • Using a #2 Phillips head screwdriver, remove the four 10 mm screws and pull the shaft straight upwards to uncover gears.

  4. Hamilton Beach 70740 Motor Replacement: step 4, image 1 of 2 Hamilton Beach 70740 Motor Replacement: step 4, image 2 of 2
    • Firmly grasp center piece of gear mechanism and pull straight upward.

  5. Hamilton Beach 70740 Motor Replacement, Motor: step 5, image 1 of 2 Hamilton Beach 70740 Motor Replacement, Motor: step 5, image 2 of 2
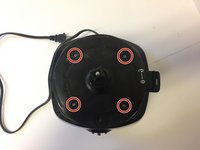
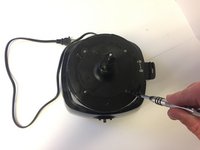
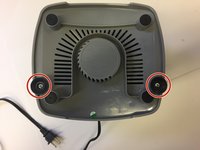
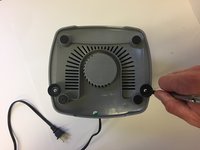
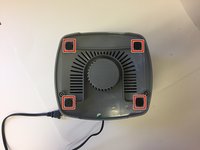
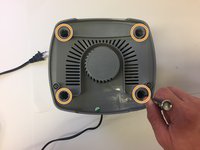
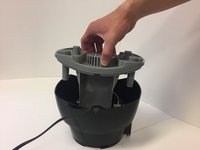
    • Using a #2 Phillips head screwdriver, remove the two 11 mm screws and pull the rubber suction cups straight up.

  6. Hamilton Beach 70740 Motor Replacement: step 6, image 1 of 3 Hamilton Beach 70740 Motor Replacement: step 6, image 2 of 3 Hamilton Beach 70740 Motor Replacement: step 6, image 3 of 3
    • Using the heavy duty plastic spudger remove the four rubber caps.

    • Using a #2 Phillips head screwdriver, remove the four 11 mm screws inside each of the bases legs.

    • Pull the base straight up to remove it from the processor.

  7. Hamilton Beach 70740 Motor Replacement: step 7, image 1 of 3 Hamilton Beach 70740 Motor Replacement: step 7, image 2 of 3 Hamilton Beach 70740 Motor Replacement: step 7, image 3 of 3
    • Using a #2 Phillips head screwdriver, remove the four 9 mm screws.

    • From the open base pull the motor straight out.

  8. Hamilton Beach 70740 Motor Replacement: step 8, image 1 of 2 Hamilton Beach 70740 Motor Replacement: step 8, image 2 of 2
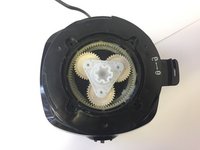
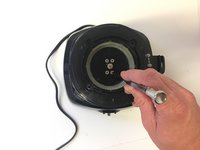
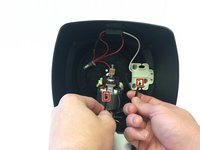
    • Using the wire stripper crimping tool cut the black wire connection from the power cord to the motor.

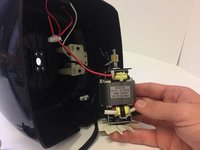
    • Using the wire stripper crimping tool strip the ends of each of the black cords and insert them into the opposite ends of a parallel connector, then crimp firmly.

    • Using the wire stripper crimping tool cut the four red wire connections from the switch to the motor and then rewire the four red wires together in a wiring connector cap.

    • Using the wire stripper crimping tool strip the ends of each red wire and insert them into a new wiring connector cap, then crimp firmly.

Conclusion

To reassemble your device, follow these instructions in reverse order.

One other person completed this guide.

Travis Williams

Member since: 02/02/17

552 Reputation

5 Guides authored

Team

USF Tampa, Team 17-4, Blackwell Spring 2017 Member of USF Tampa, Team 17-4, Blackwell Spring 2017

USFT-BLACKWELL-S17S17G4

3 Members

7 Guides authored

0 Comments

Add Comment

View Statistics:

Past 24 Hours: 0

Past 7 Days: 5

Past 30 Days: 22

All Time: 3,015