
Hamilton Beach 51101BA Motor Replacement

What you need

  1. Hamilton Beach 51101BA Motor Replacement, Rotor: step 1, image 1 of 3 Hamilton Beach 51101BA Motor Replacement, Rotor: step 1, image 2 of 3 Hamilton Beach 51101BA Motor Replacement, Rotor: step 1, image 3 of 3
    • Remove the container from the blender.

    • Hold the blender and the container, then twist the container in a clockwise motion.

    • Make sure to follow the lock and unlock markings on the container.

  2. Hamilton Beach 51101BA Motor Replacement: step 2, image 1 of 1
    • Turn the blender so the bottom is facing you.

    • Using a Phillips #2 screwdriver, remove the two 5 mm Phillips screws from the base.

  3. Hamilton Beach 51101BA Motor Replacement: step 3, image 1 of 1
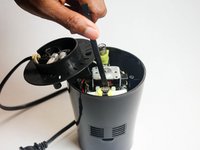
    • Using a Phillips #2 screwdriver, remove the two 5 mm Phillips screws from the motor platform.

  4. Hamilton Beach 51101BA Motor Replacement: step 4, image 1 of 1
    • Unhinge the plastic motor platform from the blender.

    • You may need a plastic spudger to unhinge the motor platform from the blender.

  5. Hamilton Beach 51101BA Motor Replacement: step 5, image 1 of 2 Hamilton Beach 51101BA Motor Replacement: step 5, image 2 of 2
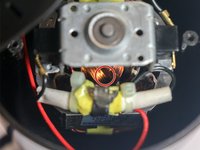
    • Using a spudger, carefully insert the tip into the coil of wire around motor.

    • This is used to hold the rotating piece of the motor still.

  6. Hamilton Beach 51101BA Motor Replacement: step 6, image 1 of 1
    • Remove the white rotor piece by rotating it counter-clockwise.

    • While rotating, make sure the rotating piece of the motor remains still.

  7. Hamilton Beach 51101BA Motor Replacement, Motor: step 7, image 1 of 2 Hamilton Beach 51101BA Motor Replacement, Motor: step 7, image 2 of 2
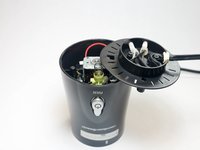
    • Move the motor platform to the side.

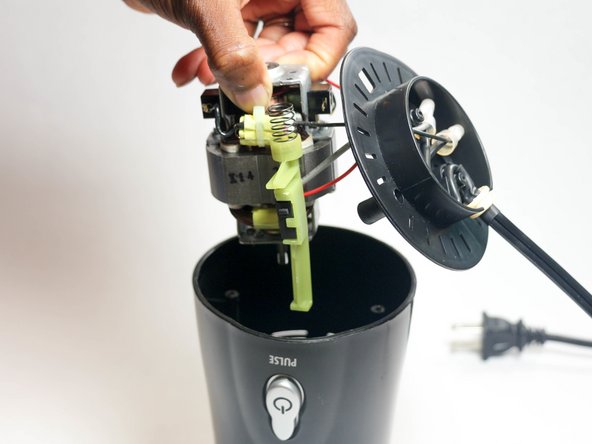
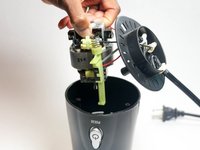
    • Lift up the motor and remove it from the blender.

  8. Hamilton Beach 51101BA Motor Replacement: step 8, image 1 of 1
    • Some soldering experience required!

    • Desolder the red wire from the green plastic piece.

  9. Hamilton Beach 51101BA Motor Replacement: step 9, image 1 of 1
    • Cut the thin black wire from the wire cap.

Conclusion

To reassemble your device, follow these instructions in reverse order.

Andrew Huff

Member since: 09/04/15

568 Reputation

3 Guides authored

Team

USF Tampa, Team 2-5, Sullivan Fall 2015 Member of USF Tampa, Team 2-5, Sullivan Fall 2015

USFT-SULLIVAN-F15S2G5

4 Members

5 Guides authored

2 Comments

This article appears to be unfinished. You cut 2 wires at the end... then what? Reconnecting them doesn't make any sense.

Geo Jack Jack - Reply

Que tipo de motor tengo que comprar?

hugoalex521 - Reply

Add Comment

View Statistics:

Past 24 Hours: 2

Past 7 Days: 20

Past 30 Days: 68

All Time: 6,795