Introduction
This guide will show you how to replace the Front Panel and gain access to the electronic circuit board and Power cord of the Brew Station. Be extra careful when unscrewing any screw and make sure the power is off.
What you need
-
-
This is what the bottom cover will look like. Flip the Brew Station upside down to easily access the screws.
 Ask FixBot
-
-
-
Using the Philips 2 Screwdriver, unscrew the three 8-mm screws labeled in a red outline.
-
Using the Crown Bolt #8 Steel Spanner, unscrew the two 8-mm screws labeled in a orange outline.
-
-
-
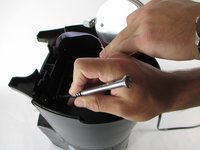
Carefully slide off the bottom drip tray by sliding it out away from the Brew Station.
-
-
-
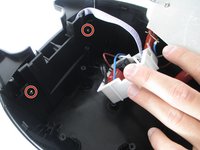
Using the Philips 2 Screwdriver, unscrew the two 8-mm screws labeled in a red outline.
-
-
-
-
Using the Philips 2 Screwdriver, unscrew the two 8-mm screws labeled in a red outline. This will release the bracket that is holding down the large piece in the middle.
-
-
-
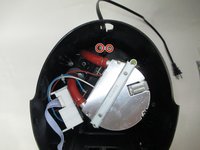
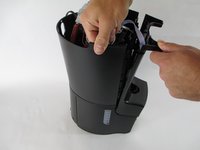
Using one hand, gently lift the large silver piece out of the base.
-
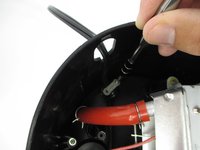
Using the Philips 2 Screwdriver, unscrew the two 8-mm screws labeled in a red outline.
-
-
-
Once the screw is out, gently lift the white circuit board out of the base. This will be where the power cord begins, so you will now have access to the full length of the cord.
-
-
-
Using one hand, hold all cords away from the front end of the Brew Station.
-
Using your other hand, use the Philips 2 Screwdriver to unscrew the two 8-mm screws labeled in a red outline. They are located inside the base on the front end of the Brew Station.
-
-
-
Once the screws from the previous step are out, you will be able to grab the bottom half of the Brew Station and lift it up.
-
Use one hand to lift up the bottom half of the Brew Station and use your other hand to unscrew the two 8-mm screws labeled in a red outline with a Phillips 2 Screwdriver.
-
-
-
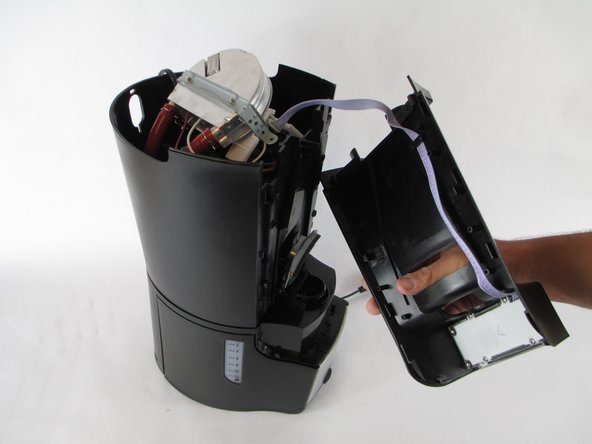
Hold the base of the Brew Station with one hand and hold the front panel with the other.
-
Gently pull the front panel away from the rest of the unit until it pulls away completely and is only attached by the purple wire.
-
-
-
Hold on to the front panel with one hand.
-
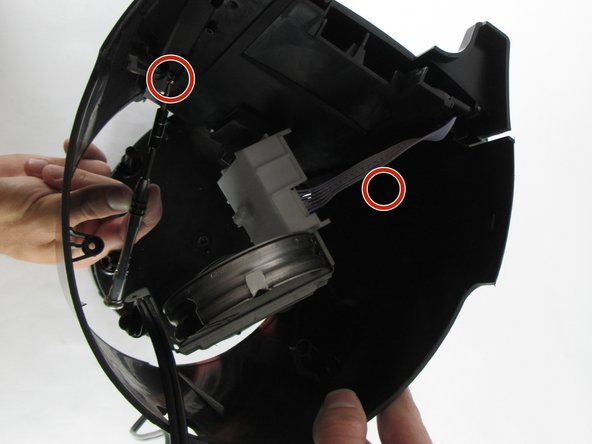
With your other hand, use the Philips 2 Screwdriver to unscrew the four 8-mm screws labeled in a red outline.
-
-
-
Once the screws are out, you can pull out the piece. This is the piece that holds the buttons located on the front panel.
-


To reassemble your device, follow these instructions in reverse order.
Cancel: I did not complete this guide.
2 other people completed this guide.
Team

USF Tampa, Team 14-1, Lacy Spring 2016 Member of USF Tampa, Team 14-1, Lacy Spring 2016
USFT-LACY-S16S14G1
4 Members
18 Guides authored