HTC One Mini Screen Replacement

Robbie and one other contributor
Last updated on Aug 12, 2014
Views: 38K
View statistics:
- Past 24 Hours:
- 3
- Past 7 Days:
- 25
- Past 30 Days:
- 83
- All Time:
- 37,747
Comments: 2
2 guide comments.
Go to guide commentsCompleted: 10 11
10 people have marked this guide "completed." Will you be next?
11 people have marked this guide "completed." Including you — great job!
Favorites: 15 16
15 people have favorited (and subscribed to) this guide. Will you be next?
16 people have favorited (and subscribed to) this guide — including you!
Needs Better Images
Better photos will improve this guide. Help out by taking, editing, or uploading new ones!
Markup Mishap
This guide needs better markups. Help out by correcting or making some markup annotations.
Community-Contributed Guide
An awesome member of our community made this guide. It was not created by iFixit staff.
Introduction
Go to step 1 ↓This guide will show you how to replace a cracked or damaged digitizer and lcd in your HTC One Mini
What you need
Parts

Tools
-
-
×2
-
-


-
-
-
Use your T6 Torx screwdriver to remove the single screw that holds the body to the aluminium back
-
-
-
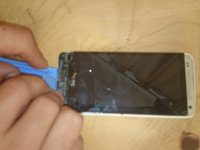
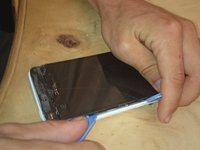
Use a plastic opening tool next to the usb port to gently lift the bottom away from the backing.
-
Use a second tool to work your way around the phone undoing the clips while the first tool lifts the undone areas
-
-
-
-
Use your heat gun and infra-red thermometer to heat the screen assembly to 130 degrees C (265 F) to soften the adhesive
-
Use opening tool to gently lift the edges of the screen away from the body working from the top down.
-
-
-
Undo the 2 Phillips screws circled in red and detach the battery connector (so we don't short anything out)
-
Undo the 3 screws holding down the bottom of the logic board and charger port circled in green
-
Undo the flex cables and speaker power cable circled in blue and lift the charger port out
-
Gently using a plastic opening tool lift out the bottom speaker
-
Also the rubber spacer circled in blue
-
Undo the flex cables circled in orange and slowly start pulling the old screen out
-
-
-
Remove any old adhesive and broken glass from the frame
-
Gently feed through the flex cables taking great care not to break them
-
-
-
Fold the screen away from the body keeping in mind not to damage the flex cables.
-
Add your strips of adhesive tape to the frame and put put the screen onto the body (I have highlighted the placement areas in blue)
-
Follow the steps in reverse for reassembly and use a couple of drops of super glue to put the front speaker cover back on
-

 Ask FixBot




To reassemble your device, follow these instructions in reverse order.
Cancel: I did not complete this guide.
10 other people completed this guide.