Introduction
Use this guide to replace a cracked front panel.
What you need
-
-
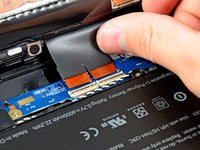
In the following steps, you will use a metal spudger to lift the front panel out from the rear case of your TouchPad.
 Ask FixBot
-
-
-
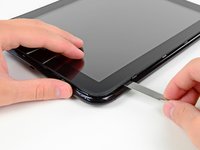
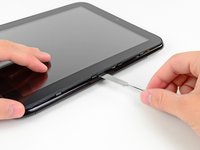
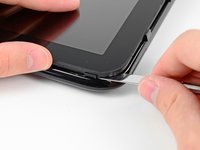
Insert a flat metal spudger in the gap between the rubber outer ring on the front panel assembly and the black plastic rear case near the USB connector.
-
Pry the front panel assembly up from the rear case, being careful not to damage the LCD or the glass panel.
-
-
-
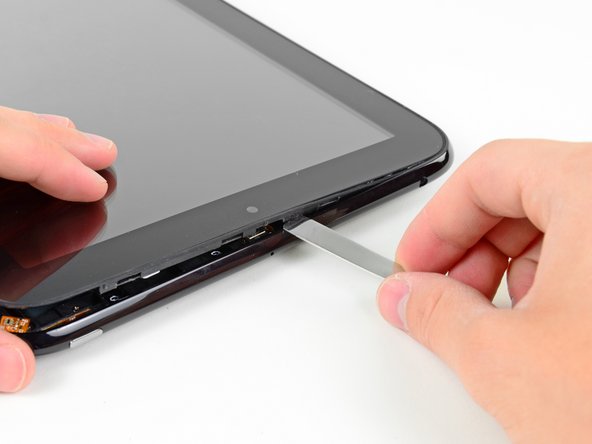
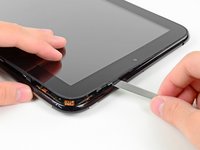
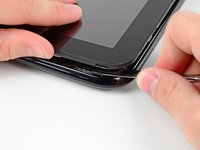
As in the previous step, use a spudger to pry the front panel up from the rear case along its long edge on the volume button side of the TouchPad.
-
Continue to pry the front panel assembly up along the volume button side of the TouchPad until there is a gap between it and the rear case.
-
-
-
-
Before lifting the free side of the front panel up from the rear case, you may need to release it from the plastic retaining clips holding it down.
-
Use your metal spudger to pull the stuck retaining clips away from the edge of the front panel.
-
-
-
After freeing the retaining clips, lift the front panel assembly away from the rear case.
-
-
-
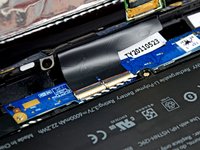
Use the attached black tab to pull the display data cable straight up and out of its socket on the motherboard.
-
-
-
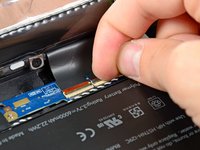
Use your fingernail to carefully flip up the retaining flaps on the two digitizer ribbon cable ZIF sockets.
-
Pull the digitizer ribbon cable straight out of its two sockets on the motherboard.
-
-
-
Remove the six 2.2 mm Phillips screws securing the LCD to the front panel.
-


To reassemble your device, follow these instructions in reverse order.
Cancel: I did not complete this guide.
22 other people completed this guide.

7 Guide Comments
The new glass touch panel I was able to purchase on ebay did not have the black plastic frame with the rubber gasket around it attached. It was just the glass with the interface cable attached. I had to use a Spudger to slide between the broken glass panel and the original plastic frame to separate them. They are stuck together by a very tough double sided sticky tape. After thoroughly cleaning the residual sticky tape from the plastic frame, I used gorilla glue epoxy to glue the plastic frame to to the new glass panel. It appears to be holding but I will know after a bit of use.
Wow, sounds like we are on parallel paths !
I just finished mine within 18 hours of yours, a process over several days.
I opted to use a silicone adhesive in case I needed to peel it back again.
But I removed the frame just as you have described.
I also taped off the button hole and camera hole to keep the silicone based glue off of that area while I spread it.
Be careful not to lose or damage that button as you separate the frame from the glass, and put it back when mounting/gluing the frame.
The silicone is a little high on the button side and the button is now recessed slightly, but still works. Also a word on the inside of the glass to protect it well during the process as you want it really clean when you marry it with the LCD.
Overall I'm happy with the recovery.
Good luck with yours !
does anyone know what to do in the event that some of the connectors break? Can I replace them? Is it even possible to find replacements?
Had 100% immersion in water so had to open up to dry out.
First off the tablet is hard to orient to the pictures above. In Step 1, the volume up down control is in the UPPER LEFT. Then in Step 2, the tablet is rotated clockwise 180 degrees and the volume up down control is in the BOTTOM RIGHT. The Step 1 diagram is best. Avoid the indicated sensitive areas!
Opening the unit requires significant force. All 7 clips were are destroyed. There is no way it goes back together without glue, sticky tape or some type of replacement clips.
I worked from the top of Step 1, cracking the top open first (4 clips) then the the sides (3 more clips) ALL WHILE LEAVING THE BOTTOM connected. You can only HINGE the top open about 20 degrees before you are stressing the cables (2 Ribbon) and one plug in. There is nowhere near enough slack in those cables to open top and bottom 180 degrees flat. If you "rip it open" there is a strong chance you will damage the ribbon cable and/or connector which are "light duty" to be sure!
...continued
Unit went 100% underwater, while on, 110 F, and was under for about 10 seconds max. Then powered off immediately. Attempted to blow out water by injecting air through case cut outs and draining through others. however that was incomplete. Screen still splotchy. On opening noted about 20 remaining droplets inside. Used more compressed air. Followed up with slight warming/drying with a hair dryer. Did NOT opt to remove the battery. All dry in about :20 min then reassemble. Ribbon cable highly problematic. Slight misalignment and fold downs are light duty at best. They don't lock in tight. Difficult to get both cables in and lids closed. Tried reusing clips but could not make any work. Currently have the unit with nothing holding it together. Tablet is functional but far from perfect. Screen often looks very faded with near zero contrast. Touch response questionable. Screen still splotchy. Yet that mostly resolves after a while, except for the splotchy when illuminated vs. black screen. :(