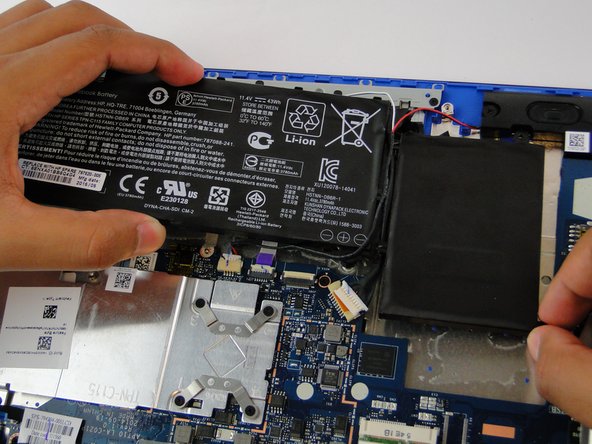
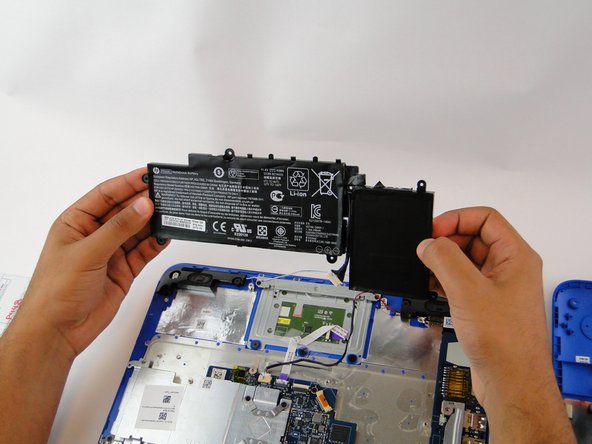
HP Stream x360 11-p010nr Battery Replacement

What you need

  1. HP Stream x360 11-p010nr Battery Replacement, Battery: step 1, image 1 of 3 HP Stream x360 11-p010nr Battery Replacement, Battery: step 1, image 2 of 3 HP Stream x360 11-p010nr Battery Replacement, Battery: step 1, image 3 of 3
    • First, make sure the laptop is completely powered off and not charging to avoid electric shock.

    • Flip the laptop upside down then remove the seven 6.5 mm screws using a JIS J0 screwdriver.

    • Also remove the two 8.5 mm JIS J0 screws near the hinge of the laptop.

    • Peel back the two rubber feet near the hinge of the laptop to reveal and remove two more 8.5 mm JIS J0 screws.

    • The rubber feet near the speakers have no screws.

  2. HP Stream x360 11-p010nr Battery Replacement: step 2, image 1 of 2 HP Stream x360 11-p010nr Battery Replacement: step 2, image 2 of 2
    • After removing all the screws, slowly and carefully lift the back cover, exposing the internal components.

    • Be careful not to damage the blue strip when opening the back case.

  3. HP Stream x360 11-p010nr Battery Replacement: step 3, image 1 of 3 HP Stream x360 11-p010nr Battery Replacement: step 3, image 2 of 3 HP Stream x360 11-p010nr Battery Replacement: step 3, image 3 of 3
    • Carefully detach the blue strip that connects the back cover to the internals.

    • Make sure the blue tab is facing upwards when reassembling.

  4. HP Stream x360 11-p010nr Battery Replacement: step 4, image 1 of 3 HP Stream x360 11-p010nr Battery Replacement: step 4, image 2 of 3 HP Stream x360 11-p010nr Battery Replacement: step 4, image 3 of 3
    • Using the JIS J0 screwdriver, unscrew the 6.5 mm screws surrounding the battery.

  5. HP Stream x360 11-p010nr Battery Replacement: step 5, image 1 of 1
    • Carefully remove the surrounding wire away from the battery

  6. HP Stream x360 11-p010nr Battery Replacement: step 6, image 1 of 3 HP Stream x360 11-p010nr Battery Replacement: step 6, image 2 of 3 HP Stream x360 11-p010nr Battery Replacement: step 6, image 3 of 3
    • Lastly, unhook the clip connecting the battery to the motherboard by pushing it away from the slot.

    • At this point, everything should be disconnected, simply remove the battery. Be sure to maneuver around the wire that runs between the middle of the battery.

Conclusion

To reassemble your device, follow these instructions in reverse order.

5 other people completed this guide.

Abdulaziz Alkulaib

Member since: 03/09/17

116 Reputation

1 Guide authored

Team

USF Tampa, Team S7-G4, Cagle Spring 2017 Member of USF Tampa, Team S7-G4, Cagle Spring 2017

USFT-CAGLE-S17S7G4

4 Members

1 Guide authored

0 Comments

Add Comment

View Statistics:

Past 24 Hours: 0

Past 7 Days: 4

Past 30 Days: 23

All Time: 3,758