
HP Spectre x360 13-aw0xxx Fan Assembly Replacement

What you need

  1. HP Spectre x360 13-aw0xxx Fan Assembly Replacement, Lower Case: step 1, image 1 of 2 HP Spectre x360 13-aw0xxx Fan Assembly Replacement, Lower Case: step 1, image 2 of 2
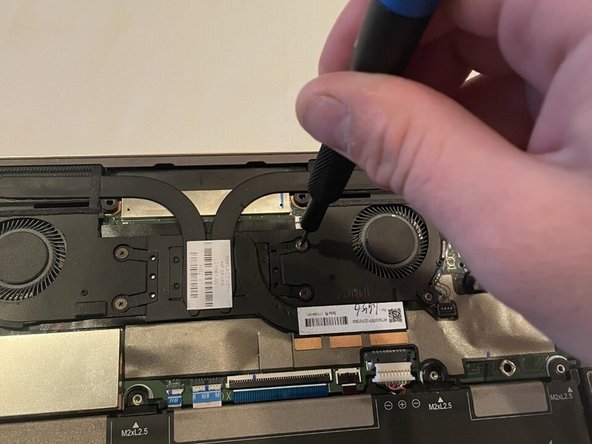
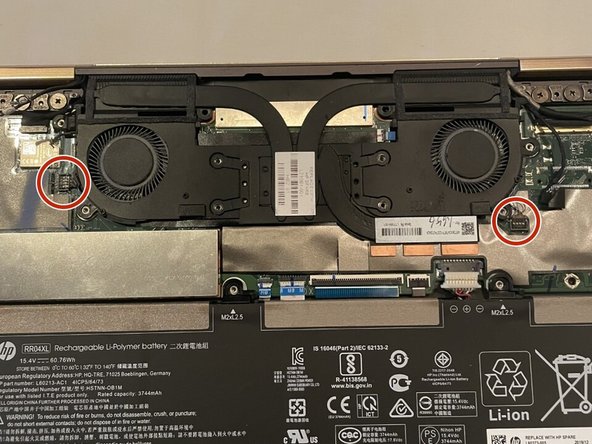
    • Remove the following screws securing the lower case:

    • Four Phillips #00 6 mm screws

    • Two T5 Torx 3 mm screws

  2. HP Spectre x360 13-aw0xxx Fan Assembly Replacement: step 2, image 1 of 1
    • Insert an opening tool in the seam between the lower case and chassis.

    • Pry around the perimeter until the lower case fully releases.

    • Remove the lower case.

  3. HP Spectre x360 13-aw0xxx Fan Assembly Replacement, Battery: step 3, image 1 of 2 HP Spectre x360 13-aw0xxx Fan Assembly Replacement, Battery: step 3, image 2 of 2
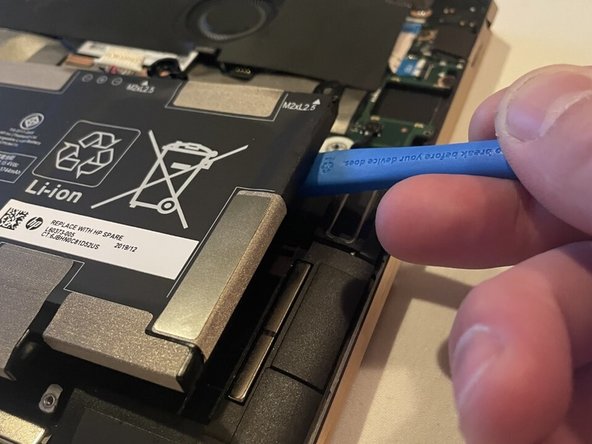
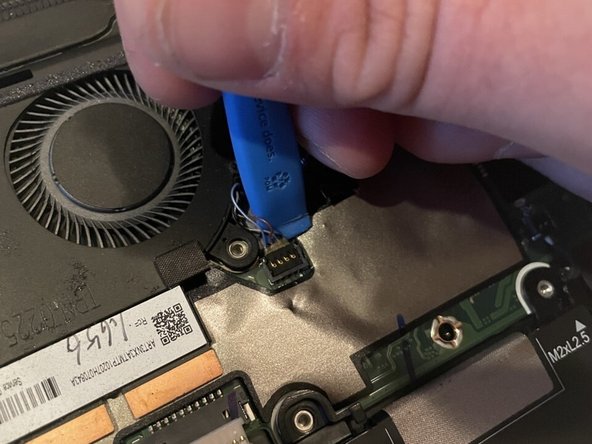
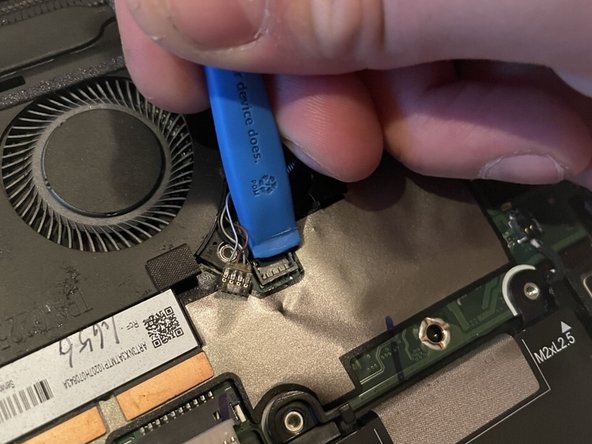
    • Use two opening tools, one on either side of the battery plug, to slowly pull the plug straight out of its port.

    • Alternatively, use your fingernails.

  4. HP Spectre x360 13-aw0xxx Fan Assembly Replacement: step 4, image 1 of 2 HP Spectre x360 13-aw0xxx Fan Assembly Replacement: step 4, image 2 of 2
    • Use a Phillips #00 screwdriver to remove the six 2.5 mm screws securing the battery.

  5. HP Spectre x360 13-aw0xxx Fan Assembly Replacement: step 5, image 1 of 2 HP Spectre x360 13-aw0xxx Fan Assembly Replacement: step 5, image 2 of 2
    • Carefully lift the edge of the battery with an opening tool.

    • Lift the battery up and out.

  6. HP Spectre x360 13-aw0xxx Fan Assembly Replacement, Fan Assembly: step 6, image 1 of 3 HP Spectre x360 13-aw0xxx Fan Assembly Replacement, Fan Assembly: step 6, image 2 of 3 HP Spectre x360 13-aw0xxx Fan Assembly Replacement, Fan Assembly: step 6, image 3 of 3
    • Remove the black film around the fans.

  7. HP Spectre x360 13-aw0xxx Fan Assembly Replacement: step 7, image 1 of 2 HP Spectre x360 13-aw0xxx Fan Assembly Replacement: step 7, image 2 of 2
    • Remove the two Wi-Fi card antenna wires using a small pry tool.

  8. HP Spectre x360 13-aw0xxx Fan Assembly Replacement: step 8, image 1 of 2 HP Spectre x360 13-aw0xxx Fan Assembly Replacement: step 8, image 2 of 2
    • Remove the eight 3 mm Phillips #00 screws securing the fan assembly.

  9. HP Spectre x360 13-aw0xxx Fan Assembly Replacement: step 9, image 1 of 3 HP Spectre x360 13-aw0xxx Fan Assembly Replacement: step 9, image 2 of 3 HP Spectre x360 13-aw0xxx Fan Assembly Replacement: step 9, image 3 of 3
    • Disconnect the two fan cables using a small pry tool.

    • Be sure not to rip the wires, as they are fragile. It may help to slightly pry on the fans while disconnecting the wires, so the pry bar has enough room.

  10. HP Spectre x360 13-aw0xxx Fan Assembly Replacement: step 10, image 1 of 2 HP Spectre x360 13-aw0xxx Fan Assembly Replacement: step 10, image 2 of 2
    • Use an opening tool to gently lift the edge of the fan assembly.

    • Lift the fan assembly up and out.

Conclusion

To reassemble your device, follow these instructions in reverse order.

0 Comments

Add Comment

View Statistics:

Past 24 Hours: 0

Past 7 Days: 0

Past 30 Days: 30

All Time: 356