Introduction
The HP Probook 640 G4 is a business class 14-inch laptop that is designed for durability. This guide will walk you through how to safely replace the SSD card. A failing SSD can cause slow boot times, frequent freezes and "disk nearly full" warnings. Replacing the SSD is the best way to extend your Probook's life.
Before you start, be sure to power the laptop off completely, unplug the AC adapter, and remove all external devices. Work on a clean flat surface. Make sure you have all of the right tools and parts available.
Before replacing your SSD, back up important files and make sure to never use metal tools to pry the SSD out.
If your laptop is experiencing slow boot times, frequent crashes, missing files, or failure to start, then replacing the SSD is often the fix.
What you need
-
-
Loosen the eight 2.5 mm-long Phillips captive screws securing the lower case.
-
-
-
-
Use a Phillips screwdriver to loosen the six 2.5 mm-long captive screws securing the battery.
-
Slide and lift the battery out.
-
-
-
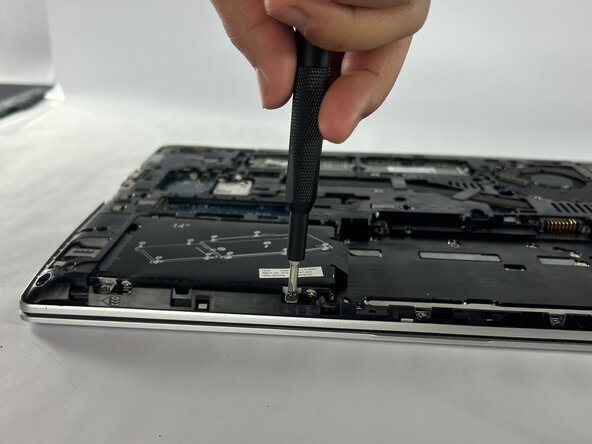
Loosen the four captive 2.5 mm-long Phillips screws securing the SSD.
-
Grip the SSD and slide it out while lifting up.
-


To reassemble your device, follow these instructions in reverse order.

Team

UMass Dartmouth, Team 1-5, Botvin Fall 2025 Member of UMass Dartmouth, Team 1-5, Botvin Fall 2025
UMASSD-BOTVIN-F25S1G5
3 Members
7 Guides authored