Introduction
The HP ProBook 470 G0 is a nice specimen of early 2010 desktop replacements.
After all these years usually the thermal paste has become brittle and cake-like so it must be replaced.
This guide shows how to disassemble the ProBook 470 G0 down to the motherboard.
What you need
-
-
-
Start by turning the notebook on its back.
-
Slide the two latches towards each other to first remove the battery.
-
Slide the latches again while pulling the backcover down to expose the innards of the device.
 Ask FixBot
-
-
-
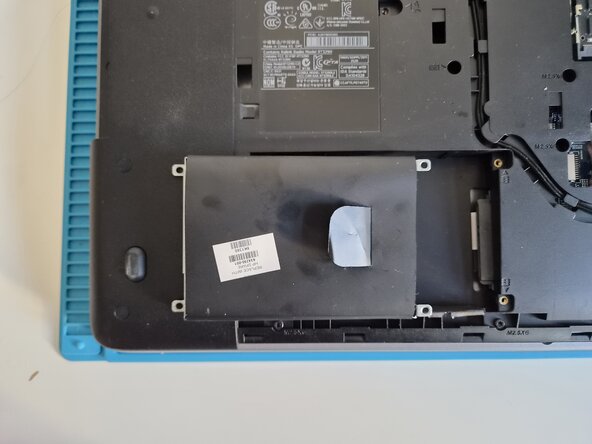
Unscrew the four screws of the hard drive or ssd as well as the DVD drive.
-
Slide the DVD drive out of the case which will expose two screws we will have to take care of soon.
-
Slide the hard disk or ssd away from the connector and lift it out of the case.
-
-
-
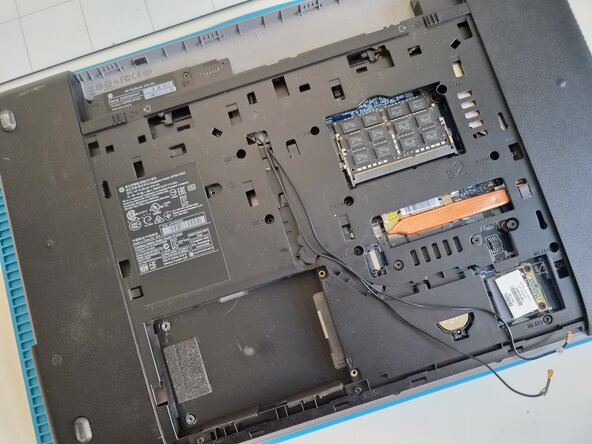
Locate the wifi card in the lower right of the case next to the BIOS battery.
-
Lift off the brass connectors carefully using your fingernails, a spudger or jimmy knife.
-
The wifi card may stay in place as you do not have to remove it from the motherboard to remove the motherboard itself.
-
-
-
On the back you will find two screw holes with a keyboard symbol which have to be removed.
-
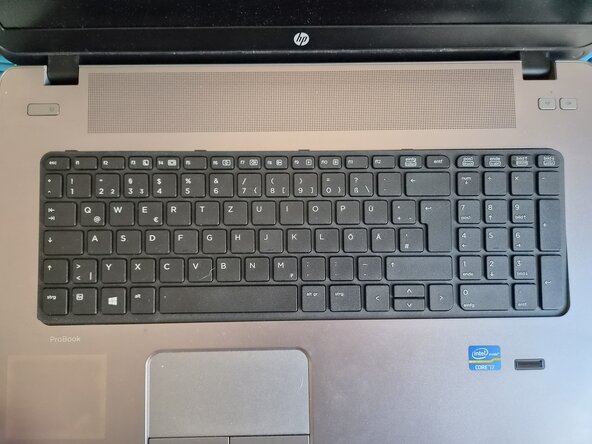
Turn the notebook around, open the display and find that the keyboard can now be wiggled around. Pull it down a bit and use a spudger to lift it out.
-
Be careful not just to rip it out as it is still connected by a large ribbon connector.
-
-
-
You will have to unplug several ribbon cables on the side now. This is fairly easy - look for the black lever on each connector and lift it up carefully using a spudger or your fingernails.
-
Remove the large keyboard ribbon cable if not already done and then proceed with the other marked connectors.
-
Make sure all ribbons are disconnected by placing them on top of their connectors.
-
-
-
-
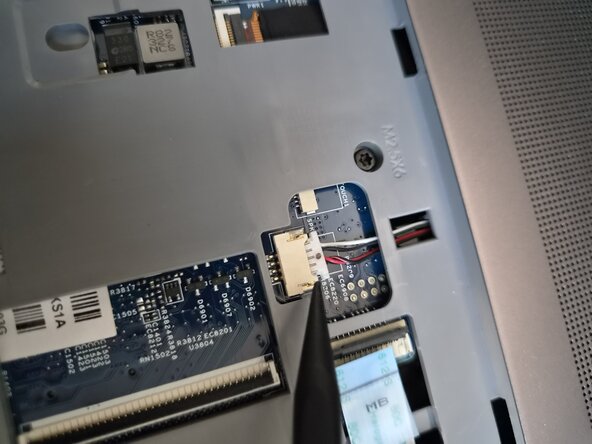
The last connector on this side must be pulled out in the direction of its cable.
-
Be very careful and do not pull by the cables but use a spudger or a toothpick for example to wiggle the plug out of the socket.
-
-
-
Close the screen lid and turn the notebook on its back again.
-
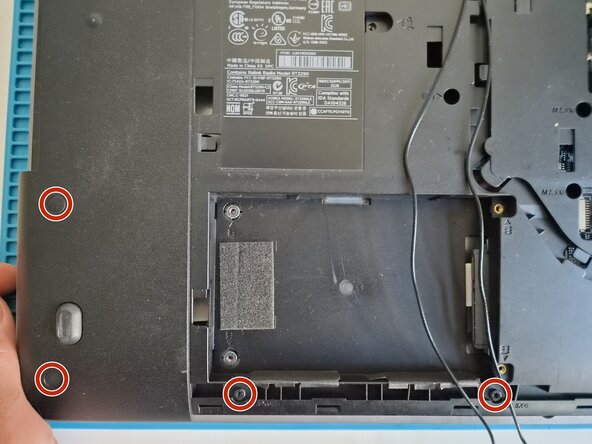
Now you will have to remove copious amounts of screws on the back.
-
Do not forget the screws which are hard to locate in the battery compartment.
-
-
-
If you have wondered about the rubber bits - yes they have to come out.
-
You can use a needle or pincers to remove the rubber seals and unscrew the torx screws hidden under them.
-
-
-
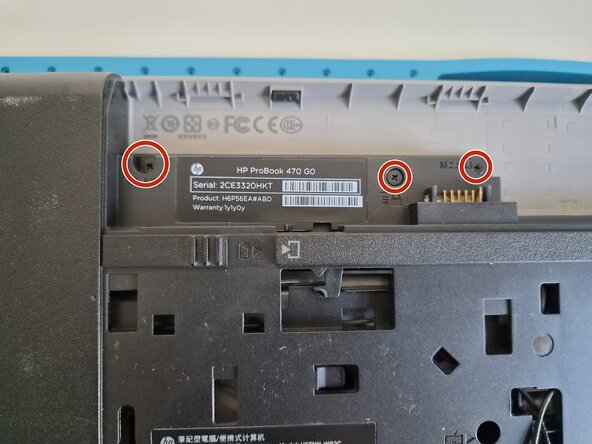
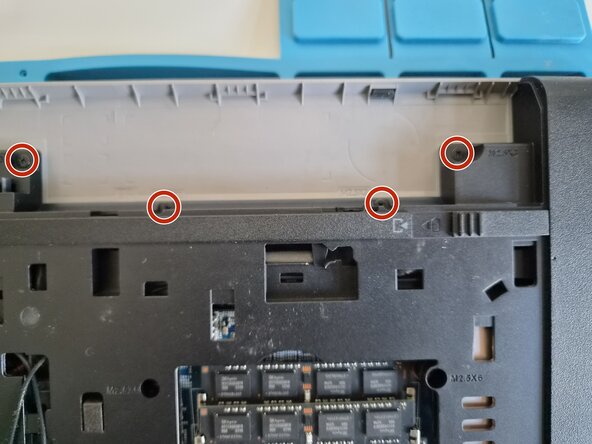
Remember the two screws under the dvd drive? Now is the chance to remove them.
-
The red circles show the location of the outer case screws you will have to remove.
-
-
-
Open the notebook slightly and place it on its side then use a guitar pick and start by the trackpad and insert it between the grey and black shell parts.
-
Move the guitar pick gently around the shell, dislodging the upper part piece by piece.
-
Note the last hidden ribbon cable and unplug it before proceeding.
-
-
-
Place the notebook firmly on the ground and then lift up the C-cover to the display.
-
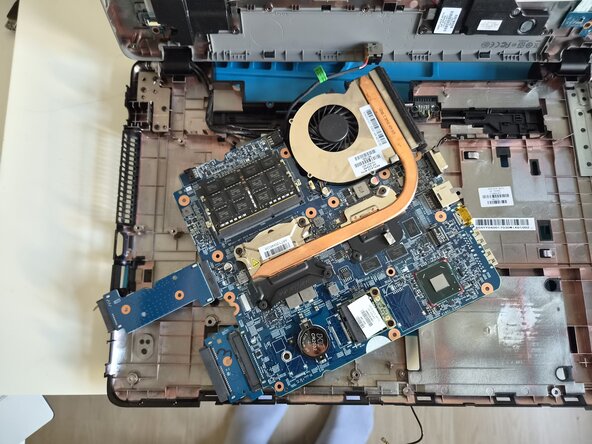
The motherboard is now visible in all its glory - only few screws are left to remove.
-
Now would be a good time to remove the display connector ribbon cable.
-
-
-
There are several screws from daughter boards and two on the motherboard itself you will have to remove in order to free the motherboard.
-
The plug connecting the battery to the mainboard can be pulled out very carefully by the black sheath.
-
It is best to give the power supply connector some room before going on.
-
-
-
With all connectors and screws removed you may pull the motherboard to the right.
-
Look at all the screws we gathered. Its probably best to use a magnetic mat and align the screws as you found them in the ProBook.
-
-
-
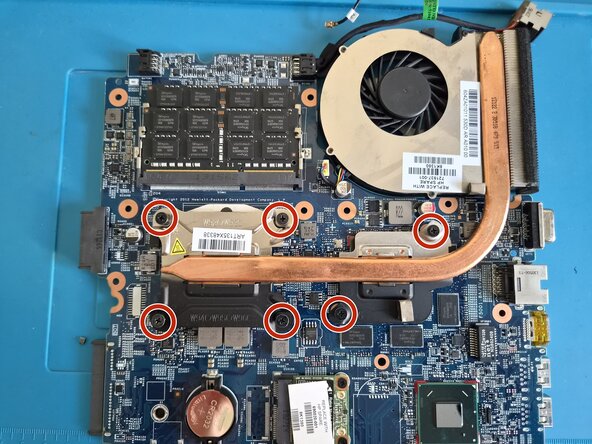
Place the board somewhere safe and remove six screws from the heat pipe.
-
It is best to unscrew cross-wise (top left, bottom right, bottom left, top right) especially when putting the board together because the DIE of the GPU and CPU are exposed, not protected by a heat spreader and could easily crack when applying too much force on one side.
-
Clean up the old thermal compound on the GPU and CPU as well as the heat sink with rubbing alcohol.
-
If your fan is clogged with dust now is the time to clean it up as well.
-
-


















To reassemble your device, follow these instructions in reverse order.
You want to make sure the device works before reseating all the screws. Place the mainboard back in the case, connect the ribbon cables back and give it a thorough test drive before.

