
HP ProBook 4540s Optical Drive Replacement

Amber Schindler and 2 other contributors
Last updated on Dec 22, 2016
Views: 3.1K
View statistics:
- Past 24 Hours:
- 2
- Past 7 Days:
- 17
- Past 30 Days:
- 85
- All Time:
- 3,128
Comments: 0
No one has left comments on this guide. Will you be first?
Go to guide commentsCompleted: 3 4
3 people have marked this guide "completed." Will you be next?
4 people have marked this guide "completed." Including you — great job!
Favorites: 0 1
No one has favorited (and subscribed to) this guide. Will you be the first?
1 person has favorited (and subscribed to) this guide — and that's you!
Introduction
Go to step 1 ↓This guide will help you replace the optical drive, otherwise known as the CD drive. Be sure that no disks are within the drive before replacing the drive.
What you need
Tools

-
-
-
Slide the two release latches on either side of the battery.
-
Gently tilt the battery upward and remove it from its socket.
 Ask FixBot
-
-
-
-
-
Turn the computer so the bottom is facing towards you.
-
Remove the one 3.0 mm Phillips PM2.0x3.0 security screw.
-
Slide the release latches then pull the door towards you. Lift the door away to completely remove it.
-
-
-
-
-
-
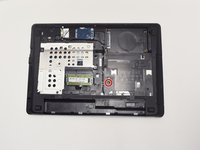
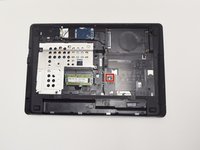
Remove one 6.0 mm Phillips PM2.5x6.0 screw that is securing the optical drive.
-
-
-
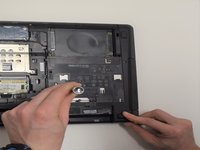
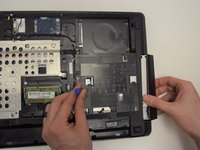
Press the optical drive tab to release the drive component.
-
Gently pull and remove the component from the computer.
-
-




To reassemble your device, follow these instructions in reverse order.
Cancel: I did not complete this guide.
3 other people completed this guide.

Team

UW Tacoma, Team 1-5, Rose Fall 2016 Member of UW Tacoma, Team 1-5, Rose Fall 2016
UWT-ROSE-F16S1G5
4 Members
72 Guides authored
