
HP ProBook 4520s Hard Drive to SSD Replacement

What you need

  1. HP ProBook 4520s Hard Drive to SSD Replacement, Battery: step 1, image 1 of 2 HP ProBook 4520s Hard Drive to SSD Replacement, Battery: step 1, image 2 of 2
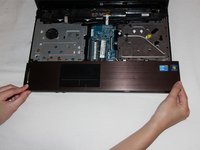
    • Flip the 4520s upside-down with the front toward you.

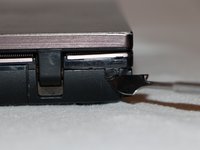
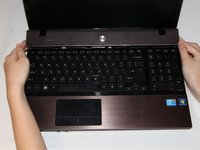
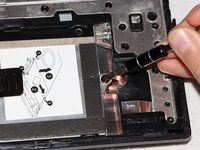
    • Push the two latches below the battery inwards at the same time.

  2. HP ProBook 4520s Hard Drive to SSD Replacement: step 2, image 1 of 1
    • Remove the battery by holding the latches and sliding the battery away from you.

  3. HP ProBook 4520s Hard Drive to SSD Replacement, Switch Cover: step 3, image 1 of 2 HP ProBook 4520s Hard Drive to SSD Replacement, Switch Cover: step 3, image 2 of 2
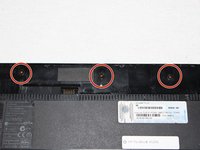
    • Use a Phillips #1 screwdriver to remove three 2mm screws where the battery was located.

  4. HP ProBook 4520s Hard Drive to SSD Replacement: step 4, image 1 of 2 HP ProBook 4520s Hard Drive to SSD Replacement: step 4, image 2 of 2
    • Flip the 4520s over and rotate it so the back is facing you.

    • Use a metal spudger to peel off two rubber caps located on either side of the battery port.

  5. HP ProBook 4520s Hard Drive to SSD Replacement: step 5, image 1 of 1
    • Use a Phillips #1 screwdriver to remove the 3mm screws behind the caps.

  6. HP ProBook 4520s Hard Drive to SSD Replacement: step 6, image 1 of 3 HP ProBook 4520s Hard Drive to SSD Replacement: step 6, image 2 of 3 HP ProBook 4520s Hard Drive to SSD Replacement: step 6, image 3 of 3
    • Rotate the 4520s and then open it with the screen facing you.

    • The switch cover is located above the keyboard. Push the switch cover away from you until it comes loose from the 4520s.

    • Lift the switch cover away from the 4520s and set it aside.

  7. HP ProBook 4520s Hard Drive to SSD Replacement, Keyboard: step 7, image 1 of 2 HP ProBook 4520s Hard Drive to SSD Replacement, Keyboard: step 7, image 2 of 2
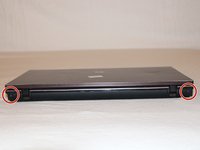
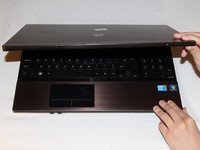
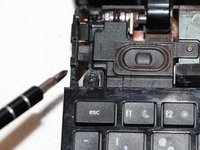
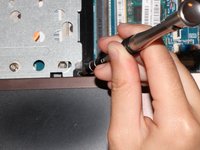
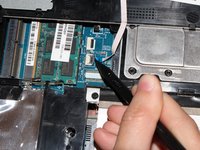
    • Use a Phillips #1 screwdriver to remove the two 7mm screws located on either side of the keyboard panel.

  8. HP ProBook 4520s Hard Drive to SSD Replacement: step 8, image 1 of 1
    • Slide the keyboard panel away from you to free it from the 4520s.

    • Do not yank the keyboard panel away from the 4520s. This may damage the cable.

  9. HP ProBook 4520s Hard Drive to SSD Replacement: step 9, image 1 of 2 HP ProBook 4520s Hard Drive to SSD Replacement: step 9, image 2 of 2
    • Gently raise up the keyboard and flip it over to reveal a ribbon cable.

    • Release the ribbon cable by carefully lifting the black tab upwards, one side at a time.

    • Remove the cable and lift the keyboard panel up. Set it aside.

    • When reassembling, feed the ribbon cable into the port. Press down on the tab to pinch the cable in place.

  10. HP ProBook 4520s Hard Drive to SSD Replacement, Palm Rest: step 10, image 1 of 2 HP ProBook 4520s Hard Drive to SSD Replacement, Palm Rest: step 10, image 2 of 2
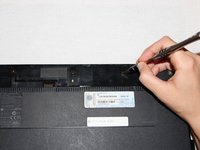
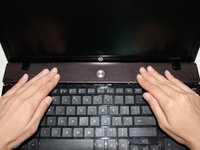
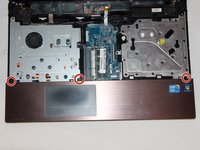
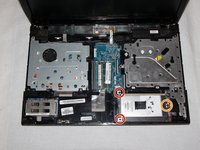
    • Use a Phillips #1 screwdriver to remove the three 3mm screws along the top of the palm rest.

  11. HP ProBook 4520s Hard Drive to SSD Replacement: step 11, image 1 of 2 HP ProBook 4520s Hard Drive to SSD Replacement: step 11, image 2 of 2
    • Slide the palm rest to the right to release it and then rotate it back gently.

    • Do not yank the palm rest away from the 4520s. This may damage the cable.

  12. HP ProBook 4520s Hard Drive to SSD Replacement: step 12, image 1 of 2 HP ProBook 4520s Hard Drive to SSD Replacement: step 12, image 2 of 2
    • Release the ribbon cable by opening the black hinge on the port using a spudger.

    • Remove the cable and set the palm rest aside.

  13. HP ProBook 4520s Hard Drive to SSD Replacement, Hard Drive to SSD: step 13, image 1 of 3 HP ProBook 4520s Hard Drive to SSD Replacement, Hard Drive to SSD: step 13, image 2 of 3 HP ProBook 4520s Hard Drive to SSD Replacement, Hard Drive to SSD: step 13, image 3 of 3
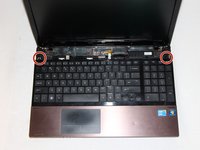
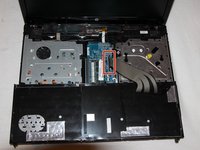
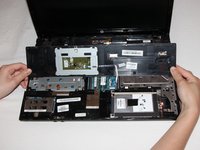
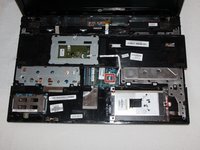
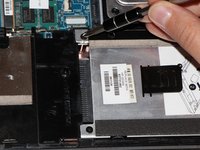
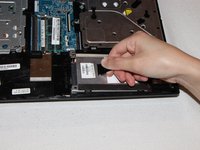
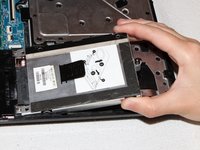
    • The hard drive is contained in the housing on the lower right.

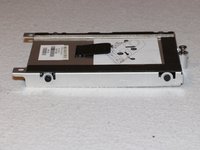
    • Remove two 5mm screws on the left using a Phillips #1 screwdriver.

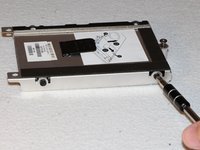
    • Fully loosen the captive screw on the right using a Phillips #1 screwdriver.

  14. HP ProBook 4520s Hard Drive to SSD Replacement: step 14, image 1 of 2 HP ProBook 4520s Hard Drive to SSD Replacement: step 14, image 2 of 2
    • Disconnect the hard drive by pulling the tab to the right.

    • Lift the housing out from the 4520s.

  15. HP ProBook 4520s Hard Drive to SSD Replacement: step 15, image 1 of 2 HP ProBook 4520s Hard Drive to SSD Replacement: step 15, image 2 of 2
    • Use a Phillips #1 screwdriver to remove the four 3mm screws on the sides of the housing.

  16. HP ProBook 4520s Hard Drive to SSD Replacement: step 16, image 1 of 1
    • Lift the housing away from the hard drive.

    • The hard drive is 2.5".

Conclusion

To reassemble your device, follow these instructions in reverse order.

57 other people completed this guide.

May Lin

Member since: 09/21/16

897 Reputation

1 Guide authored

Team

UC Davis, Team 1-3, Oliver Fall 2016 Member of UC Davis, Team 1-3, Oliver Fall 2016

UCD-OLIVER-F16S1G3

5 Members

8 Guides authored

5 Guide Comments

is it 2.5" HDD ?

Bf Soldier - Reply

Yes. I should have included that.

Robert Spencer Harrison -

Thank you so much lol

You taught me that i didn’t have to throw and break this darn machine to get the hard drive out :P

M

Maria Sergent - Reply

Thank you!

This guide works well for the 4320s as well, though there are a few small differences.

The battery compartment has 4 screws and there are none on the back.

The keyboard is held by 4 screws.

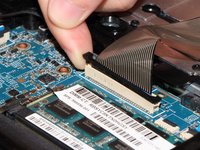
The touchpad has the same type of connector as the keyboard.

The hard drive cage is held by a #1 Philips and two #0 Philips instead of #1.

Carl - Reply

Thank you kindly for such a easy to follow step by step tutorial. Never thought this rooky would be able to repair my own laptop

You guys rock

Eugene B - Reply

Add Comment

View Statistics:

Past 24 Hours: 2

Past 7 Days: 19

Past 30 Days: 131

All Time: 41,012