What you need
-
-
Carefully remove the main battery.
-
Locate the screw on the bottom side.
-
Unscrew and remove it.
-
Carefully take off the two plastic covers.
 Ask FixBot
-
-
-
Locate the three screws marked with a keyboard icon next to them.
-
Carefully unscrew and remove each of them.
-
Take a thin, flat tool, such as a guitar pick.
-
Gently insert it at the top edge of the keyboard.
-
Carefully slide it along the edge until the keyboard starts to lift or "pop" out.
-
Do not immediately pull out the keyboard.
-
Carefully locate and detach the keyboard cable connecting it to the motherboard.
-
-
-
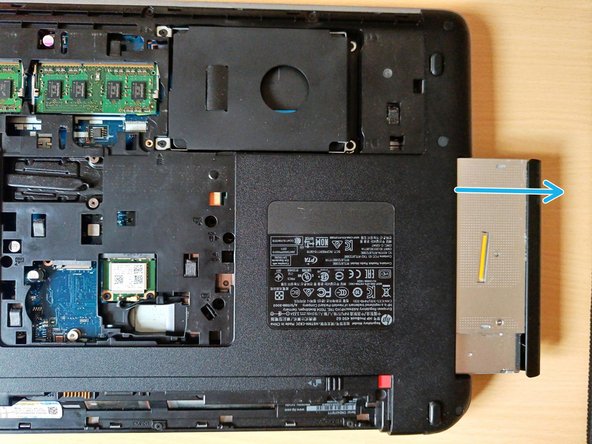
Locate the screw marked with a CD icon next to it.
-
Carefully unscrew and remove it.
-
Carefully pull out the CD-DVD unit.
-
-
-
-
Locate the four screws marked.
-
Carefully unscrew and remove each of them.
-
Slide the disk to the right and then carefully pull it out.
-
-
-
On the bottom locate the 11 (M2.5x3) screws marked and 2 (M2.5x6) - picture 1.
-
Carefully unscrew and remove each of them.
-
On the bottom locate the 6 (M2.5x6) screws hidden under the rubbers - picture 2.
-
Under the keyboard locate the 3 (M2.5x6) screws.
-
Carefully unscrew and remove each of them.
-
Detach all cables connected to the motherboard.
-
-
-
Carefully separate the covers.
-
Be aware that there is an additional cable underneath. Detach this cable with caution.
-
-
-
Locate the five screws marked.
-
Carefully unscrew and remove each of them.
-
Detach all cables connected to the motherboard.
-
To more easily access and detach the cables, gently pull out the motherboard a bit.
-
-
-
Locate the six screws marked.
-
Carefully unscrew and remove each of them.
-
Now you can take off cooling pipe and clean it.
-


To reassemble your device, follow these instructions in reverse order.
Cancel: I did not complete this guide.
3 other people completed this guide.
