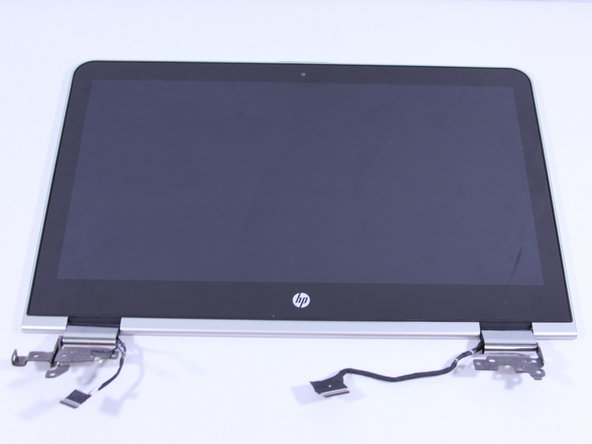
HP Pavilion x360 m3-u001dx Display Replacement

What you need

  1. HP Pavilion x360 m3-u001dx Display Replacement, Keyboard: step 1, image 1 of 1
    • Shut down the computer.

    • Disconnect the power and all external devices connected to the computer.

    • Working on your device while it is turned on may result in electric shock.

  2. HP Pavilion x360 m3-u001dx Display Replacement: step 2, image 1 of 2 HP Pavilion x360 m3-u001dx Display Replacement: step 2, image 2 of 2
    • Use a Metal Spudger and remove the rubber foot closet from the bottom of the laptop.

  3. HP Pavilion x360 m3-u001dx Display Replacement: step 3, image 1 of 1
    • Remove all of the screws located on the bottom of the laptop:

    • 5 Phillips 2.4 x 5.7 mm screws

    • 5 Phillips 2.0 x 5.0 mm screws

    • Make special note of each screw and screw lock size and location during removal and replacement.

  4. HP Pavilion x360 m3-u001dx Display Replacement: step 4, image 1 of 1
    • Turn the computer over onto its base, with the computer open and the keyboard facing upward.

  5. HP Pavilion x360 m3-u001dx Display Replacement: step 5, image 1 of 2 HP Pavilion x360 m3-u001dx Display Replacement: step 5, image 2 of 2
    • The keyboard is attached internally by clips. Use a small amount of force when removing the keyboard.

    • Use the Plastic Opening Tool to separate the keyboard from the base of the laptop.

  6. HP Pavilion x360 m3-u001dx Display Replacement: step 6, image 1 of 1
    • Raise the keyboard slightly to access the touch pad and keyboard cables.

    • Raising the keyboard too far or with excessive force may cause damage to the keyboard, touch pad cables, or their connectors.

  7. HP Pavilion x360 m3-u001dx Display Replacement: step 7, image 1 of 1
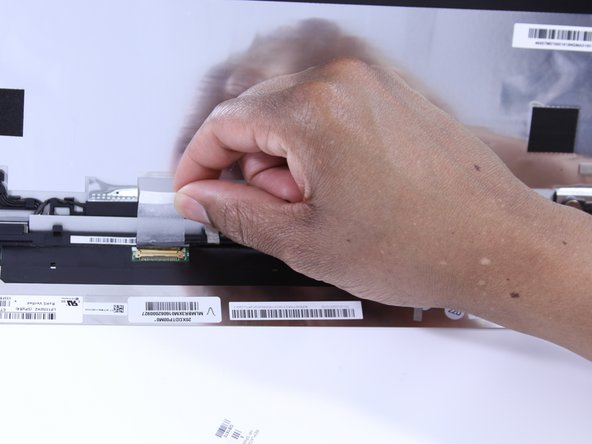
    • Disconnect the ribbon cables attaching the touch pad and keyboard to the system board (motherboard).

    • Using the Heavy-Duty Spudger lift up the plastic locks connecting the ribbon cable to the motherboard.

    • Use the blue plastic tab on the ribbon cable to pull it out from the lock on the motherboard.

  8. HP Pavilion x360 m3-u001dx Display Replacement: step 8, image 1 of 1
    • Lift the keyboard away from the base of the laptop.

  9. HP Pavilion x360 m3-u001dx Display Replacement, Battery: step 9, image 1 of 1
    • Using the Phillips 00 Screwdriver, remove 6 Phillips 2.0 x 4.6 mm screws from the perimeter of the battery.

    • Make special note of each screw and screw lock size and location during removal and replacement.

  10. HP Pavilion x360 m3-u001dx Display Replacement: step 10, image 1 of 1
    • Carefully lift the battery up from lower right corner and disconnect it from the motherboard.

  11. HP Pavilion x360 m3-u001dx Display Replacement, USB Port Shield: step 11, image 1 of 3 HP Pavilion x360 m3-u001dx Display Replacement, USB Port Shield: step 11, image 2 of 3 HP Pavilion x360 m3-u001dx Display Replacement, USB Port Shield: step 11, image 3 of 3
    • (You don't NEED to remove this shielding as you can remove the board with it still there.)

    • Remove the adhesive strip.

    • Lift the shield away from the base of the laptop.

  12. HP Pavilion x360 m3-u001dx Display Replacement, System Board (Motherboard): step 12, image 1 of 3 HP Pavilion x360 m3-u001dx Display Replacement, System Board (Motherboard): step 12, image 2 of 3 HP Pavilion x360 m3-u001dx Display Replacement, System Board (Motherboard): step 12, image 3 of 3
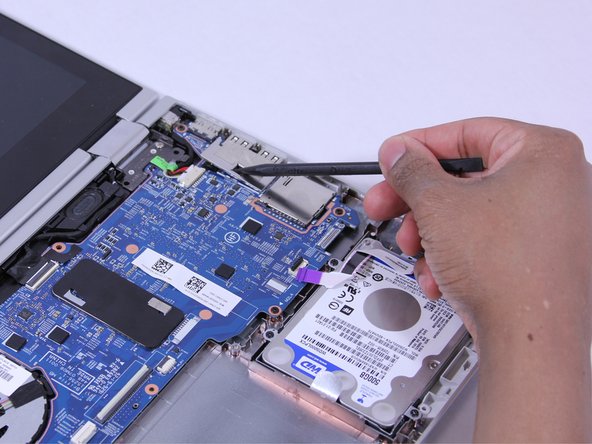
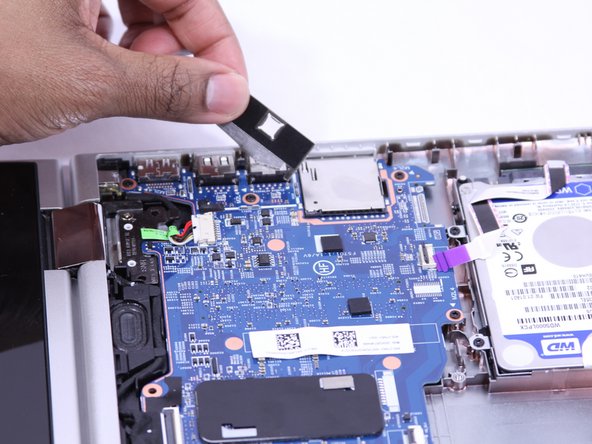
    • Disconnect the ribbon cables attached to the system board (motherboard).

    • Using the Heavy-Duty Spudger lift up the plastic locks connecting the ribbon cable to the motherboard.

    • Use the plastic tab on the ribbon cable to pull it out from the lock on the motherboard.

  13. HP Pavilion x360 m3-u001dx Display Replacement: step 13, image 1 of 2 HP Pavilion x360 m3-u001dx Display Replacement: step 13, image 2 of 2
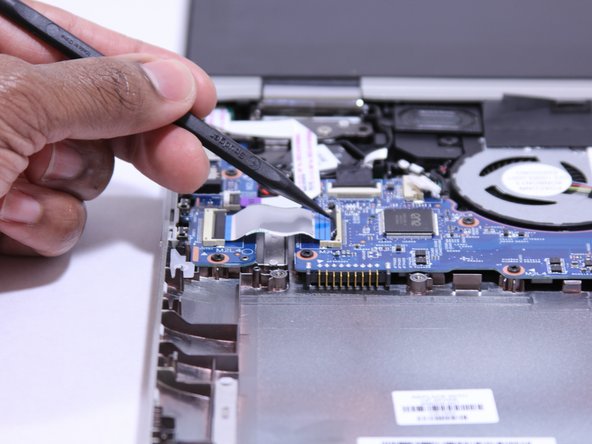
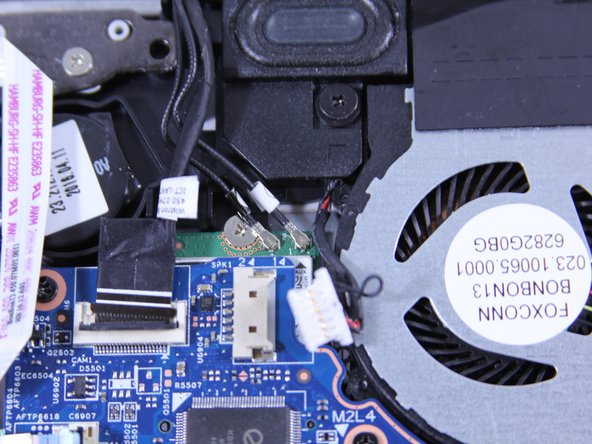
    • Disconnect the fastened cables from the system board (motherboard) by carefully pushing the cable's plastic edges using the Heavy Duty Spudger.

  14. HP Pavilion x360 m3-u001dx Display Replacement: step 14, image 1 of 2 HP Pavilion x360 m3-u001dx Display Replacement: step 14, image 2 of 2
    • Pull the clipped cables from system board (motherboard).

  15. HP Pavilion x360 m3-u001dx Display Replacement: step 15, image 1 of 3 HP Pavilion x360 m3-u001dx Display Replacement: step 15, image 2 of 3 HP Pavilion x360 m3-u001dx Display Replacement: step 15, image 3 of 3
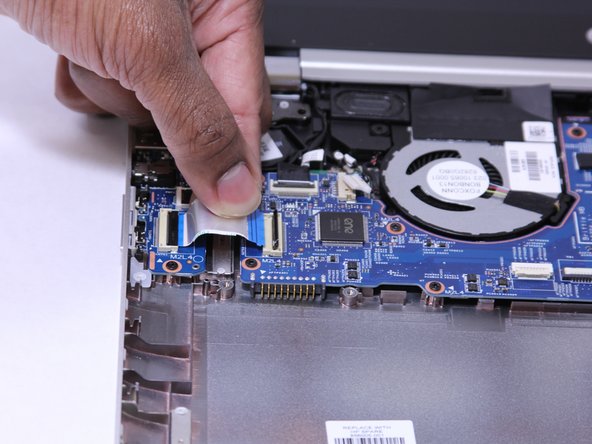
    • Remove the system board (motherboard).

    • Using the Phillips 00 Screw Driver, remove 9 Phillips 2.0 x 4.7 mm screws with "M2L4" next to them.

    • Using the Phillips 00 Screw Driver, remove the silver screw.

    • Make special note of each screw and screw lock size and location during removal and replacement.

  16. HP Pavilion x360 m3-u001dx Display Replacement: step 16, image 1 of 1
    • Carefully lift the front side of the system board (motherboard).

  17. HP Pavilion x360 m3-u001dx Display Replacement: step 17, image 1 of 1
    • Using a Heavy Duty Spudger, disconnect the black and red RTC battery cable on the left side of the system board (motherboard).

  18. HP Pavilion x360 m3-u001dx Display Replacement: step 18, image 1 of 1
    • Release the system board (motherboard) from the base enclosure.

    • Place the motherboard somewhere safe since it is the most delicate and expensive part of the laptop.

  19. HP Pavilion x360 m3-u001dx Display Replacement, Display: step 19, image 1 of 1
    • Using the Phillips 00 Screw Driver, remove 5 Phillips 2.5 x 4.2 screws from the hinges from the laptop's base.

    • Make special note of each screw and screw lock size and location during removal and replacement.

  20. HP Pavilion x360 m3-u001dx Display Replacement: step 20, image 1 of 2 HP Pavilion x360 m3-u001dx Display Replacement: step 20, image 2 of 2
    • Gently pull the display away from the base panel to unhinge.

  21. HP Pavilion x360 m3-u001dx Display Replacement: step 21, image 1 of 1
    • Use a Metal Spudger to pry the display panel from the outer casing.

    • Start from the top of the display panel and move along the edges and do not to push the metal spudger too far into the screen.

    • Be cautious not to apply heavy pressure to the display panel. This could damage the touch screen.

  22. HP Pavilion x360 m3-u001dx Display Replacement: step 22, image 1 of 1
    • Open the display panel to expose the connecting cables.

    • Open carefully to avoid causing damage to the connecting cables.

  23. HP Pavilion x360 m3-u001dx Display Replacement: step 23, image 1 of 2 HP Pavilion x360 m3-u001dx Display Replacement: step 23, image 2 of 2
    • Peel off the adhesive tape and remove the connected cable from the screen.

  24. HP Pavilion x360 m3-u001dx Display Replacement: step 24, image 1 of 2 HP Pavilion x360 m3-u001dx Display Replacement: step 24, image 2 of 2
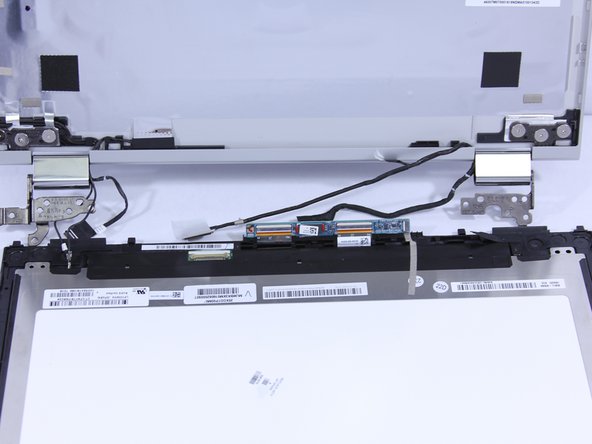
    • Lift the circuit board out of the way to expose the wire underneath. Remove the wire from the base of the laptop.

_ thinhh@uw.edu

Member since: 02/01/17

297 Reputation

2 Guides authored

Team

UW Tacoma, Team 1-6, Rose Winter 2017 Member of UW Tacoma, Team 1-6, Rose Winter 2017

UWT-ROSE-W17S1G6

4 Members

8 Guides authored

View Statistics:

Past 24 Hours: 1

Past 7 Days: 7

Past 30 Days: 19

All Time: 7,255