Introduction
This guide is specifically prepared for HP Pavilion dv7-6c96dx laptops. It provides step-by-step instructions to replace the laptop's HDD / SSD. For this repair, you do not need any previous hands-on experience in laptop repairs, the guide is specially organized for non-experienced users.
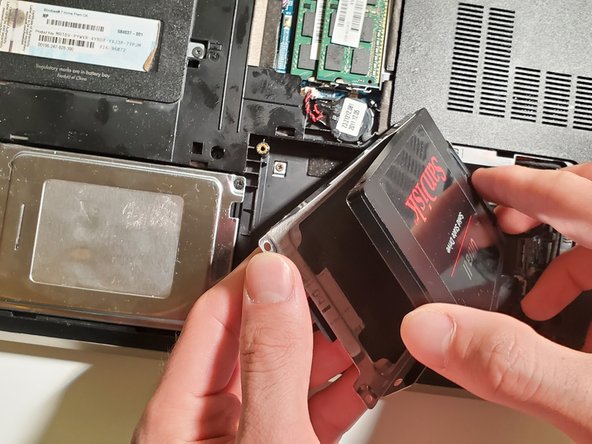
What you need
-
-
To remove the battery, push the switch to the left until you hear and feel a click.
-
Remove the battery from the device.
-
-


To reassemble your device, follow the steps in reverse order.
To reassemble your device, follow the steps in reverse order.
Cancel: I did not complete this guide.
One other person completed this guide.
Team

York University, Team S1-G29, Melo-Thaiss Winter 2021 Member of York University, Team S1-G29, Melo-Thaiss Winter 2021
YORK-MELO-THAISS-W21S1G29
1 Member
1 Guide authored