Introduction
If your keyboard is not responding or you want to add in a new one, this guide is for you.
What you need
-
-
Remove the battery from the back of the computer.
-
Remove the two 7.2mm screws underneath holding the keyboard in.
-
Use a Phillips screwdriver to remove the three screws in the battery well.
 Ask FixBot
-
-
-
Use a Phillips screwdriver to remove the two screws securing the RAM door.
-
Lift and remove the RAM door.
-
Use a Phillips screwdriver to remove the screw securing the keyboard to the laptop.
-
-
-
-
Flip the laptop back over (keyboard side up).
-
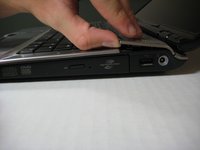
Pop the bezel off of the case by reaching underneath it.
-
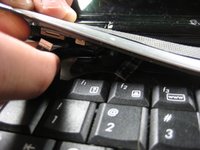
Carefully remove the three ribbons underneath the bezel which attach it to the computer.
-
-
-
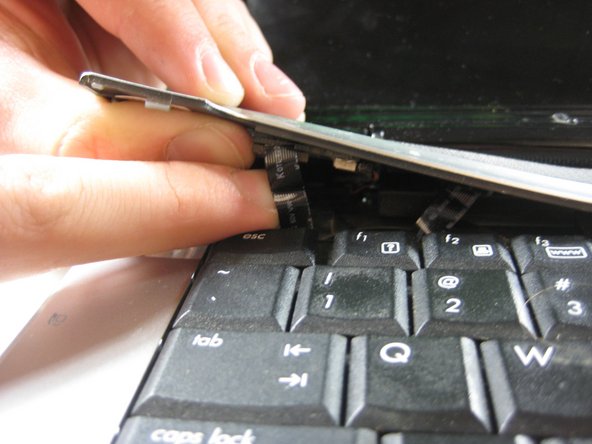
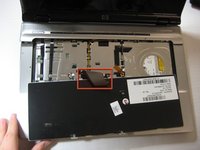
Gently lift the keyboard out of the casing by holding the top edge (as shown). Be careful to keep the lower edge of the keyboard in place as you lift because there is a ribbon attached to the back (marked in red).
-
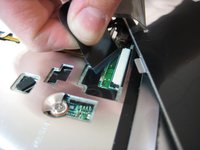
The keyboard is held in by six small tabs (2 on the top and 4 on the bottom). Lifting the bevel frees the top two. Free the bottom four tabs by sliding the keyboard forward towards the screen.
-
-
-
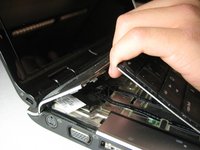
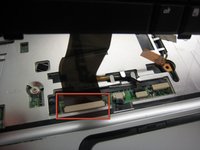
Remove the ribbon from the computer by pulling straight back (away from the track pad and towards the monitor).
-


To reassemble your device, follow these instructions in reverse order.
Cancel: I did not complete this guide.
10 other people completed this guide.
Team

Cal Poly, Team 21-33, Regan Fall 2010 Member of Cal Poly, Team 21-33, Regan Fall 2010
CPSU-REGAN-F10S21G33
4 Members
12 Guides authored
3 Guide Comments
Actually I was able to remove the keyboard fairly easily following the steps provided. However even after quite a few attempts at replacing it with either the new one I purchased or even the old one I am still unable to secure the data ribbon into the appropriate connector.therefore the keyboard is not functional… HELP!!! PLEASE??