
HP Pavilion Wave 600-a014 Front IO Board Replacement

Cristian Vanegas and
Last updated on Dec 27, 2021
Views: 1.4K
View statistics:
- Past 24 Hours:
- 3
- Past 7 Days:
- 19
- Past 30 Days:
- 73
- All Time:
- 1,403
Comments: 0
No one has left comments on this guide. Will you be first?
Go to guide commentsCompleted: 0 1
No one has marked this guide "completed." Will you be the first?
1 person has marked this guide "completed." It's you — great job!
Favorites: 0 1
No one has favorited (and subscribed to) this guide. Will you be the first?
1 person has favorited (and subscribed to) this guide — and that's you!
Action Shots
Be an action hero! This guide needs images that better demonstrate how to perform specific actions.
Introduction
Go to step 1 ↓This guide will walk you through how to replace the front IO Board for the HP Pavilion Wave 600. A pry tool and a Philips screwdriver will be needed to replace this part. Ensure that the device is disconnected from the power source and all other devices are disconnected from the computer.
What you need


-
-
-
Turn over the computer and remove the rubber feet.
-
Remove the 8mm Philips screws indicated in red circles with a Philips #0 screwdriver.
-
Use a pry tool and lift the lid.
 Ask FixBot
-
-
-


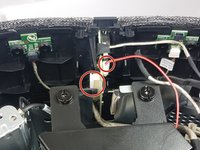
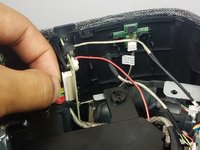
To reassemble your device, follow these instructions in reverse order.

Team

Cal Poly, Team S8-G4, Banghart Fall 2017 Member of Cal Poly, Team S8-G4, Banghart Fall 2017
CPSU-BANGHART-F17S8G4
4 Members
60 Guides authored
