HP Pavilion Sleekbook 14-b013cl Cooling Fan Replacement

What you need

  1. HP Pavilion Sleekbook 14-b013cl Cooling Fan Replacement, Battery: step 1, image 1 of 2 HP Pavilion Sleekbook 14-b013cl Cooling Fan Replacement, Battery: step 1, image 2 of 2
    • Flip the computer over and move the battery lock switch to the "unlocked" position (marked by an orange lock icon).

  2. HP Pavilion Sleekbook 14-b013cl Cooling Fan Replacement: step 2, image 1 of 2 HP Pavilion Sleekbook 14-b013cl Cooling Fan Replacement: step 2, image 2 of 2
    • Press the switch on the right-hand side of the back of the device towards the center until the gray battery icon is no longer visible. This will eject the battery.

  3. HP Pavilion Sleekbook 14-b013cl Cooling Fan Replacement: step 3, image 1 of 2 HP Pavilion Sleekbook 14-b013cl Cooling Fan Replacement: step 3, image 2 of 2
    • Carefully pull the battery away from the device.

  4. HP Pavilion Sleekbook 14-b013cl Cooling Fan Replacement, Cooling Fan: step 4, image 1 of 1
    • Using a Phillips #0 screwdriver, unscrew all nine of the screws from the bottom of the computer.

    • There is a wire connecting the keyboard to the motherboard. Do not pull the keyboard away until you have disconnected the wire.

  5. HP Pavilion Sleekbook 14-b013cl Cooling Fan Replacement: step 5, image 1 of 3 HP Pavilion Sleekbook 14-b013cl Cooling Fan Replacement: step 5, image 2 of 3 HP Pavilion Sleekbook 14-b013cl Cooling Fan Replacement: step 5, image 3 of 3
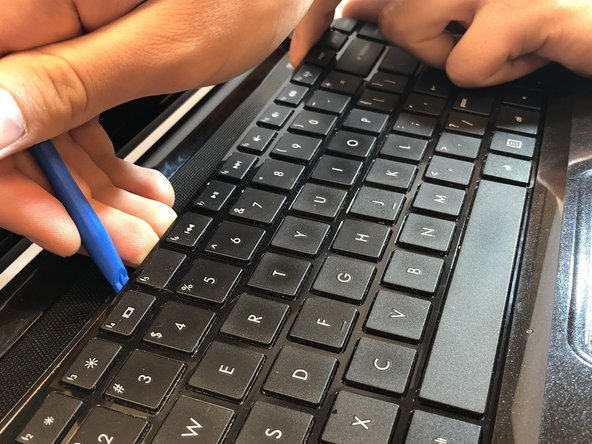
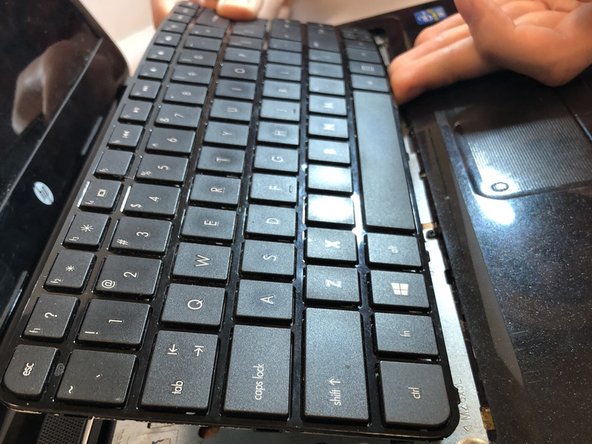
    • Using a plastic opening tool, pry up along the edge of the keyboard.

    • There is a wire connecting the keyboard to the motherboard. Do not completely pull the keyboard off until the wire is disconnected.

  6. HP Pavilion Sleekbook 14-b013cl Cooling Fan Replacement: step 6, image 1 of 3 HP Pavilion Sleekbook 14-b013cl Cooling Fan Replacement: step 6, image 2 of 3 HP Pavilion Sleekbook 14-b013cl Cooling Fan Replacement: step 6, image 3 of 3
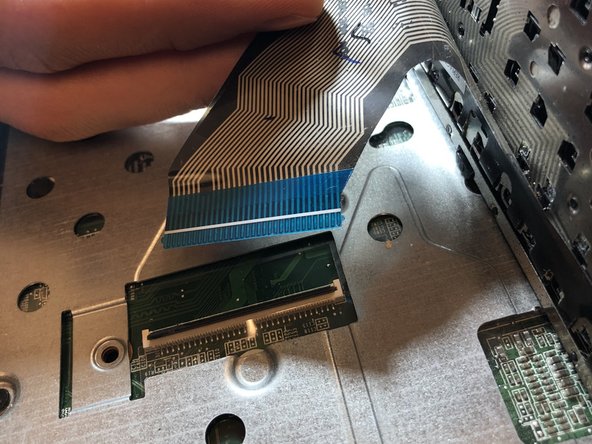
    • To disconnect the wire, pry up on the latch connecting it to the motherboard.

  7. HP Pavilion Sleekbook 14-b013cl Cooling Fan Replacement: step 7, image 1 of 3 HP Pavilion Sleekbook 14-b013cl Cooling Fan Replacement: step 7, image 2 of 3 HP Pavilion Sleekbook 14-b013cl Cooling Fan Replacement: step 7, image 3 of 3
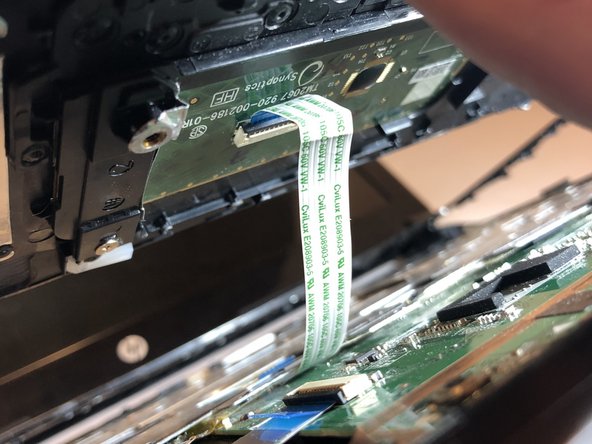
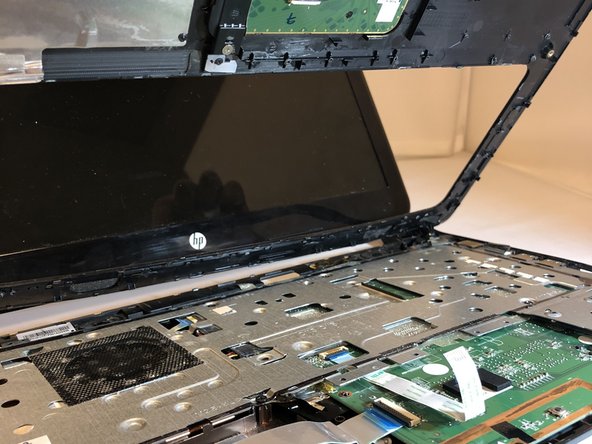
    • Using a plastic or metal spudger, carefully pry apart the palm rest from the rest of the laptop.

    • Be careful when using the metal spudger, as you could damage the internal components if the spudger is inserted too far.

    • Do not completely pull the halves apart yet because there are still wires holding them together.

  8. HP Pavilion Sleekbook 14-b013cl Cooling Fan Replacement: step 8, image 1 of 3 HP Pavilion Sleekbook 14-b013cl Cooling Fan Replacement: step 8, image 2 of 3 HP Pavilion Sleekbook 14-b013cl Cooling Fan Replacement: step 8, image 3 of 3
    • Disconnect the touch pad wire by flipping the black lever with a plastic spudger.

  9. HP Pavilion Sleekbook 14-b013cl Cooling Fan Replacement: step 9, image 1 of 2 HP Pavilion Sleekbook 14-b013cl Cooling Fan Replacement: step 9, image 2 of 2
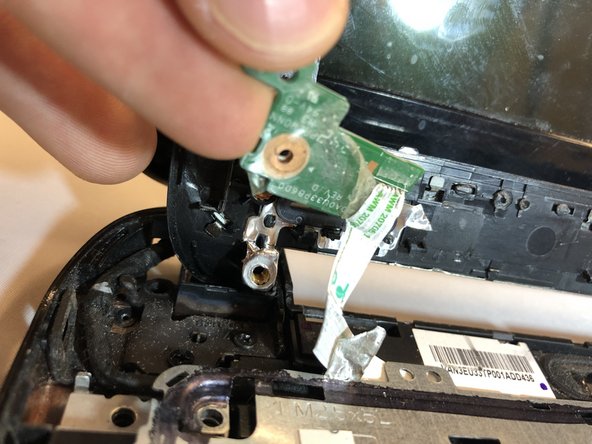
    • Unscrew the circuit board underneath the power button.

    • Remove this circuit board by pulling up and away on the plastic tab.

  10. HP Pavilion Sleekbook 14-b013cl Cooling Fan Replacement: step 10, image 1 of 3 HP Pavilion Sleekbook 14-b013cl Cooling Fan Replacement: step 10, image 2 of 3 HP Pavilion Sleekbook 14-b013cl Cooling Fan Replacement: step 10, image 3 of 3
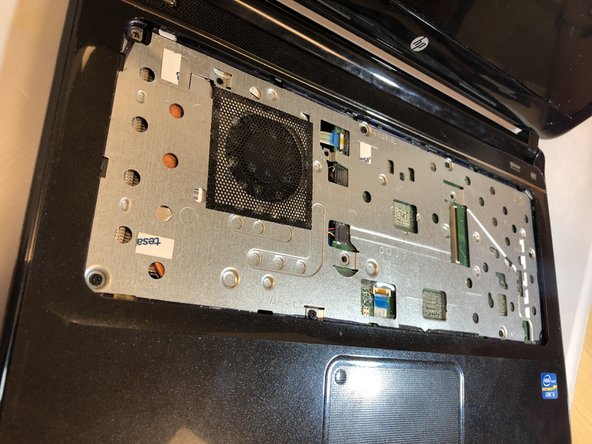
    • Using a Phillips #0 screwdriver, remove all the screws and take the metal plate off the mother board.

    • Double sided tape holds the plate down as well as the screws. You will need to apply force to remove the plate.

  11. HP Pavilion Sleekbook 14-b013cl Cooling Fan Replacement: step 11, image 1 of 2 HP Pavilion Sleekbook 14-b013cl Cooling Fan Replacement: step 11, image 2 of 2
    • Remove the three screws holding the cooling fan in place using a Phillips #0 screwdriver.

    • Using a plastic opening tool, remove the power cable for the fan.

    • Remove the fan from the device.

Conclusion

To reassemble your device, follow these instructions in reverse order.

One other person completed this guide.

Josh Svik

Member since: 04/10/18

281 Reputation

1 Guide authored

0 Comments

Add Comment

View Statistics:

Past 24 Hours: 0

Past 7 Days: 3

Past 30 Days: 5

All Time: 368