HP Pavilion G7-2289wm Fan and Heat Sink Replacement

What you need

  1. HP Pavilion G7-2289wm Fan and Heat Sink Replacement, Battery: step 1, image 1 of 1
    • Located on the bottom side of your laptop, slide the battery release latch to the left, towards the center of the laptop.

    • Lift the battery up, and pull towards the center of the laptop to remove it.

  2. HP Pavilion G7-2289wm Fan and Heat Sink Replacement, Optical Drive: step 2, image 1 of 1
    • Loosen the screw that secures the service cover using a Phillips #0 screwdriver.

    • Lift the edge of the service cover up and forward until it’s at an angle to remove it.

  3. HP Pavilion G7-2289wm Fan and Heat Sink Replacement: step 3, image 1 of 2 HP Pavilion G7-2289wm Fan and Heat Sink Replacement: step 3, image 2 of 2
    • Remove the screw that secures the optical drive to the laptop using a Phillips #0 screwdriver.

    • Slide the optical drive out of the laptop.

  4. HP Pavilion G7-2289wm Fan and Heat Sink Replacement, Hard Drive: step 4, image 1 of 1
    • Loosen the screw that secures the service cover using a Phillips #0 screwdriver.

    • Pull the edge of the service cover toward you to remove it.

  5. HP Pavilion G7-2289wm Fan and Heat Sink Replacement: step 5, image 1 of 1
    • Disconnect the hard drive connector cable from the motherboard.

  6. HP Pavilion G7-2289wm Fan and Heat Sink Replacement: step 6, image 1 of 1
    • Lift the front edge of the hard drive, then pull the hard drive out gently.

  7. HP Pavilion G7-2289wm Fan and Heat Sink Replacement, Keyboard: step 7, image 1 of 1
    • Remove all the screw that secures the keyboard to the computer using a Phillips #0 screwdriver.

  8. HP Pavilion G7-2289wm Fan and Heat Sink Replacement: step 8, image 1 of 3 HP Pavilion G7-2289wm Fan and Heat Sink Replacement: step 8, image 2 of 3 HP Pavilion G7-2289wm Fan and Heat Sink Replacement: step 8, image 3 of 3
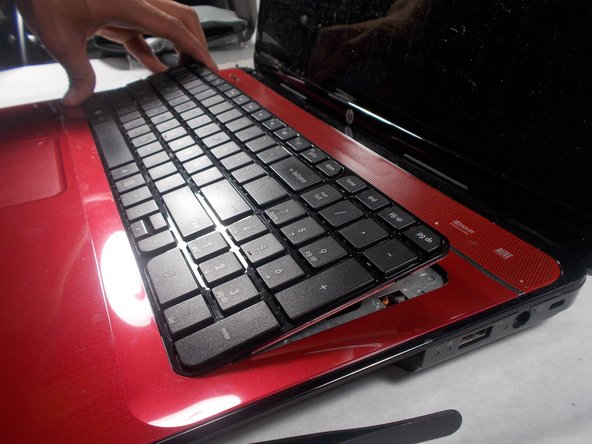
    • Flip your laptop around to the front, using an opening tool, pry around the perimeter of the keyboard.

    • Lift the keyboard from the top backward towards the touch pad.

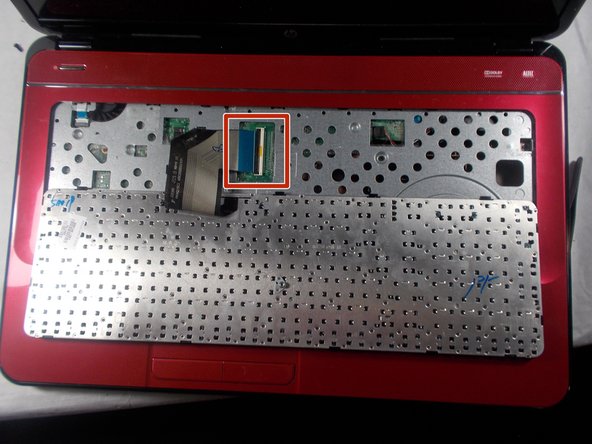
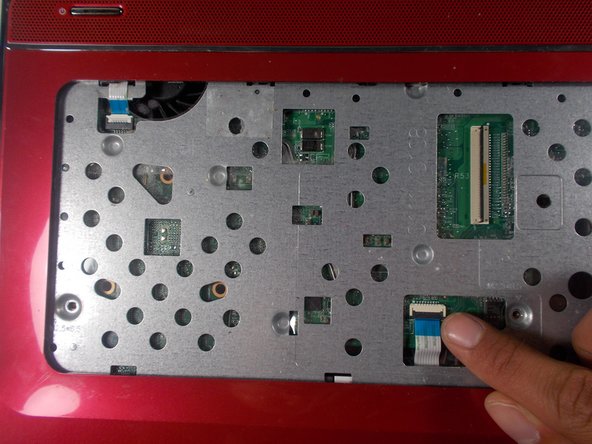
    • Unlatch the keyboard connector from the motherboard and remove the keyboard.

  9. HP Pavilion G7-2289wm Fan and Heat Sink Replacement, Fan and Heat Sink: step 9, image 1 of 1
    • Remove the three screws that hold the keyboard palm rest in place using a Phillips #0 screwdriver.

    • Lift the palm rest up and out.

  10. HP Pavilion G7-2289wm Fan and Heat Sink Replacement: step 10, image 1 of 3 HP Pavilion G7-2289wm Fan and Heat Sink Replacement: step 10, image 2 of 3 HP Pavilion G7-2289wm Fan and Heat Sink Replacement: step 10, image 3 of 3
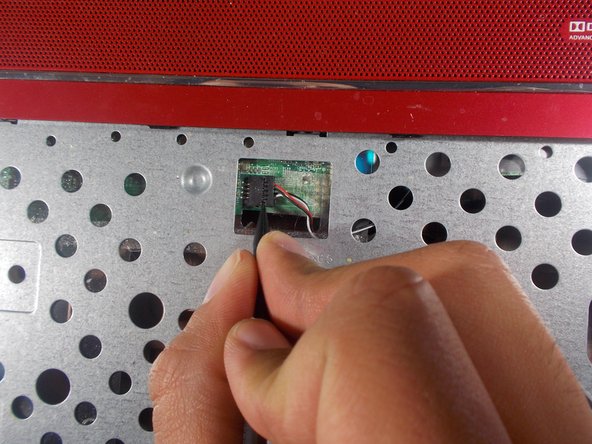
    • Remove the wires attached under the keyboard.

  11. HP Pavilion G7-2289wm Fan and Heat Sink Replacement: step 11, image 1 of 1
    • Pry open the bottom of the laptop by using the opening tool to open it up. Do this around the entire outer edge of the laptop.

  12. HP Pavilion G7-2289wm Fan and Heat Sink Replacement: step 12, image 1 of 3 HP Pavilion G7-2289wm Fan and Heat Sink Replacement: step 12, image 2 of 3 HP Pavilion G7-2289wm Fan and Heat Sink Replacement: step 12, image 3 of 3
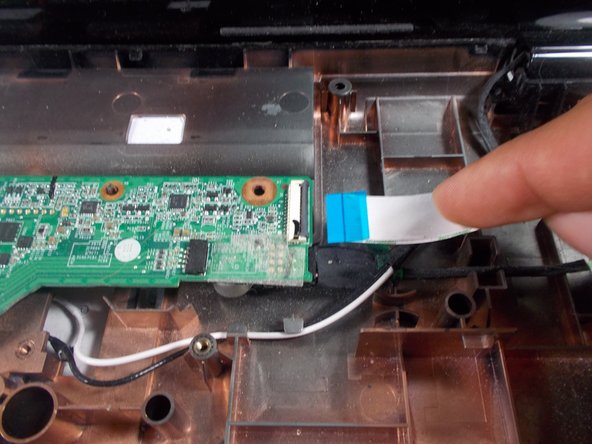
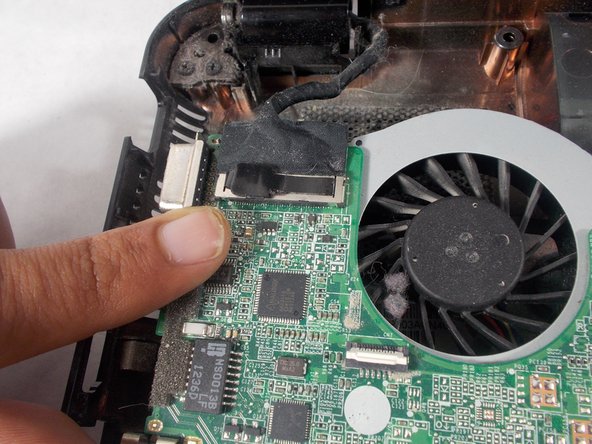
    • Remove the screw that holds the motherboard in place.

    • Remove the wires attached to the motherboard.

    • Unplug the laptop fan.

  13. HP Pavilion G7-2289wm Fan and Heat Sink Replacement: step 13, image 1 of 1
    • Remove the four screws that hold the fan and heat sink in place.

    • Remove the entire heat sink from the laptop.

Conclusion

To reassemble your device, follow these instructions in reverse order.

Clayton LaBrecque

Member since: 03/19/18

171 Reputation

1 Guide authored

0 Comments

Add Comment

View Statistics:

Past 24 Hours: 0

Past 7 Days: 0

Past 30 Days: 4

All Time: 406